Brake
Rear brake master cylinder disassembly and assembly
In this manual: Brake
2steps
~12min
1/5difficulty
Done 0 of 2
Refer to “rear brake master cylinder assembly removal and installation” .
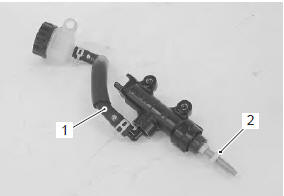
Disassembly- Disconnect the reservoir hose (1).
- Remove the lock-nut (2).
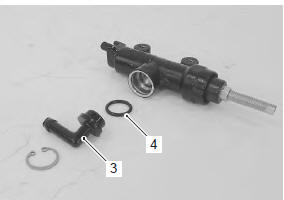
- Remove the brake hose connector (3) and o-ring (4).
 : 09900–06108 (snap ring remover
(close type))
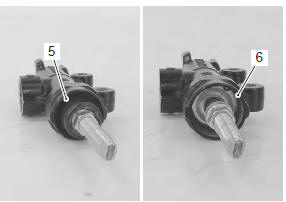
- Pull out the dust boot (5) and remove the snap ring (6).
 : 09900–06108 (snap ring remover
(close type))
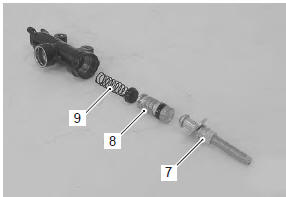
- Remove the push rod (7), piston/cup set (8) and spring (9).
Assembly
Assemble the master cylinder in the reverse order of disassembly. Pay attention to the following points:
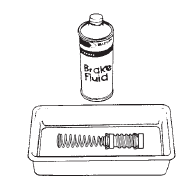
Caution- wash the master cylinder components with new brake fluid before reassembly.
- Do not wipe the brake fluid off after washing the components.
- When washing the components, use the specified brake fluid. Never use different types of fluid or cleaning solvents such as gasoline, kerosine, etc.
- Apply brake fluid to the master cylinder bore and all of the master cylinder component to be inserted into the bore.
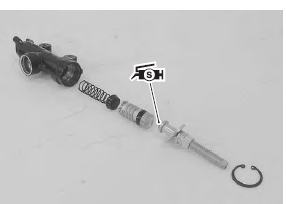
- Apply grease to the push rod end.
 : Grease 99000–25100 (suzuki
silicone grease or equivalent)
Caution replace the o-ring with a new one.

Test yourself
A quick Suzuki GSX-R 1000 quiz: every answer comes with an explanation and a link to the manual page.
Was this page helpful?