Brake
Rear brake master cylinder assembly removal and installation
In this manual: Brake
8steps
~48min
2/5difficulty
Done 0 of 8
Refer to “rear brake hose routing diagram” (page 4a- 2).
Removal- Remove the right side frame cover. Refer to “exterior parts removal and installation” in section 9d .
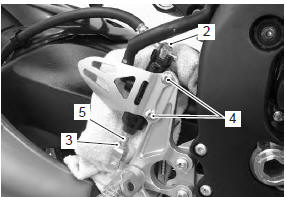
- Remove the rear brake fluid reservoir mounting bolt (1).

- Drain brake fluid. Refer to “brake fluid replacement” .
- Place a rag underneath the brake hose union bolt (2) on the master cylinder to catch any spilt brake fluid.
- Remove the brake hose union bolt (2).
- Loosen the lock-nut (3).
- Remove the master cylinder mounting bolts (4).
- Remove the master cylinder along with the reservoir by turning the push rod (5).
Installation
Install the rear brake master cylinder in the reverse order of removal. Pay attention to the following points:
Cautionthe seal washers should be replaced with the new ones to prevent fluid leakage.
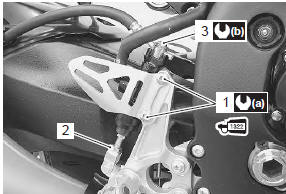
- Apply thread lock to the master cylinder mounting bolts (1) and tighten them to the specified torque.
 : Thread lock cement
99000–32110 (thread lock cement super “1322” or equivalent)
- Tighten the lock-nut (2) temporarily.
- After setting the brake hose union to the stopper, tighten the union bolt (3) to the specified torque.
- Bleed air from the brake system after reassembling the master cylinder. Refer to “air bleeding from brake fluid circuit” .
- Adjust the brake pedal height. Refer to “brake pedal height inspection and adjustment” .
- Install the removed parts.
Test yourself
A quick Suzuki GSX-R 1000 quiz: every answer comes with an explanation and a link to the manual page.
Was this page helpful?