Clearance Sonar Main Switch
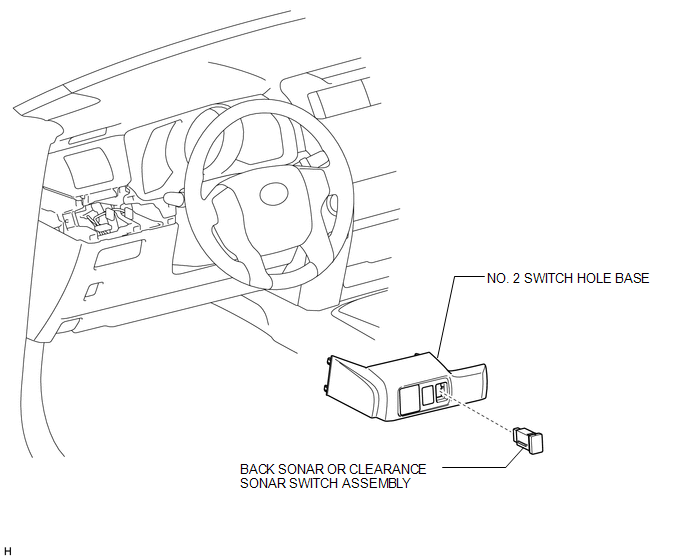
Removal REMOVAL PROCEDURE
1. REMOVE NO. 2 SWITCH HOLE BASE

2. REMOVE BACK SONAR OR CLEARANCE SONAR SWITCH ASSEMBLY
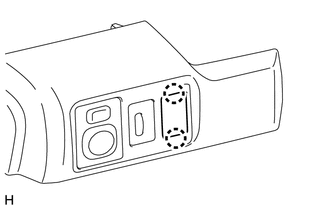
(a) Detach the 2 claws and remove the back sonar or clearance sonar switch.
Inspection INSPECTION PROCEDURE1. INSPECT BACK SONAR OR CLEARANCE SONAR SWITCH ASSEMBLY
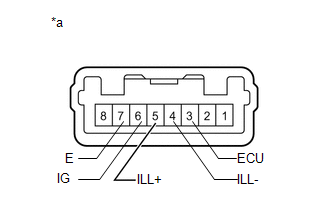
(a) Check the resistance.
(1) Measure the resistance according to the value(s) in the table below.
Standard Resistance:
Tester Connection | Switch Condition | Specified Condition |
|---|---|---|
3 (ECU) - 6 (IG) |
Sonar switch off |
10 kΩ or higher |
Sonar switch on |
Below 1 Ω |
If the result is not as specified, replace the back sonar or clearance sonar switch assembly.
(b) Apply battery voltage to the connector and check the LED illumination condition.
OK:
Measurement Condition | Specified Condition |
|---|---|
Battery positive (+) → Terminal 3 (ECU) Battery negative (-) → Terminal 7 (E) |
LED illuminates |
Battery positive (+) → Terminal 5 (ILL+) Battery negative (-) → Terminal 4 (ILL-) |
LED illuminates |
If the result is not as specified, replace the back sonar or clearance sonar switch assembly.
Text in Illustration*a |
Component without harness connected (Back Sonar or Clearance Sonar Switch Assembly) |
1. INSTALL BACK SONAR OR CLEARANCE SONAR SWITCH ASSEMBLY
(a) Attach the 2 claws to install the back sonar or clearance sonar switch.
2. INSTALL NO. 2 SWITCH HOLE BASE

Test yourself
A quick Toyota 4Runner quiz: every answer comes with an explanation and a link to the manual page.