Ultrasonic Sensor(for Front)
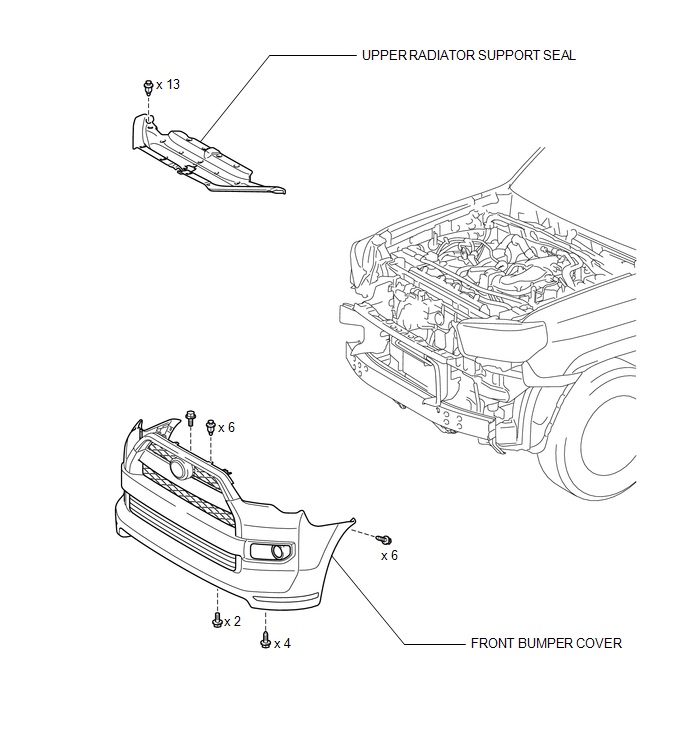
ILLUSTRATION
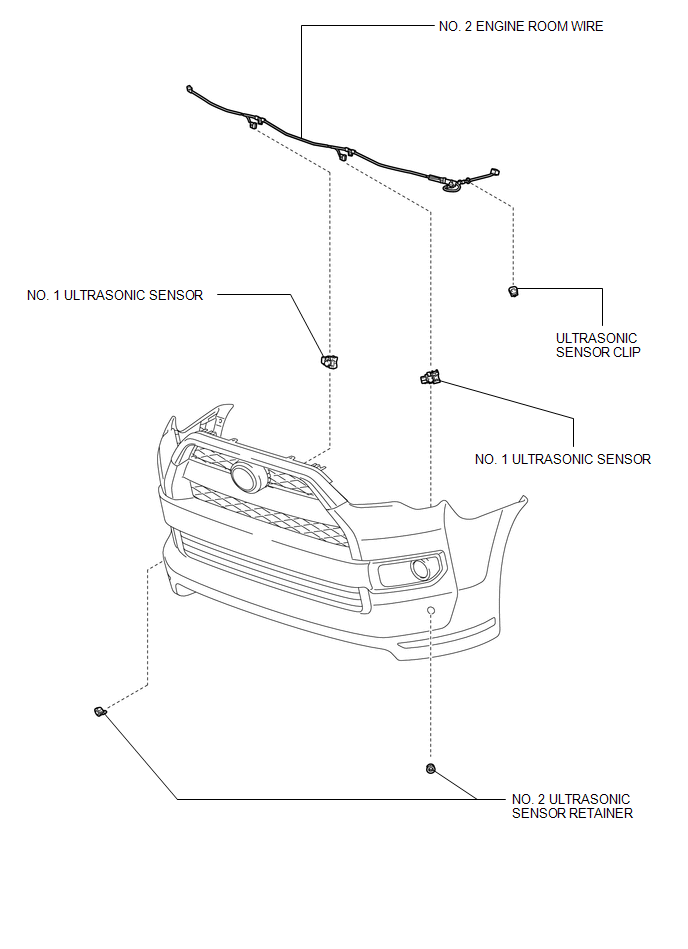
Removal REMOVAL PROCEDURE
1. REMOVE UPPER RADIATOR SUPPORT SEAL

2. REMOVE FRONT BUMPER COVER
3. REMOVE NO. 2 ENGINE ROOM WIRE
4. REMOVE NO. 1 ULTRASONIC SENSOR
(a) Detach the 2 claws to remove the No. 1 ultrasonic sensor from the No. 2 ultrasonic sensor retainer. HINT: Use the same procedure as for the other side. |
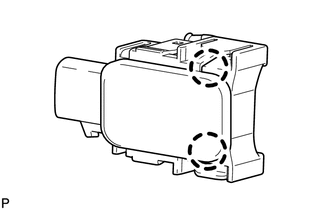 |
5. REMOVE ULTRASONIC SENSOR CLIP
(a) Using a screwdriver, detach the claw to remove the ultrasonic sensor clip from the No. 1 ultrasonic sensor as shown in the illustration. Text in Illustration
HINT: Tape the screwdriver tip before use. |
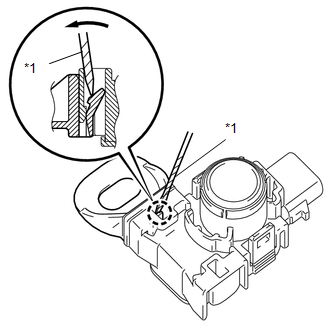 |
6. REMOVE NO. 2 ULTRASONIC SENSOR RETAINER
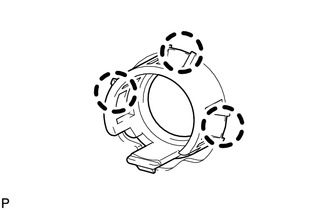
(a) Detach the 3 claws to remove the No. 2 ultrasonic sensor retainer from the front bumper cover. HINT: Use the same procedure as for the other side. |
 |
1. INSPECT NO. 1 ULTRASONIC SENSOR
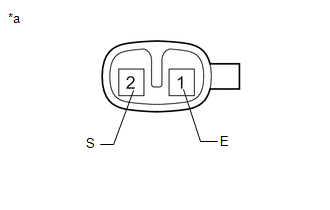
(a) Measure the resistance according to the value(s) in the table below. Standard Resistance:
If the result is not as specified, replace the No. 1 ultrasonic sensor. |
 |
1. INSTALL NO. 2 ULTRASONIC SENSOR RETAINER
(a) Align the keyhole and protrusion as shown in the illustration. Text in Illustration
|
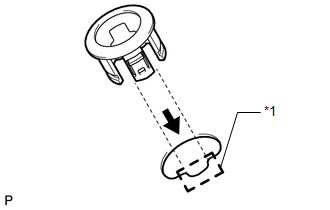 |
(b) Attach the 3 claws to install the No. 2 ultrasonic sensor retainer to the front bumper cover.
NOTICE:
Do not damage the front bumper cover with the protrusion when installing the No. 2 ultrasonic sensor retainer.
HINT:
Use the same procedure as for the other side.
2. INSTALL ULTRASONIC SENSOR CLIP
(a) Attach the claw to install the ultrasonic sensor clip to the No. 1 ultrasonic sensor.
3. INSTALL NO. 1 ULTRASONIC SENSOR
(a) Attach the 2 claws to install the No. 1 ultrasonic sensor to the No. 2 ultrasonic sensor retainer.
HINT:
Use the same procedure as for the other side.
4. INSTALL NO. 2 ENGINE ROOM WIRE

5. INSTALL FRONT BUMPER COVER
6. INSTALL UPPER RADIATOR SUPPORT SEAL
Test yourself
A quick Toyota 4Runner quiz: every answer comes with an explanation and a link to the manual page.