Mayday Battery
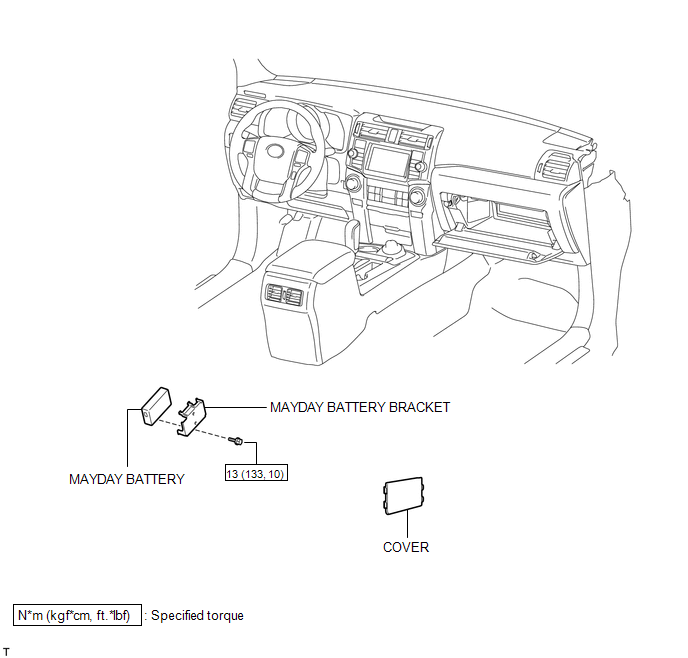
Removal REMOVAL PROCEDURE
1. DISCONNECT CABLE FROM NEGATIVE BATTERY TERMINAL
NOTICE:
When disconnecting the cable, some systems need to be initialized after the cable is reconnected (See page  ).
2. REMOVE MAYDAY BATTERY WITH BRACKET
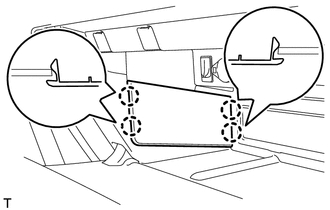
(a) Detach the 4 claws and remove the cover. |
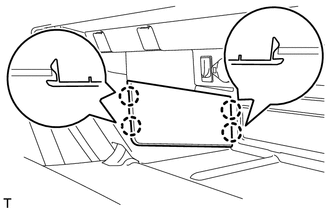 |
(b) Remove the bolt and detach the 2 claws. |
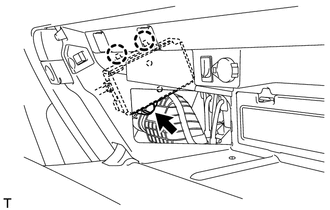 |
(c) Move the mayday battery with bracket as shown in the illustration. |
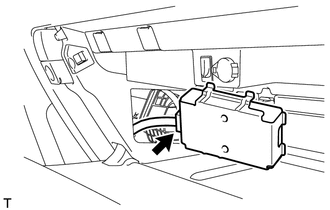 |
(d) Disconnect the connector and remove the mayday battery with bracket.
3. REMOVE MAYDAY BATTERY
(a) Remove the bracket from the mayday battery. |
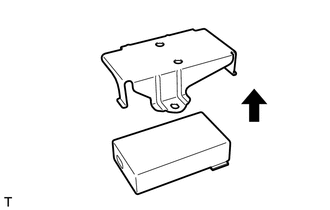 |
1. INSTALL MAYDAY BATTERY
(a) Install the bracket to the battery. |
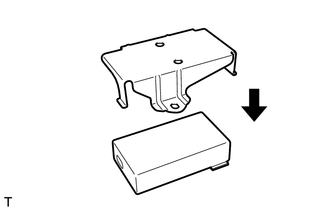 |
2. INSTALL MAYDAY BATTERY WITH BRACKET
(a) Connect the connector. |
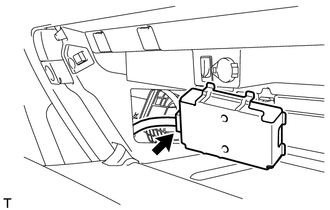 |
(b) Attach the 2 claws and install the mayday battery with bracket with the bolt. Torque: 13 N·m {133 kgf·cm, 10 ft·lbf} |
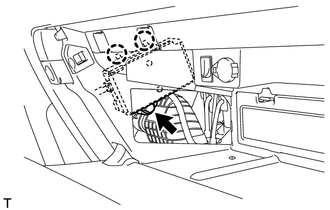 |
(c) Attach the 4 claws to install the cover. |
 |
3. CONNECT CABLE TO NEGATIVE BATTERY TERMINAL
NOTICE:
When disconnecting the cable, some systems need to be initialized after the cable is reconnected (See page  ).
4. CHECK SRS WARNING LIGHT
(a) Check the SRS warning light (See page ).
5. PERFORM REGISTRATION
(a) Perform registration (See page ).
NOTICE:
When replacing the mayday battery or DCM (telematics transceiver) together with the mayday battery, perform registration.
Test yourself
A quick Toyota 4Runner quiz: every answer comes with an explanation and a link to the manual page.