Removal
NOTICE:
Be sure to read PRECAUTION before performing this procedure (See page  ).
PROCEDURE
1. REMOVE FRONT WHEEL
2. REMOVE REAR WHEEL
3. REMOVE CENTER CONTROL ABSORBER ASSEMBLY LH
(a) While using a wrench to hold the bracket, disconnect the joint. NOTICE: Check that all four shock absorbers are fully extended to the normal suspension rebound point. |
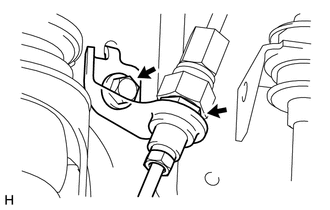 |
(b) Remove the bolt and disconnect the bracket.
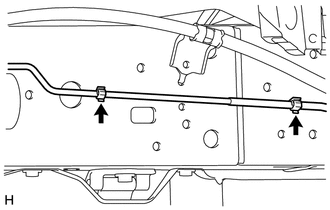
(c) Disconnect the tube from the 2 clamps. |
 |
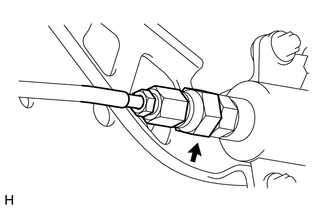
(d) While using a wrench to hold the center control absorber assembly, disconnect the joint. NOTICE:
|
 |
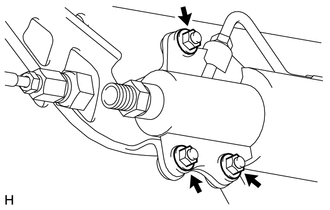
(e) Remove the 3 nuts and center control absorber assembly. NOTICE:
|
 |
4. REMOVE CENTER CONTROL ABSORBER ASSEMBLY RH
HINT:
Use the same procedure described for the LH side.
5. REMOVE TUBE PROTECTOR LH
(a) Remove the bolt and tube protector LH. |
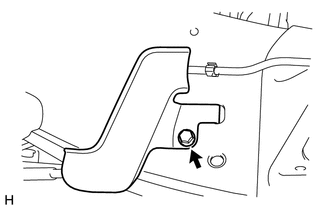 |
6. REMOVE TUBE PROTECTOR RH
HINT:
Use the same procedure described for the LH side.
7. REMOVE NO. 1 CENTER CONTROL ABSORBER TUBE LH
(a) While using a wrench to hold the bracket, disconnect the joint. |
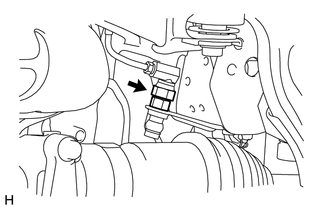 |
(b) Using pliers, cut the center control absorber tube. Use a container to catch suspension fluid as it drains out. Text in Illustration
|
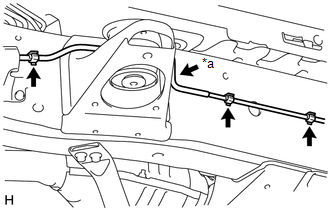 |
(c) Detach the 3 clamps from the frame.
(d) Detach the 2 clamps. |
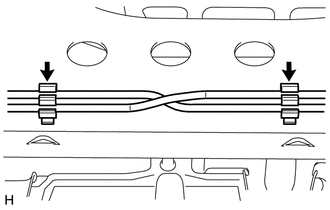 |
(e) Remove the No. 1 center control absorber tube LH.
8. REMOVE NO. 1 CENTER CONTROL ABSORBER TUBE RH
HINT:
Use the same procedure described for the LH side.
9. REMOVE CENTER CONTROL ABSORBER BRACKET LH
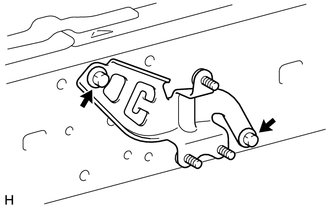
(a) Remove the 2 bolts and center control absorber bracket LH from the frame. |
 |
10. REMOVE CENTER CONTROL ABSORBER BRACKET RH
HINT:
Use the same procedure described for the LH side.
Test yourself
A quick Toyota 4Runner quiz: every answer comes with an explanation and a link to the manual page.