Disassembly
DISASSEMBLY
PROCEDURE
1. REMOVE SIDE DEFROSTER NOZZLE NO. 1
(a) Release the claws to remove the side defroster nozzle No. 1. |
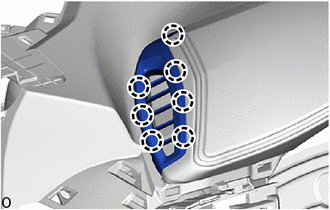 |
2. REMOVE SIDE DEFROSTER NOZZLE NO. 2
(a) Release the claws to remove the side defroster nozzle No. 2. |
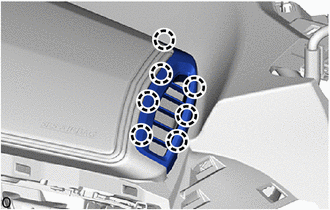 |
3. REMOVE DEFROSTER NOZZLE ASSEMBLY
(a) Remove the 3 screws <D>. |
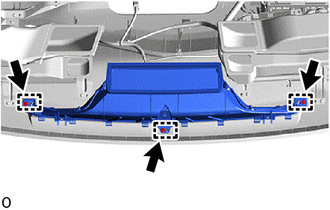 |
(b) Release the guides to remove the defroster nozzle assembly.
4. REMOVE GPS AND TELEPHONE ANTENNA ASSEMBLY (for radio and display type)
Click here
5. REMOVE HEATER DUCT SUB-ASSEMBLY WITH REGISTER NO. 1
(a) Release the clip to disconnect the instrument panel wire No. 2. |
|
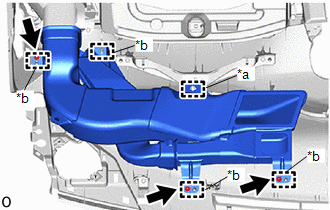
(b) Remove the 3 screws <D>.
(c) Release the guides to remove the heater duct sub-assembly No. 1.
6. REMOVE HEATER DUCT SUB-ASSEMBLY WITH REGISTER NO. 3
(a) Remove the 3 screws <D>. |
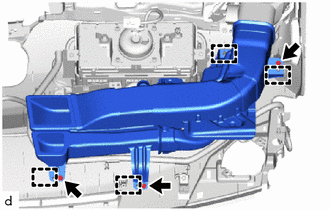 |
(b) Release the guides to remove the heater duct sub-assembly No. 3.
(c) With ion generator: (1) Disconnect the rear air duct sub-assembly. |
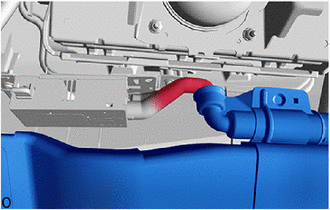 |
7. REMOVE INSTRUMENT PANEL REGISTER ASSEMBLY NO. 1
(a) Remove the 4 screws <D>. |
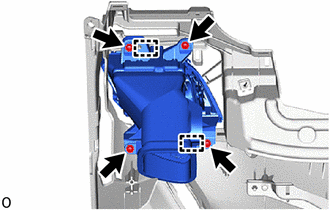 |
(b) Release the guides to remove the instrument panel register assembly No. 1.
8. REMOVE INSTRUMENT PANEL REGISTER ASSEMBLY NO. 2
(a) Remove the 3 screws <D>. |
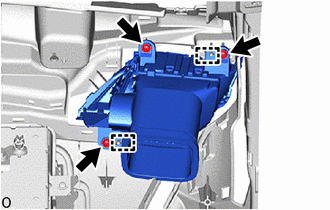 |
(b) Release the guides to remove the instrument panel register assembly No. 2.
9. REMOVE FRONT PASSENGER AIRBAG ASSEMBLY
Click here
10. REMOVE ION GENERATOR SUB-ASSEMBLY (with ion generator)
Click here
11. REMOVE ANTENNA WIRE SUB-ASSEMBLY
Click here
12. REMOVE AUTO LIGHT CONTROL SENSOR
Click here
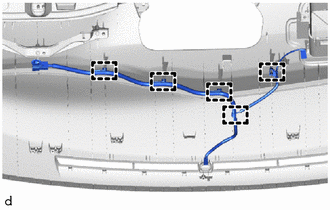
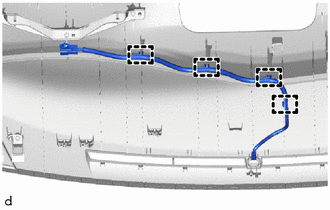
13. REMOVE INSTRUMENT PANEL WIRE NO. 2
(a) With ion generator: (1) Release the clips to remove the instrument panel wire No. 2. |
 |
(b) Without ion generator:
(1) Release the clips to remove the instrument panel wire No. 2. |
 |
14. REMOVE INSTRUMENT PANEL PIN NO. 1
HINT:
Use the same procedure as for the opposite side.
(a) Remove the screw <D>. |
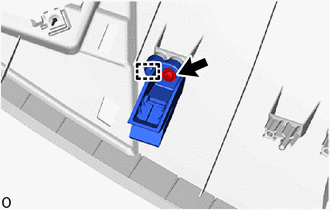 |
(b) Release the guide to remove the instrument panel pin No. 1.
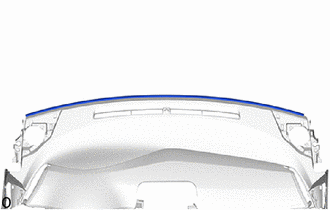
15. REMOVE INSTRUMENT PANEL PAD NO. 1
(a) Remove the instrument panel pad No. 1. |
 |