Reassembly
REASSEMBLY
PROCEDURE
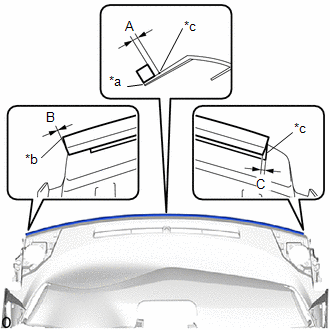
1. INSTALL INSTRUMENT PANEL CUSHION NO. 1
(a) Install a new instrument panel cushion as shown in the illustration. Standard measurement:
HINT: Remove the protective paper from the double-sided tape before installing the instrument panel cushion No. 1. |
|
2. INSTALL INSTRUMENT PANEL PIN NO. 1
HINT:
Use the same procedure as for the opposite side.
(a) Engage the guide to install the instrument panel pin No. 1. |
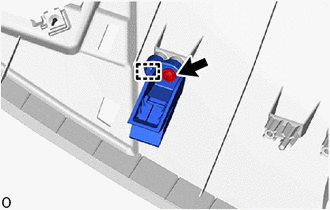 |
(b) Install the screw <D>.
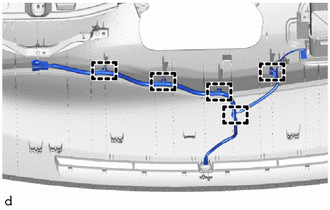
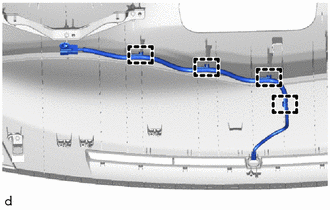
3. INSTALL INSTRUMENT PANEL WIRE NO. 2
(a) With ion generator: (1) Engage the clips to install the instrument panel wire No. 2. |
 |
(b) Without ion generator:
(1) Engage the clips to install the instrument panel wire No. 2. |
 |
4. INSTALL AUTO LIGHT CONTROL SENSOR
Click here
5. INSTALL ANTENNA WIRE SUB-ASSEMBLY
Click here
6. INSTALL ION GENERATOR SUB-ASSEMBLY (with ion generator)
Click here
7. INSTALL FRONT PASSENGER SIDE INSTRUMENT PANEL AIRBAG ASSEMBLY
Click here
8. INSTALL INSTRUMENT PANEL REGISTER ASSEMBLY NO. 2
(a) Engage the guides to install the instrument panel register assembly No. 2. |
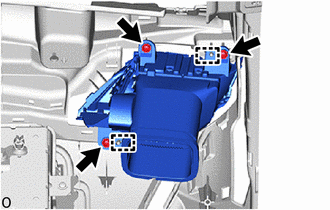 |
(b) Install the 3 screws <D>.
9. INSTALL INSTRUMENT PANEL REGISTER ASSEMBLY NO. 1
(a) Engage the guides to install the instrument panel register assembly No. 1. |
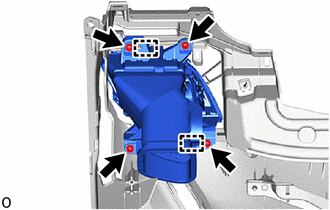 |
(b) Install the 4 screws <D>.
10. INSTALL HEATER DUCT SUB-ASSEMBLY WITH REGISTER NO. 3
(a) With ion generator: (1) Connect the rear air duct sub-assembly. |
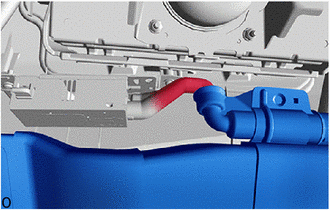 |
(b) Engage the guides to install the heater duct sub-assembly No. 3. |
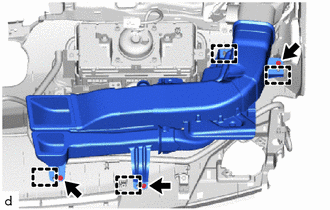 |
(c) Install the 3 screws <D>.
11. INSTALL HEATER DUCT SUB-ASSEMBLY WITH REGISTER NO. 1
(a) Engage the guides to install the heater duct sub-assembly No. 1. |
|
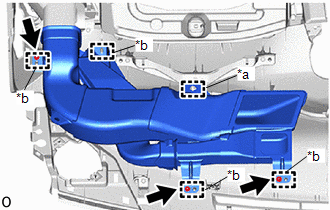
(b) Install the 3 screws <D>.
(c) Engage the clip to connect the instrument panel wire No. 2.
12. INSTALL GPS AND TELEPHONE ANTENNA ASSEMBLY (for radio and display type)
Click here
13. INSTALL DEFROSTER NOZZLE ASSEMBLY
(a) Engage the guides to install the defroster nozzle assembly. |
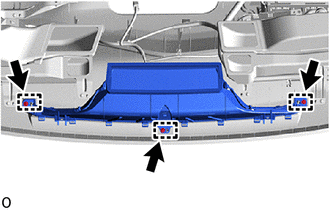 |
(b) Install the 3 screws <D>.
14. INSTALL SIDE DEFROSTER NOZZLE NO. 2
(a) Engage the claws to install the side defroster nozzle No. 2. |
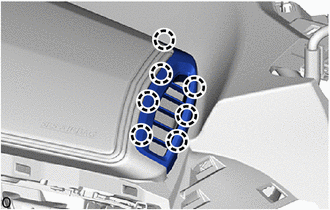 |
15. INSTALL SIDE DEFROSTER NOZZLE NO. 1
(a) Engage the claws to install the side defroster nozzle No. 1. |
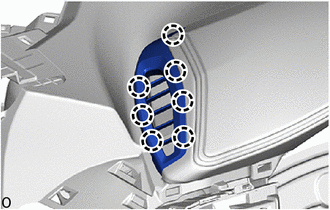 |