Removal
REMOVAL
PROCEDURE
1. REMOVE INSTRUMENT PANEL FINISH PANEL GARNISH ASSEMBLY
Click here
2. REMOVE LOWER CENTER INSTRUMENT PANEL FINISH PANEL SUB-ASSEMBLY
Click here
3. REMOVE INSTRUMENT PANEL CENTER REGISTER ASSEMBLY
Click here
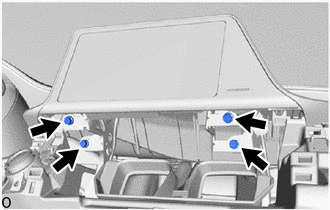
4. REMOVE RADIO AND DISPLAY RECEIVER ASSEMBLY WITH BRACKET
(a) Remove the 4 screws. |
 |
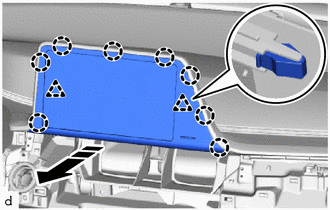
(b) Pull the radio and display receiver assembly with bracket towards the rear of the vehicle to release the claws and clips, as shown in the illustration.
 |
Remove in this direction |
(c) Disconnect each connector and remove the radio and display receiver assembly with bracket.
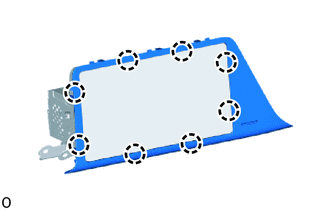
5. REMOVE CENTER INSTRUMENT PANEL FINISH PANEL SUB-ASSEMBLY
(a) Release the claws to remove the center instrument panel finish panel sub-assembly. |
 |
6. REMOVE RADIO RECEIVER BRACKET NO. 1
(a) Remove the 2 screws and the radio receiver bracket No. 1 from the radio and display receiver assembly. |
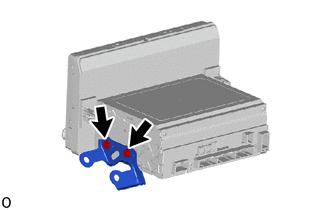 |
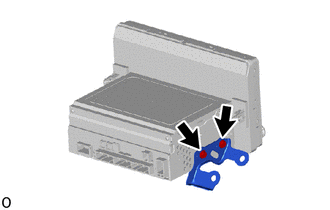
7. REMOVE RADIO RECEIVER BRACKET NO. 2
(a) Remove the 2 screws and the radio receiver bracket No. 2 from the radio and display receiver assembly. |
 |