Installation
INSTALLATION
PRECAUTION / NOTICE / HINT
HINT:
- Repeat the same procedure for the right side and the left side.
- The following procedure applies to the left side.
PROCEDURE
1. INSTALL SIDE AIRBAG SENSOR (for Front Door)
(a) Make sure the ignition switch is in the OFF position.
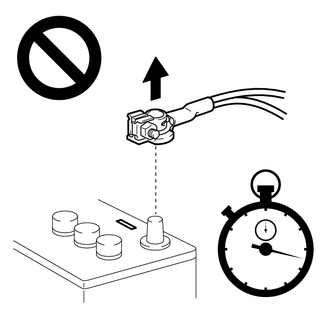
(b) Make sure the cable is disconnected from the negative (-) battery terminal.
CAUTION:
Wait at least 90 seconds after disconnecting the cable from the negative (-) battery terminal to disable the SRS system.
(c) Connect the connector to the door side airbag sensor.
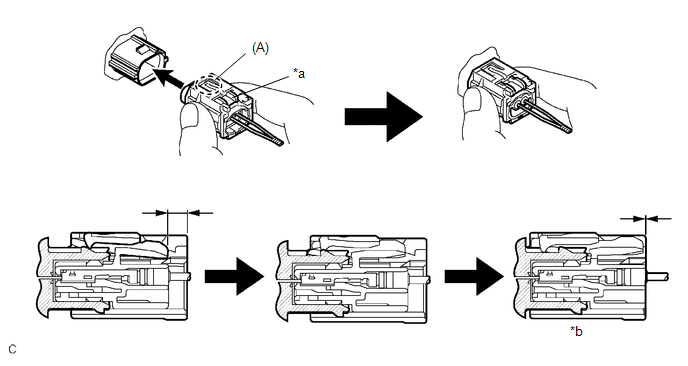
*a |
White housing lock |
*b |
The connection is complete. |
NOTICE:
When connecting any airbag connector, take care not to damage the airbag wire harness.
HINT:
- Be sure to connect the connector until it locks (when locking, make sure a click is heard).
- When the connector is locked, the white housing lock will slide. Do not hold the white housing lock or part (A), as this may cause improper connection.
(d) Before connecting the connector, make sure the white housing lock position is as shown in the illustration.
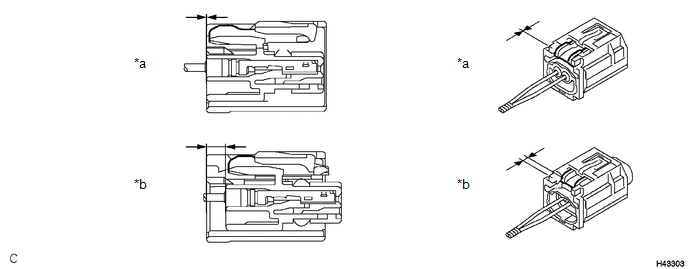
*a |
Incorrect |
*b |
Correct |
(e) Engage the claw to install the door side airbag sensor using the nut. Torque: 9 N·m {92 kgf·cm, 80 in·lbf} NOTICE:
|
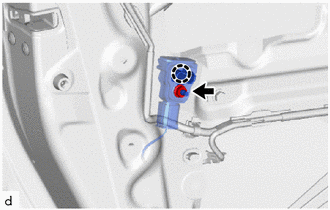 |
(f) Make sure that there is no play in the installed door side airbag sensor parts.
2. INSTALL FRONT DOOR SERVICE HOLE COVER
Click here
3. INSTALL FRONT DOOR TRIM PANEL SUB-ASSEMBLY
Click here
4. INSTALL MAIN MULTIPLEX NETWORK SWITCH ASSEMBLY WITH FRONT ARMREST BASE UPPER PANEL SUB-ASSEMBLY (for Driver Side)
Click here
5. INSTALL POWER WINDOW REGULATOR SWITCH ASSEMBLY WITH FRONT ARMREST BASE UPPER PANEL SUB-ASSEMBLY (for Front Passenger Side)
Click here
6. INSTALL FRONT DOOR INSIDE HANDLE BEZEL CLIP
Click here
7. CONNECT CABLE TO NEGATIVE BATTERY TERMINAL
Click here
NOTICE:
When the cable has been disconnected, some systems must be reset after the cable is reconnected.
Click here
8. CHECK POWER WINDOW OPERATION
Click here
9. PERFORM DIAGNOSTIC SYSTEM CHECK
Click here
10. CHECK SRS WARNING LIGHT
Click here