Separate and remove the transaxle from the engine.
STALL MANUAL TRANSAXLE ASSY
a. Align the input shaft with the clutch disc and install the transaxle to the engine.
b. Install the 10 bolts.Torque: Bolt A: 64 N·m Bolt B: 46 N·m Bolt C: 44 N·m16. INSTALL ENGINE MOUNTING INSULATOR LH a. Install the engine mounting insulator LH with the 4 bolts.Torque: 64 N·m
HINT: Tighten them in order: A, B, C and D.
Install engine mounting insulator LH17. INSTALL EXHAUST PIPE SUPPORT BRACKET No.1 a. Install the exhaust pipe support bracket No.1 Ωith the 2 bolts.Torque: 19 N·mInstall exhaust pipe support bracket No.118. INSTALL MANUAL TRANSMISSION CASE PROTECTOR a. Install the manual transmission cse protector with the 2 bolts.Torque: 18 N·mInstall manual transmission case protector19. INSTALL ENGINE MOUNTING BRACKET FR a. Install the engine mounting bracket FR with the 3 bolts.Torque: 64 N·m Install engine mounting bracket FR20. INSTALL STARTER ASSY a. Install the starter assy with the 2 bolts.Torque: 39 N·mInstall starter assy21. INSTALL WIRE HARNESS CLAMP a. Install the 2 Ωire harness clamps with the 2 bolts.Torque: 8,4 N·mInstall wire harness clamp22. INSTALL ENGINE WIRE No.3 a. Connect the engine wire No. 3 with the bolt.Torque: 9,6 N·mInstall engine wire No.323. CONNECT WIRE HARNESS
Install the wire harness clamp.
Connect the back−up lamp switch connector, speedometer sensor connector and starter connector.
INSTALL CLUTCH RELEASE CYLINDER ASSY
INSTALL CLUTCH ACCUMULATOR ASSY
INSTALL FRONT DRIVE SHAFT ASSY LH
INSTALL FRONT DRIVE SHAFT ASSY RH
INSTALL ENGINE ASSEMBLY WITH TRANSAXLE
?
Test yourself
A quick Toyota Camry quiz: every answer comes with an explanation and a link to the manual page.
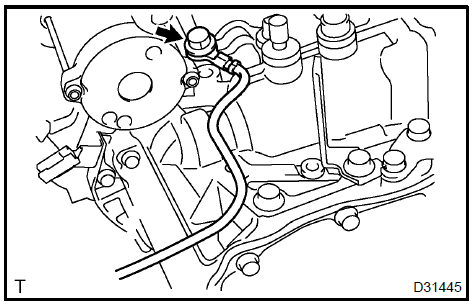 Remove engine wire No.3 8. REMOVE WIRE HARNESS CLAMP
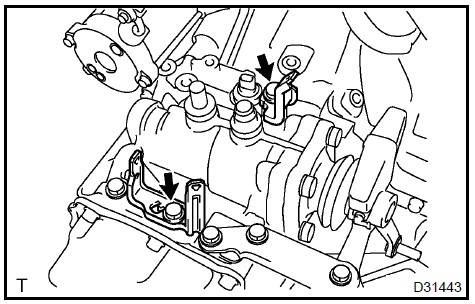 Remove wire harness clamp 9. REMOVE STARTER ASSY
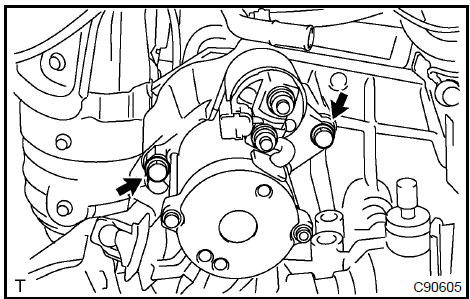 Remove starter assy 10. REMOVE ENGINE MOUNTING BRACKET FR
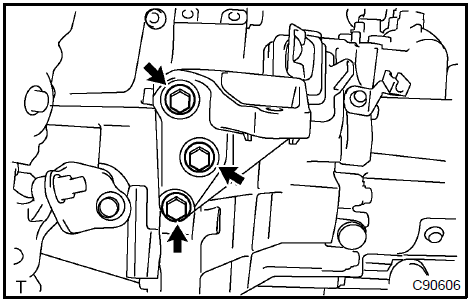 Remove engine mounting bracket FR 11. REMOVE MANUAL TRANSMISSION CASE PROTECTOR
 Remove manual transmission case protector 12. REMOVE EXHAUST PIPE SUPPORT BRACKET No.1
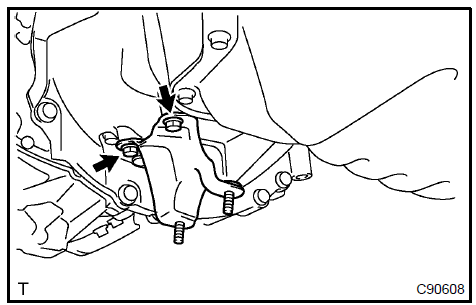 Remove exhaust pipe support bracket No.1 13. REMOVE ENGINE MOUNTING INSULATOR LH
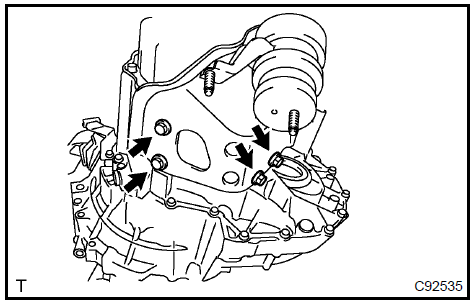 Remove engine mounting insulator LH 14. REMOVE MANUAL TRANSAXLE ASSY

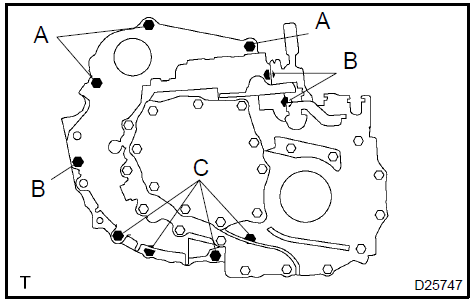
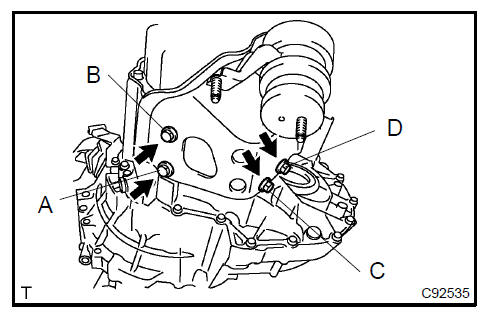 Install engine mounting insulator LH 17. INSTALL EXHAUST PIPE SUPPORT BRACKET No.1 a. Install the exhaust pipe support bracket No.1 Ωith the 2 bolts.Torque: 19 N·m
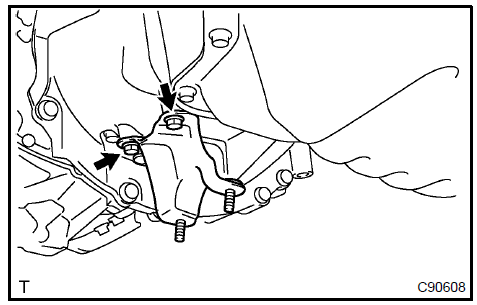 Install exhaust pipe support bracket No.1 18. INSTALL MANUAL TRANSMISSION CASE PROTECTOR a. Install the manual transmission cse protector with the 2 bolts.Torque: 18 N·m
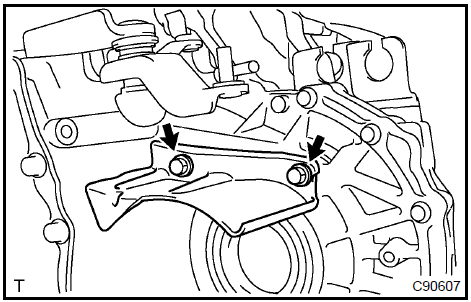 Install manual transmission case protector 19. INSTALL ENGINE MOUNTING BRACKET FR a. Install the engine mounting bracket FR with the 3 bolts.Torque: 64 N·m
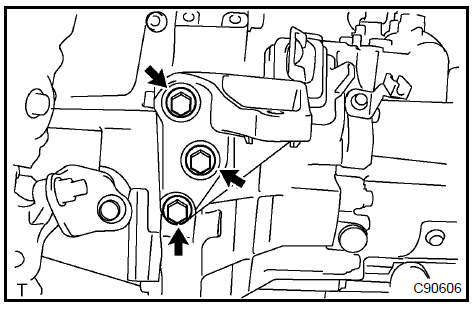 Install engine mounting bracket FR 20. INSTALL STARTER ASSY a. Install the starter assy with the 2 bolts.Torque: 39 N·m
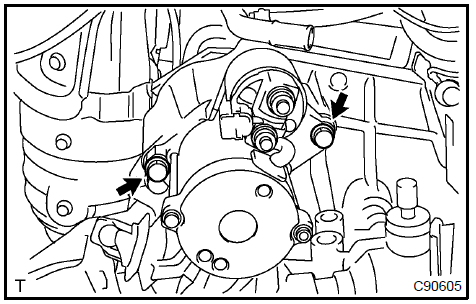 Install starter assy 21. INSTALL WIRE HARNESS CLAMP a. Install the 2 Ωire harness clamps with the 2 bolts.Torque: 8,4 N·m
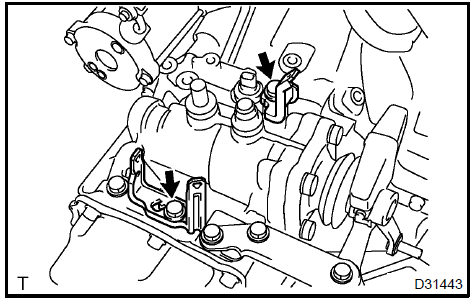 Install wire harness clamp 22. INSTALL ENGINE WIRE No.3 a. Connect the engine wire No. 3 with the bolt.Torque: 9,6 N·m
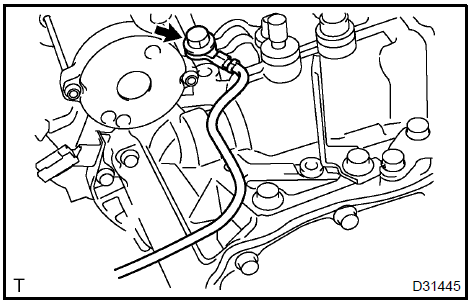 Install engine wire No.3 23. CONNECT WIRE HARNESS