Front Door Opening Trim Weatherstrip
Removal
REMOVAL
COMPONENTS (REMOVAL)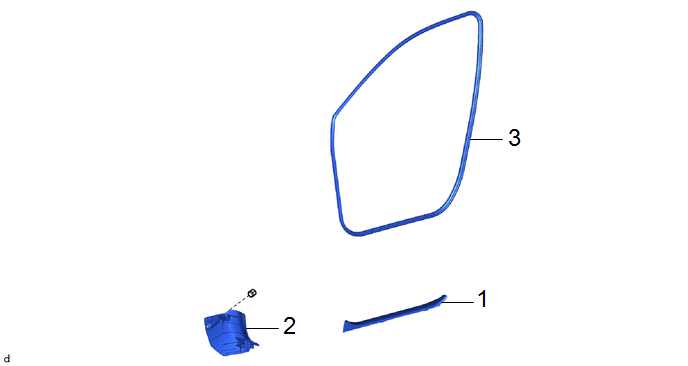
Procedure | Part Name Code |  |  |  |
|
|---|---|---|---|---|---|
1 |
FRONT DOOR SCUFF PLATE |
67914 |
- |
- |
- |
2 |
COWL SIDE TRIM SUB-ASSEMBLY |
62112A |
- |
- |
- |
3 |
FRONT DOOR OPENING TRIM WEATHERSTRIP |
62312B |
- |
- |
- |
HINT:
- Use the same procedure for the RH side and LH side.
- The following procedure is for the LH side.
PROCEDURE
1. REMOVE FRONT DOOR SCUFF PLATE
Click here 
2. REMOVE COWL SIDE TRIM SUB-ASSEMBLY
Click here
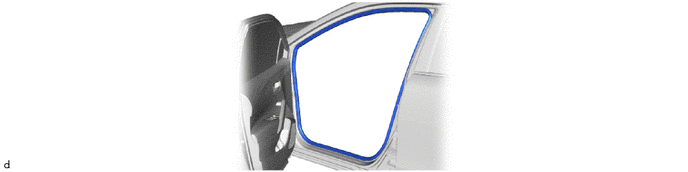
3. REMOVE FRONT DOOR OPENING TRIM WEATHERSTRIP
Installation
INSTALLATION
COMPONENTS (INSTALLATION)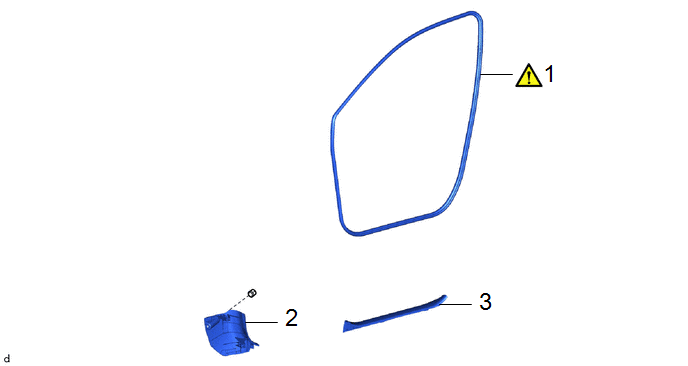
Procedure | Part Name Code |  |  |  |
|
|---|---|---|---|---|---|
1 |
FRONT DOOR OPENING TRIM WEATHERSTRIP |
62312B |
 |
- |
- |
2 |
COWL SIDE TRIM SUB-ASSEMBLY |
62112A |
- |
- |
- |
3 |
FRONT DOOR SCUFF PLATE |
67914 |
- |
- |
- |
HINT:
- Use the same procedure for the RH side and LH side.
- The following procedure is for the LH side.
PROCEDURE
1. INSTALL FRONT DOOR OPENING TRIM WEATHERSTRIP
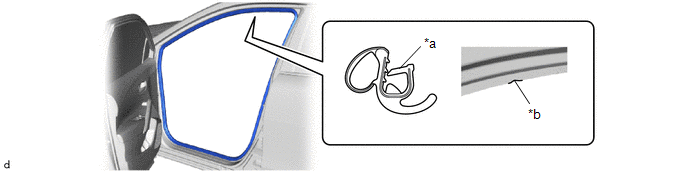
*a |
Paint Mark |
*b |
Cutout |
(1) Align the paint mark on the front door opening trim weatherstrip with the cutout on the vehicle body, and install the front door opening trim weatherstrip.
NOTICE:
- Make sure that the paint mark is aligned with the cutout when installing the front door opening trim weatherstrip, otherwise water ingress may occur.
- After installation, check that the corners fit correctly.
HINT:
- Make sure to install the part of the front door opening trim weatherstrip near the paint mark first.
- The color of the paint marks on the front door opening trim weatherstrip LH and front door opening trim weatherstrip RH are different.
Paint Mark:
Location
Color
for LH Side
Orange
for RH Side
Pink
2. INSTALL COWL SIDE TRIM SUB-ASSEMBLY
3. INSTALL FRONT DOOR SCUFF PLATE