Power Back Door Main Switch
Removal
REMOVAL
COMPONENTS (REMOVAL)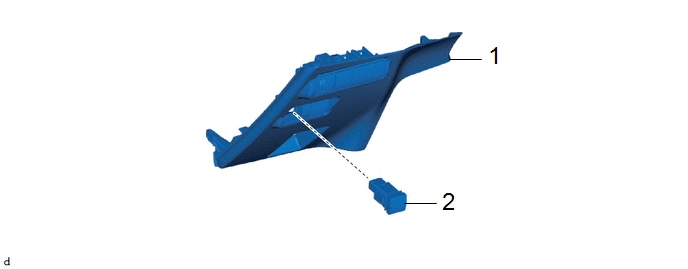
Procedure | Part Name Code |  |  |  |
|
|---|---|---|---|---|---|
1 |
LOWER NO. 1 INSTRUMENT PANEL FINISH PANEL |
55432D |
- |
- |
- |
2 |
NO. 1 POWER BACK DOOR CONTROL SWITCH |
84966A |
- |
- |
- |
PROCEDURE
1. REMOVE LOWER NO. 1 INSTRUMENT PANEL FINISH PANEL
Click here 
2. REMOVE NO. 1 POWER BACK DOOR CONTROL SWITCH
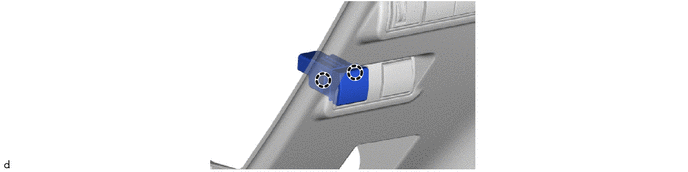
Inspection
INSPECTION
PROCEDURE
1. INSPECT NO. 1 POWER BACK DOOR CONTROL SWITCH
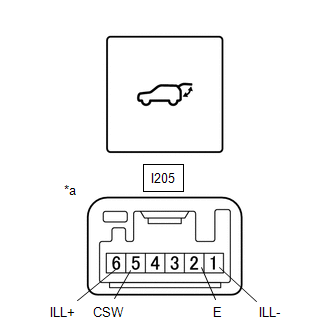
*a |
Component without harness connected (No. 1 Power Back Door Control Switch) |
*b |
Pushed |
*c |
Not Pushed |
(a) Check the resistance of the No. 1 power back door control switch.
(1) Measure the resistance according to the value(s) in the table below.
Standard Resistance:
Tester Connection | Switch Condition | Specified Condition |
|---|---|---|
I205-5 (CSW) - I205-2 (E) |
Free |
Below 1 Ω |
I205-5 (CSW) - I205-2 (E) |
Pushed |
10 kΩ or higher |
If the result is not as specified, replace the No. 1 power back door control switch.
(b) Check that the switch illuminates.
(1) Apply battery voltage to the No. 1 power back door control switch and check that the switch illuminates.
OK:
Measurement Condition | Specified Condition |
|---|---|
Auxiliary battery positive (+) → I205-6 (ILL+) Auxiliary battery negative (-) → I205-1 (ILL-) |
Illuminates |
If the result is not as specified, replace the No. 1 power back door control switch.
Installation
INSTALLATION
COMPONENTS (INSTALLATION)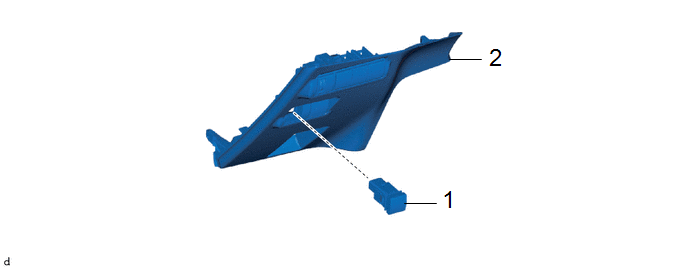
Procedure | Part Name Code |  |  |  |
|
|---|---|---|---|---|---|
1 |
NO. 1 POWER BACK DOOR CONTROL SWITCH |
84966A |
- |
- |
- |
2 |
LOWER NO. 1 INSTRUMENT PANEL FINISH PANEL |
55432D |
- |
- |
- |
PROCEDURE
1. INSTALL NO. 1 POWER BACK DOOR CONTROL SWITCH
2. INSTALL LOWER NO. 1 INSTRUMENT PANEL FINISH PANEL
Click here 