Installation
INSTALLATION
COMPONENTS (INSTALLATION)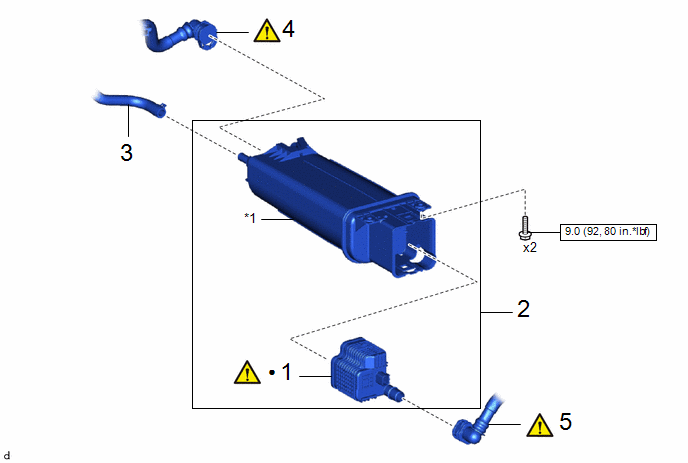
Procedure | Part Name Code |  |  |  |
|
|---|---|---|---|---|---|
1 |
LEAK DETECTION PUMP SUB-ASSEMBLY |
77740R |
 |
- |
- |
2 |
CANISTER (CHARCOAL CANISTER ASSEMBLY) |
77740 |
- |
- |
- |
3 |
CHARCOAL CANISTER HOSE |
77759A |
- |
- |
- |
4 |
NO. 2 FUEL TANK VENT HOSE SUB-ASSEMBLY |
77404B |
|
- |
- |
5 |
FUEL TANK VENT HOSE SUB-ASSEMBLY |
77404 |
|
- |
- |
*1 |
CHARCOAL CANISTER SUB-ASSEMBLY |
- |
- |
 |
N*m (kgf*cm, ft.*lbf): Specified torque |
● |
Non-reusable part |
Procedure | Part Name Code | | | |
|
|---|---|---|---|---|---|
6 |
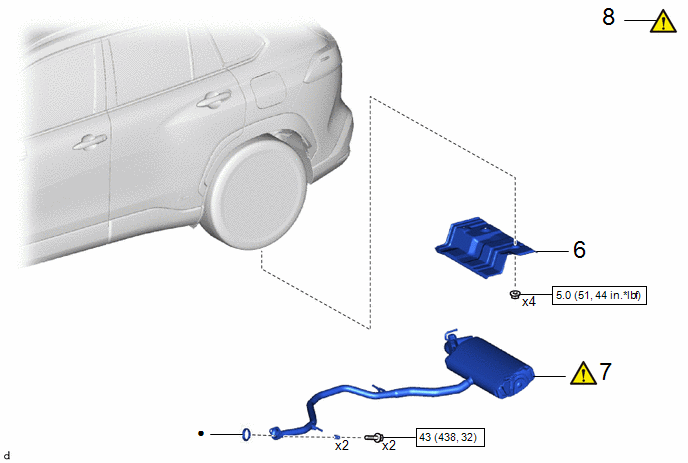
MAIN MUFFLER UPPER HEAT INSULATOR |
58327D |
- |
- |
- |
7 |
TAIL EXHAUST PIPE ASSEMBLY |
17430 |
|
- |
- |
8 |
INSPECT FOR EXHAUST GAS LEAK |
- |
|
- |
- |
|
N*m (kgf*cm, ft.*lbf): Specified torque |
● |
Non-reusable part |
PROCEDURE
1. INSTALL LEAK DETECTION PUMP SUB-ASSEMBLY
|
HINT: Only perform this procedure when replacement of the leak detection pump sub-assembly is necessary. |
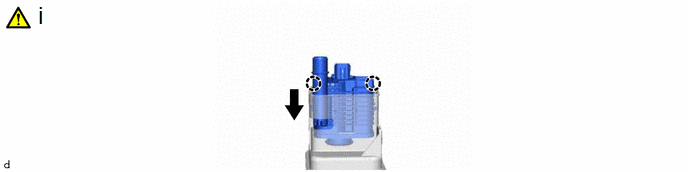
(1) Engage the 2 claws to install a new leak detection pump sub-assembly to the charcoal canister sub-assembly.
NOTICE:
- Do not allow foreign matter such as grease, oil or water to adhere to the O-ring.
- Ensure that the claws are engaged properly.
2. INSTALL CANISTER (CHARCOAL CANISTER ASSEMBLY)
Torque:
9 N·m {92 kgf·cm, 80 in·lbf}
3. CONNECT CHARCOAL CANISTER HOSE
4. CONNECT NO. 2 FUEL TANK VENT HOSE SUB-ASSEMBLY
*a |
Retainer |
- |
- |
 |
Push |
- |
- |
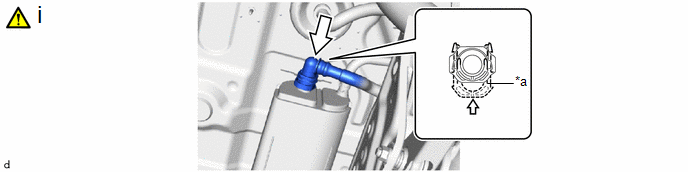
(1) Push the No. 2 fuel tank vent hose onto the canister (charcoal canister assembly) and push in the retainer to engage the lock claws.
Click here
NOTICE:
- Check that there are no scratches or foreign matter around the connecting parts of the tube connector and pipe (canister (charcoal canister assembly)) before performing this work.
- After connecting the No. 2 fuel tank vent hose, check that the No. 2 fuel tank vent hose is securely connected by pulling on the tube connector.
5. CONNECT FUEL TANK VENT HOSE SUB-ASSEMBLY
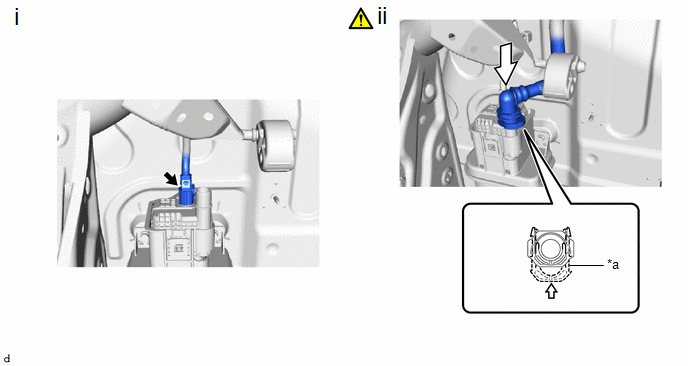
*a |
Retainer |
- |
- |
|
Push |
- |
- |
(1) Connect the leak detection pump sub-assembly connector.
(2) Push in the fuel tank vent hose sub-assembly onto the leak detection pump sub-assembly and push in the retainer to engage the lock claws.
Click here
NOTICE:
- Check that there are no scratches or foreign matter around the connecting parts of the tube connector and pipe (leak detection pump sub-assembly) before performing this work.
- After connecting the fuel tank vent hose sub-assembly, check that the fuel tank vent hose sub-assembly is securely connected by pulling on the tube connector.
6. INSTALL MAIN MUFFLER UPPER HEAT INSULATOR
Torque:
5 N·m {51 kgf·cm, 44 in·lbf}
7. INSTALL TAIL EXHAUST PIPE ASSEMBLY
|
Click here |
8. INSPECT FOR EXHAUST GAS LEAK
Click here