Rear brake pad
COMPONENTS
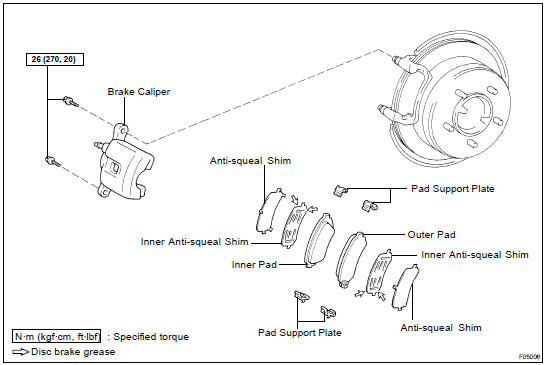
REPLACEMENT
1. REMOVE REAR WHEEL
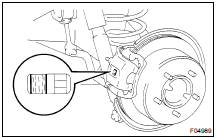
2. INSPECT PAD LINING THICKNESS
Check the pad thickness through the caliper inspection hole and replace pads if not within the specification.
Minimum thickness: 1.0 mm (0.039 in.)
3. REMOVE BRAKE CALIPER
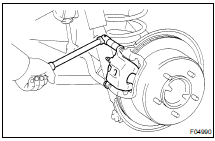
(b) Remove the caliper and suspend it so the hose is not stretched.
HINT: Do not disconnect the flexible hose.
4. REMOVE 2 PADS AND 4 ANTI-SQUEAL SHIMS
5. REMOVE 4 PAD SUPPORT PLATES
NOTICE: The pad support plates can be used again provided that they have sufficient rebound, no deformation, cracks or wear, and have had all rust, dirt and foreign particles cleaned off.
6. CHECK DISC THICKNESS AND RUNOUT ( BR-30 )
7. INSTALL PAD SUPPORT PLATES
8. INSTALL NEW PADS
NOTICE: When replacing worn pads, the anti-squeal shims must be replaced together with the pads. Install the 4 anti-squeal shims to the pads.
HINT: Apply disc brake grease to both sides of the inner anti-squeal shims ( BR-24 ).
NOTICE: Do not allow oil or grease to get on the rubbing face.
9. INSTALL CALIPER
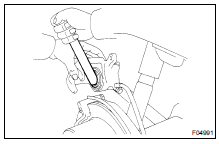
(b) Press in the pistons with a hammer handle or an equivalent.
HINT:
- Always change the pads on one wheel at a time as there is a possibility of the opposite piston flying out.
- If the piston is difficult to push in, loosen the bleeder plug and push in the piston while letting some fluid escape.
(d) Install 2 mounting bolts.
Torque: 26 N·m
10. INSTALL REAR WHEEL
Torque: 103 N·m
11. DEPRESS BRAKE PEDAL SEVERAL TIMES
12. CHECK THAT FLUID LEVEL IS AT MAX LINE
Test yourself
A quick Toyota Land Cruiser quiz: every answer comes with an explanation and a link to the manual page.