Automatic Transmission
Vehicle speed sensor
In this manual: Automatic Transmission
~1min read
ON-VEHICLE REPAIR
1. DISCONNECT NO. 1 VEHICLE SPEED SENSOR CONNECTOR
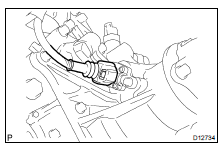
2. REMOVE NO. 1 VEHICLE SPEED SENSOR
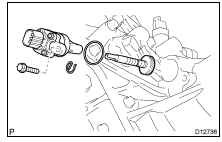
Remove the bolt and the No. 1 vehicle speed sensor.
3. DISASSEMBLE NO. 1 VEHICLE SPEED SENSOR
(a) Remove the O-ring from the speedometer driven gear assembly.(b) Remove the clip and the speedometer driven gear from the speedometer driven gear sleeve.
4. ASSEMBLE NO. 1 VEHICLE SPEED SENSOR
(a) Install the speedometer driven gear and the clip to the speedometer driven gear sleeve. (b) Coat a new O-ring with ATF.(c) Install the O-ring to the speedometer driven gear assembly.
5. INSTALL NO. 1 VEHICLE SPEED SENSOR
Install the No. 1 vehicle speed sensor with the bolt.
Torque: 16 N·m
6. CONNECT NO. 1 VEHICLE SPEED SENSOR CONNECTOR
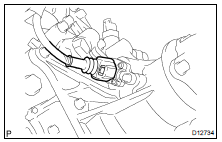
7. DISCONNECT SPEED SENSOR NT AND SP2 CONNECTORS
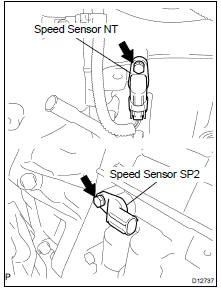
8. REMOVE SPEED SENSOR NT AND SP2
(a) Remove the 2 bolts, speed sensor NT and SP2.
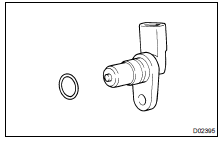
(b) Remove 2 O-rings from the speed sensor NT and SP2.
9. INSTALL SPEED SENSOR NT AND SP2
(a) Coat 2 new O-rings with ATF and install them to the speed sensor NT and SP2.
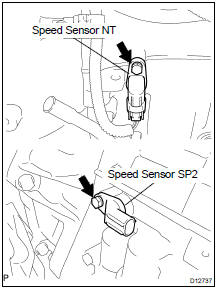
(b) Install the speed sensor NT and SP2 with 2 bolts.
Torque: 5,4 N·m
10. CONNECT SPEED SENSOR NT AND SP2 CONNECTORS
Test yourself
A quick Toyota Land Cruiser quiz: every answer comes with an explanation and a link to the manual page.
Was this page helpful?