Disassembly
1. REMOVE SHIFT LEVER KNOB
2. REMOVE POSITION INDICATOR HOUSING
(a) Using a small screwdriver, remove the shift lock release cover from the position indicator housing.(b) Remove the position indicator housing assembly.
3. REMOVE POSITION INDICATOR LIGHT GUIDE
(a) Disconnect the indicator lamp wire from the position indicator light guide.(b) Remove the position indicator light guide.
4. REMOVE SLIDE COVER AND NO. 2 SLIDE COVER
5. REMOVE SHIFT LEVER GUIDE HOUSING
(a) Disconnect the shift lock control ECU connector from the shift lever plate.(b) Disconnect the 2 transmission control switches and the shift lock control switch from the shift lever guide housing.
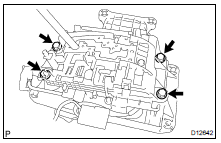
(c) Remove the 4 bolts, nuts and the shift lever guide housing assembly.
6. DISASSEMBLE SHIFT LEVER GUIDE HOUSING
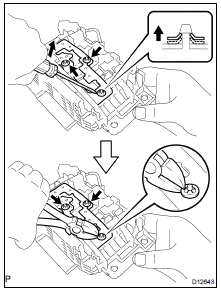
(b) Using nippers, cut the 3 shift lever nuts off then.
HINT: Remove the shift lever lock pin of the shift lever nut in the same way.
(c) Remove the shift lever guide cushion. (d) Remove the 3 screws, the shift lock control ECU and the shift lock solenoid. (e) Remove the shift lock control ECU bracket from the shift lock control ECU. (f) Disconnect the transmission control switch connector from the shift lever guide housing.(g) Remove the shift lock release button and the spring.
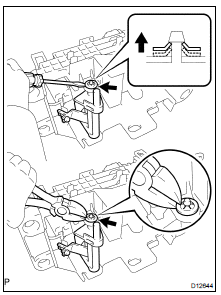
(j) Remove the shift lever lock pin, the shift lock plate stopper and the cushion.
7. DISCONNECT SHIFT LOCK CONTROL ECU, SHIFT LOCK SOLENOID, SHIFT LOCK CONTROL SWITCH AND TRANSMISSION CONTROL SWITCH
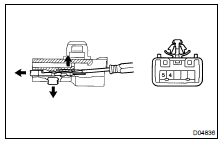
(b) Release the locking lug of the terminal 4 and 5, and pull the terminals out from the rear.
HINT: Remove the transmission control switch in the same way.
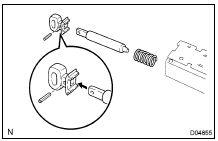
(d) Using 2 mm dia. steel wire, remove the pin and the shift lock solenoid link from the shift lock solenoid plunger.

(k) Remove the indicator lamp wire.
8. REMOVE SHIFT LEVER SUB-ASSEMBLY
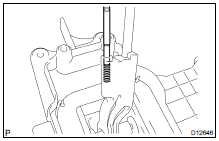
(a) Using a magnetic finger, remove the detent shift lever pin and the spring.
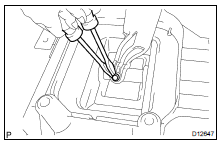
(c) Remove the pin and shift lever sub-assembly.
9. DISASSEMBLE SHIFT LEVER PLATE
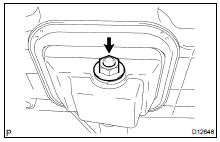
(a) Remove the nut, the control lever, the plate washer, the 2 spacers and the 2 O-rings.
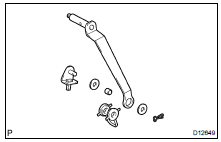
(f) Remove the 2 spring nuts.
Test yourself
A quick Toyota Land Cruiser quiz: every answer comes with an explanation and a link to the manual page.