Installation
1. INSPECT PROPELLER SHAFT WITH CENTER BEARING ASSEMBLY (with Grease Fitting)
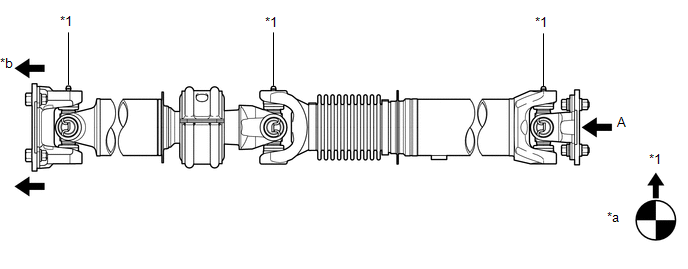 Text in Illustration
*1 |
Grease Fitting |
- |
- |
*a |
View A |
*b |
Front Side |
HINT:
When replacing the spider bearing, make sure that the grease fitting assembly hole is facing in the direction shown in the illustration.
2. INSTALL PROPELLER SHAFT WITH CENTER BEARING ASSEMBLY
(a) Align the matchmarks on the propeller shaft flange yoke and transfer flange. Text in Illustration
|
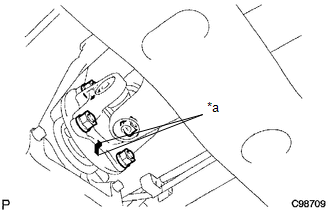 |
(b) Install the propeller shaft with the 4 nuts and 4 washers.
Torque:
88 N·m {899 kgf·cm, 65 ft·lbf}
(c) Align the matchmarks on the propeller shaft flange yoke and differential flange. Text in Illustration
|
 |
(d) for Differential Type BD20:
(1) Install the propeller shaft with the 4 bolts, 4 washers and 4 nuts.
Torque:
88 N·m {899 kgf·cm, 65 ft·lbf}
(e) for Differential Type BD22:
(1) Install the propeller shaft with the 4 washers and 4 nuts.
Torque:
88 N·m {899 kgf·cm, 65 ft·lbf}
(f) Provisionally install the center support bearing with 2 mounting bolts. Text in Illustration
HINT: Make sure the bearing is installed with the drain hole facing downwards. |
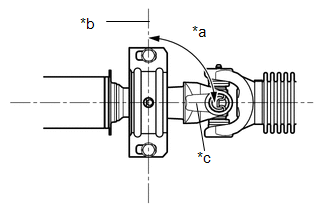 |
(g) Tighten the 2 bolts.
Torque:
36 N·m {369 kgf·cm, 27 ft·lbf}
Test yourself
A quick Toyota Tacoma quiz: every answer comes with an explanation and a link to the manual page.