Power Outlet Socket(for Front Side)
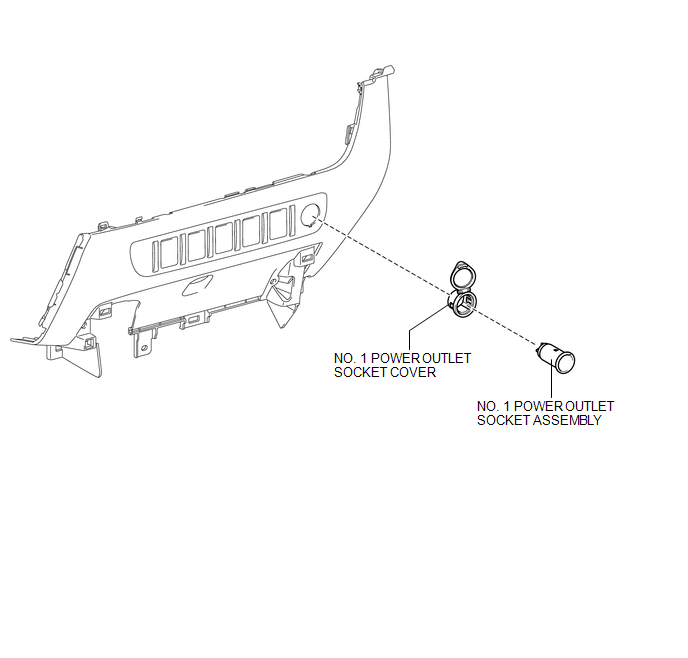 Removal REMOVAL PROCEDURE
1. REMOVE INSTRUMENT PANEL LOWER CENTER FINISH PANEL
(See page  )
2. REMOVE NO. 1 POWER OUTLET SOCKET ASSEMBLY
(a) Using a screwdriver with its tip wrapped in protective tape, disengage the 2 claws to remove the No. 1 power outlet socket assembly as shown in the illustration. Text in Illustration
|
 |
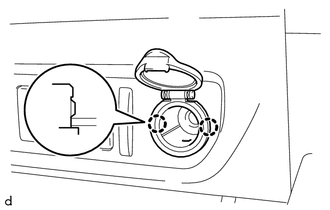
3. REMOVE NO. 1 POWER OUTLET SOCKET COVER
(a) Disengage the 2 claws to remove the No. 1 power outlet socket cover. |
 |
1. INSTALL NO. 1 POWER OUTLET SOCKET COVER
(a) Engage the 2 claws to install the No. 1 power outlet socket cover.
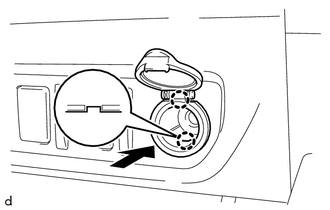
2. INSTALL NO. 1 POWER OUTLET SOCKET ASSEMBLY
(a) Engage the 2 claws to install the No. 1 power outlet socket assembly as shown in the illustration. |
 |
3. INSTALL INSTRUMENT PANEL LOWER CENTER FINISH PANEL
(See page  )
Test yourself
A quick Toyota Tacoma quiz: every answer comes with an explanation and a link to the manual page.