Stereo Component Amplifier
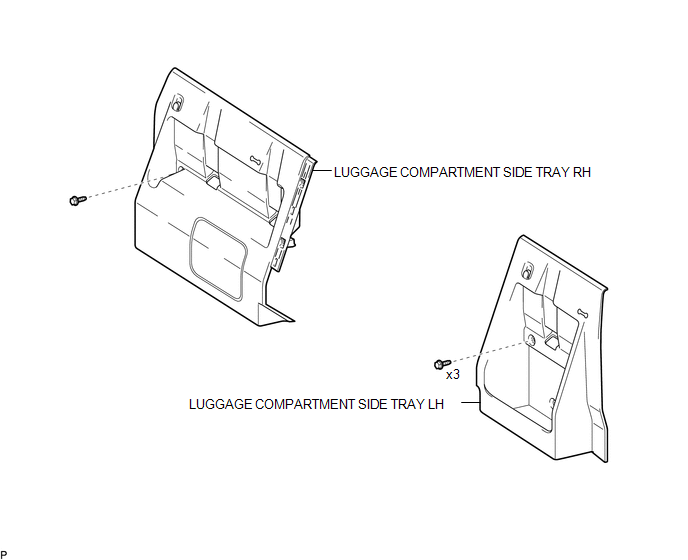 ILLUSTRATION
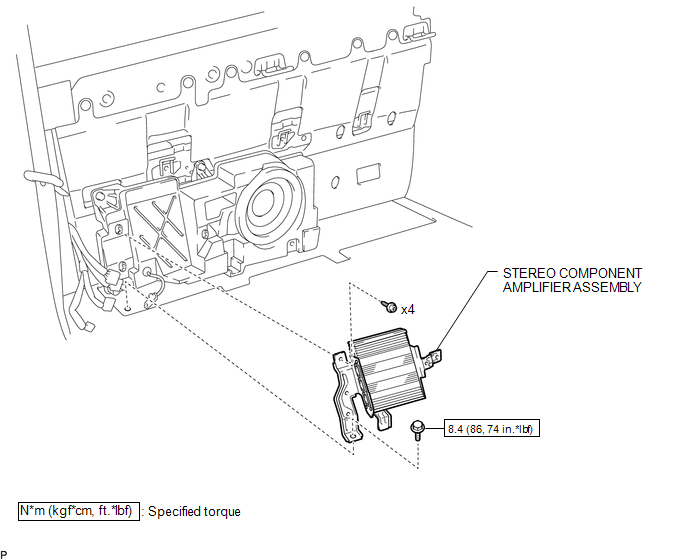 Removal REMOVAL PROCEDURE
1. PRECAUTION
NOTICE:
After turning the ignition switch off, waiting time may be required before disconnecting the cable from the negative (-) battery terminal. Therefore, make sure to read the disconnecting the cable from the negative (-) battery terminal notices before proceeding with work.
Click here 
2. DISCONNECT CABLE FROM NEGATIVE BATTERY TERMINAL
NOTICE:
When disconnecting the cable, some systems need to be initialized after the cable is reconnected.
Click here
3. REMOVE REAR SEATBACK ASSEMBLY RH
(See page )
4. REMOVE REAR SEATBACK ASSEMBLY LH
(See page )
5. REMOVE LUGGAGE COMPARTMENT SIDE TRAY LH
(See page )
6. REMOVE LUGGAGE COMPARTMENT SIDE TRAY RH
(See page )
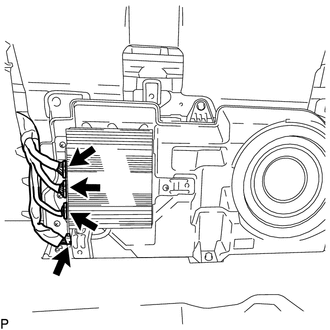
7. REMOVE STEREO COMPONENT AMPLIFIER ASSEMBLY
(a) Disconnect the 4 connectors. |
 |
(b) Disengage the clamp. |
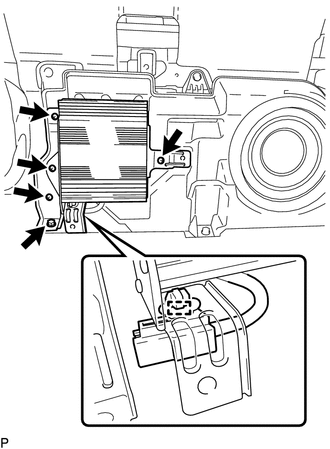 |
(c) Remove the bolt.
(d) Using a T20 "TORX" socket wrench, remove the 4 screws and stereo component amplifier assembly.
Installation INSTALLATION PROCEDURE1. INSTALL STEREO COMPONENT AMPLIFIER ASSEMBLY
(a) Using a T20 "TORX" socket wrench, install the stereo component amplifier assembly with the 4 screws.
(b) Install the bolt.
Torque:
8,4 N·m {86 kgf·cm, 74 in·lbf}
(c) Engage the clamp.
(d) Connect the 4 connectors.
2. INSTALL LUGGAGE COMPARTMENT SIDE TRAY RH
(See page  )
3. INSTALL LUGGAGE COMPARTMENT SIDE TRAY LH
(See page )
4. INSTALL REAR SEATBACK ASSEMBLY LH
(See page )
5. INSTALL REAR SEATBACK ASSEMBLY RH
(See page )
6. CONNECT CABLE TO NEGATIVE BATTERY TERMINAL
Torque:
5,4 N·m {55 kgf·cm, 48 in·lbf}
NOTICE:
When disconnecting the cable, some systems need to be initialized after the cable is reconnected.
Click here
Test yourself
A quick Toyota Tacoma quiz: every answer comes with an explanation and a link to the manual page.