Washer Level Warning Switch
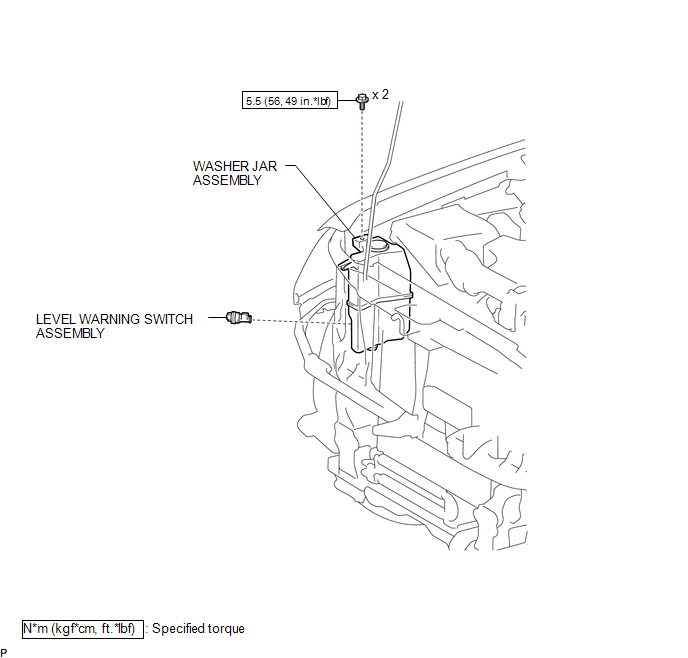 Inspection INSPECTION PROCEDURE
1. INSPECT LEVEL WARNING SWITCH ASSEMBLY
HINT:
This check should be performed with the windshield washer motor and pump assembly installed on the washer jar.
(a) Fill the washer jar with washer fluid.
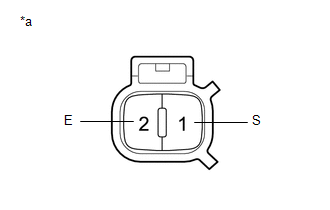
(b) Measure the resistance according to the value(s) in the table below. Standard Resistance:
HINT: *: The level warning switch assembly begins operating when the fluid volume is 600 to 800 cc (36.6 to 48.8 cu.in.) depending on the vehicle condition. Text in Illustration
If the result is not as specified, replace the level warning switch assembly. |
 |
1. INSTALL LEVEL WARNING SWITCH ASSEMBLY
(a) Install the level warning switch assembly. |
 |
(b) Connect the connector.
(c) Connect the washer hose to the windshield washer motor and pump assembly.
2. INSTALL WASHER JAR ASSEMBLY

3. ADD WASHER FLUID
4. INSTALL HEADLIGHT ASSEMBLY RH
HINT:
Use the same procedure as for the LH side. (See page )
1. REMOVE HEADLIGHT ASSEMBLY RH
HINT:
Use the same procedure as for the LH side. (See page  )
2. SEPARATE WASHER JAR ASSEMBLY
3. DRAIN WINDSHIELD WASHER FLUID
4. REMOVE LEVEL WARNING SWITCH ASSEMBLY
(a) Disconnect the connector. |
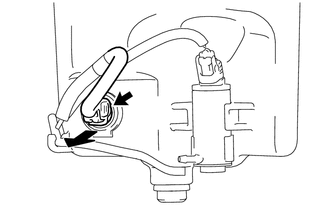 |
(b) Remove the level warning switch assembly as shown in the illustration.
Test yourself
A quick Toyota Tacoma quiz: every answer comes with an explanation and a link to the manual page.