Electrical Key Oscillator(for Rear Floor)
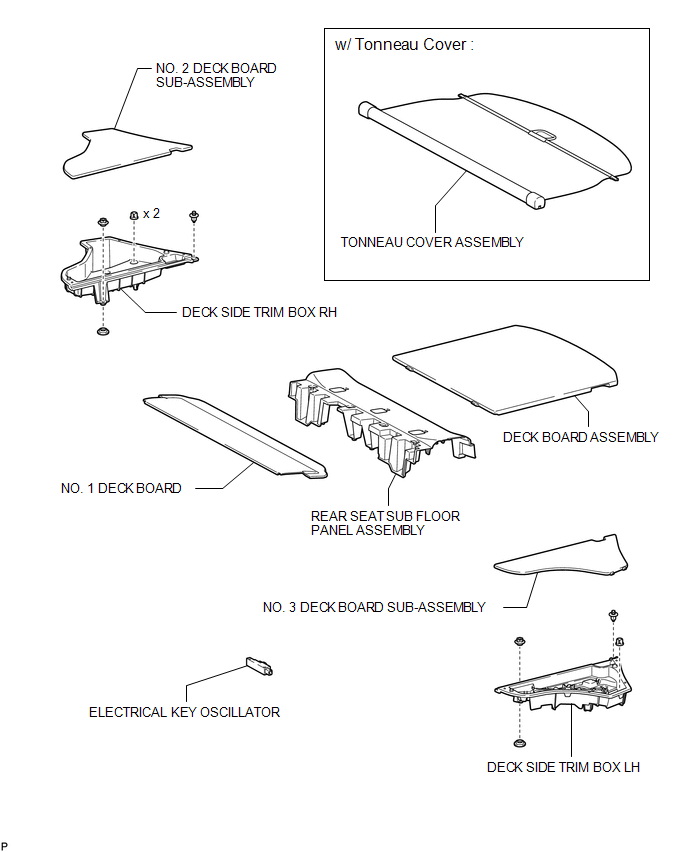
Removal REMOVAL PROCEDURE
1. REMOVE TONNEAU COVER ASSEMBLY (w/ Tonneau Cover)

2. REMOVE DECK BOARD ASSEMBLY
3. REMOVE NO. 3 DECK BOARD SUB-ASSEMBLY
4. REMOVE DECK SIDE TRIM BOX LH
5. REMOVE NO. 2 DECK BOARD SUB-ASSEMBLY
6. REMOVE DECK SIDE TRIM BOX RH
7. REMOVE NO. 1 DECK BOARD
8. REMOVE REAR SEAT SUB FLOOR PANEL ASSEMBLY
9. REMOVE ELECTRICAL KEY OSCILLATOR
(a) Disconnect the connector. |
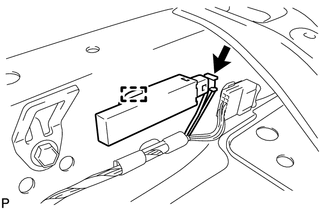 |
(b) Disengage the clamp and remove the electrical key oscillator.
NOTICE:
Be careful when removing the electrical key oscillator. If the oscillator is dropped, replace it with a new one.
Installation INSTALLATION PROCEDURE1. INSTALL ELECTRICAL KEY OSCILLATOR
(a) Engage the clamp and install the electrical key oscillator. NOTICE: Be careful when installing the electrical key oscillator. If the oscillator is dropped, replace it with a new one. |
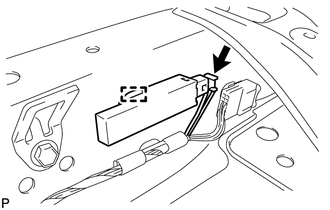 |
(b) Connect the connector.
2. INSTALL REAR SEAT SUB FLOOR PANEL ASSEMBLY

3. INSTALL NO. 1 DECK BOARD
4. INSTALL DECK SIDE TRIM BOX RH
5. INSTALL NO. 2 DECK BOARD SUB-ASSEMBLY
6. INSTALL DECK SIDE TRIM BOX LH
7. INSTALL NO. 3 DECK BOARD SUB-ASSEMBLY
8. INSTALL DECK BOARD ASSEMBLY
9. INSTALL TONNEAU COVER ASSEMBLY (w/ Tonneau Cover)
Test yourself
A quick Toyota Venza quiz: every answer comes with an explanation and a link to the manual page.