Installation
1. INSTALL POWER STEERING ECU ASSEMBLY
(a) Engage the 4 wire harness clamps to the power steering ECU assembly. |
 |
(b) Install the power steering ECU assembly with the 3 nuts. Torque: 14 N·m {138 kgf·cm, 10 ft·lbf} |
 |
(c) Securely connect the connector to the power steering ECU assembly. HINT: Return the lock lever to its original position to connect the connector, and then securely push in the lock of the lock lever as shown in the illustration . |
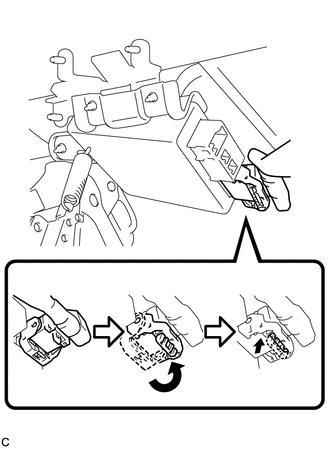 |
(d) Connect the 3 connectors to the power steering ECU assembly. |
 |
2. INSTALL DRIVER SIDE JUNCTION BLOCK ASSEMBLY
(a) Engage the 2 claws to install the driver side junction block assembly. |
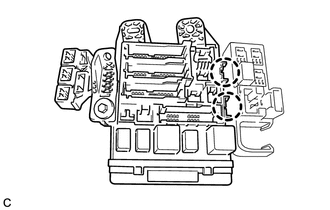 |
(b) Connect the connectors to the back of the driver side junction block assembly.
(c) Install the driver side junction block assembly with the 3 nuts. Torque: 8 N·m {82 kgf·cm, 71 in·lbf} |
 |
(d) Connect the connectors to the driver side junction block assembly.
3. INSTALL DRIVER SIDE KNEE AIRBAG ASSEMBLY
HINT:
Refer to the instructions for Installation of the knee airbag assembly (See page  ).
4. CONNECT CABLE TO NEGATIVE BATTERY TERMINAL
NOTICE:
When disconnecting the cable, some systems need to be initialized after the cable is reconnected (See page ).
5. INITIALIZE ROTATION ANGLE SENSOR AND CALIBRATE TORQUE SENSOR ZERO POINT
(a) If replacing the power steering ECU assembly, clear the rotation angle sensor calibration value, initialize the rotation angle sensor, and calibrate the torque sensor zero point (See page ).
Test yourself
A quick Toyota Venza quiz: every answer comes with an explanation and a link to the manual page.