Removal
1. REMOVE TAIL EXHAUST PIPE ASSEMBLY (for 1AR-FE)

2. REMOVE TAIL EXHAUST PIPE ASSEMBLY (for 2GR-FE)
3. REMOVE CENTER EXHAUST PIPE ASSEMBLY (for 1AR-FE)
4. REMOVE CENTER EXHAUST PIPE ASSEMBLY (for 2GR-FE)
5. REMOVE PROPELLER WITH CENTER BEARING SHAFT ASSEMBLY
(a) Depress the brake pedal and hold it.
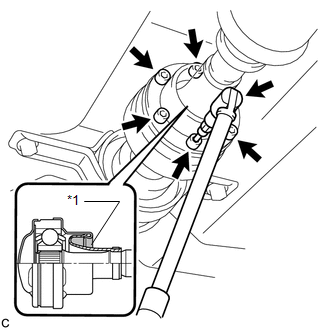
(b) Using a hexagon wrench (6 mm), loosen the cross groove joint set bolts 1/2 turn. NOTICE:
|
 |
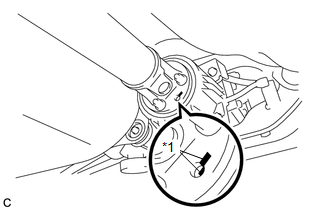
(c) Place matchmarks on the rear propeller shaft and electromagnetic control coupling assembly. Text in Illustration
|
 |
(d) Remove the 4 nuts and 4 washers. |
 |
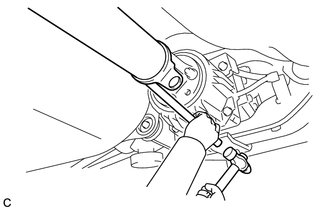
(e) Using a brass bar and a hammer, separate the propeller with center bearing shaft assembly. |
 |
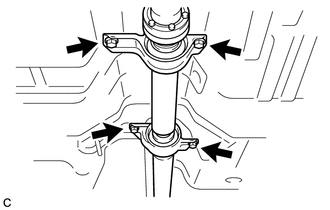
(f) Remove the 4 bolts, 2 No. 1 center support bearing washers and 2 No. 2 center support bearing washers. NOTICE: When removing the bolts and washers, do not apply excessive force to the universal joint. |
 |
(g) Pull out the propeller with center bearing shaft assembly from the transfer.
NOTICE:
- When removing the propeller shaft, do not apply excessive force to the universal joint.
- During and after the removal of the propeller shaft, keep the universal joint angle straight (within 15 degrees).
- Be careful not to damage the oil seal.
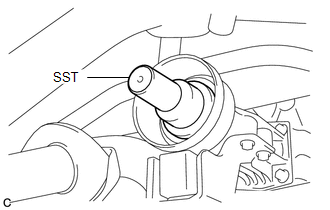
(h) Insert SST into the transfer to prevent oil leaks. SST: 09325-20010 NOTICE: Be careful not to damage the oil seal. |
 |
Test yourself
A quick Toyota Venza quiz: every answer comes with an explanation and a link to the manual page.