General body repairs, interior
Assembly overview - A-pillar trim
In this manual: General body repairs, interior
~1min read
 Note The illustration shows the A-pillar trims on the left side. The right-hand side is similar (mirror image of left-hand side). |
Upper A-pillar trim and trim for triangular window
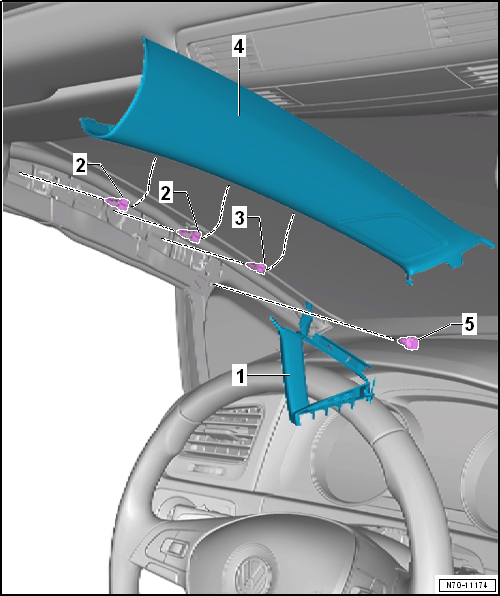
| 1 - | Trim for triangular window |
- Removing and installing → Chapter
| 2 - | Retaining clips |
- With barbs
- Insert into trim
- Remove any retaining clips left in body mountings using removal tool -T40280
- Always renew retaining clips
| 3 - | Retaining clip |
- Insert into trim
- Remove any retaining clips left in body mountings using removal tool -T40280-
- Renew any damaged or deformed retaining clips
| 4 - | Upper A-pillar trim |
- Removing and installing → Chapter
| 5 - | Clip |
- Remove and install together with trim for triangular window
- Insert into trim
- Renew clip if damaged or deformed
Lower A-pillar trim, LHD vehicles
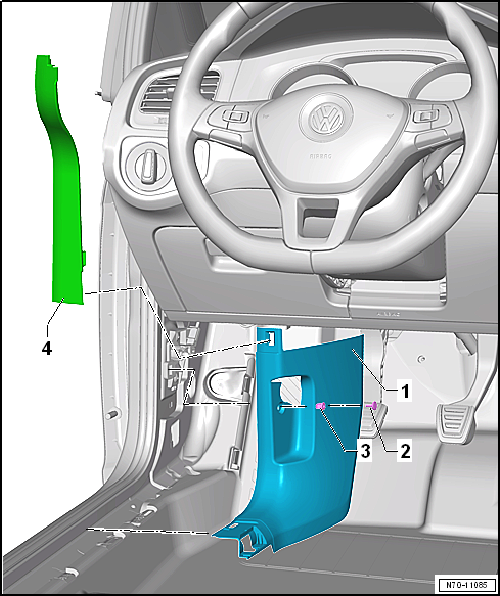
| 1 - | Lower A-pillar trim |
- Removing and installing → Chapter
| 2 - | Spreader clip |
| 3 - | Spreader plug |
| 4 - | A-pillar gap cover |
- Removing and installing → Chapter
Lower A-pillar trim, RHD vehicles
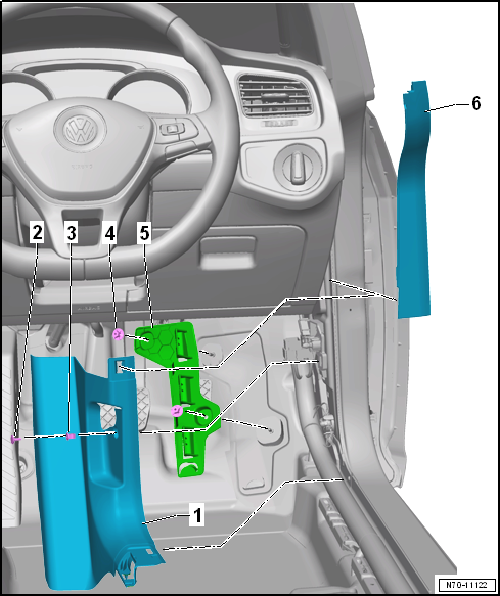
| 1 - | Lower A-pillar trim |
- Removing and installing → Chapter
| 2 - | Spreader clip |
| 3 - | Spreader plug |
| 4 - | Nut |
- Qty. 2
- 2 N·m
| 5 - | Bracket |
- Removing and installing → Chapter
| 6 - | A-pillar gap cover |
- Removing and installing → Chapter
Test yourself
A quick Volkswagen Golf quiz: every answer comes with an explanation and a link to the manual page.
Was this page helpful?