General body repairs, interior
Removing and installing A-pillar trim
In this manual: General body repairs, interior
~3min read
Special tools and workshop equipment required |
|
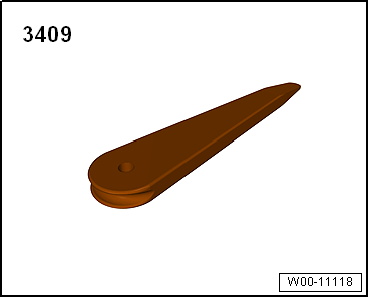
|
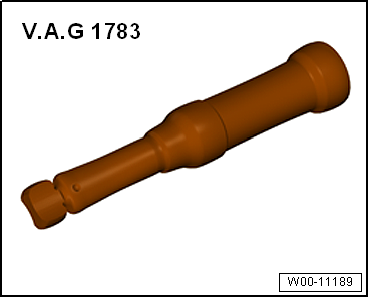
RemovingUpper A-pillar trim Note Removal and installation are described for the left vehicle side. Follow same instructions for the right side as appropriate.
|
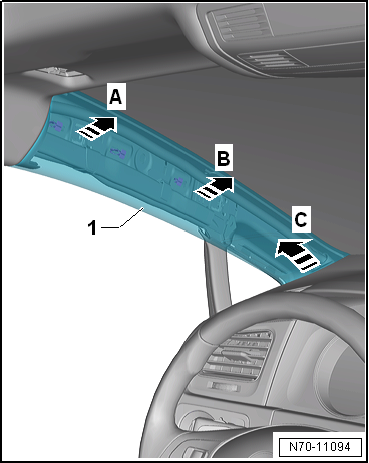 |
 Caution When carrying out the steps below, the curtain airbag may become damaged. For this reason, proceed with extreme caution when bending the barbs.
Remove trim for triangular window. Note Removal and installation are described for the left vehicle side. Follow same instructions for the right side as appropriate.
|
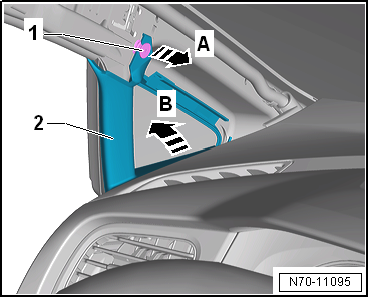 |
Removing lower A-pillar trim on driver side, LHD vehicles
- Release sill panel moulding from body in area of overlap to lower trim of A-pillar → Chapter.
- Remove A-pillar gap cover → Chapter.
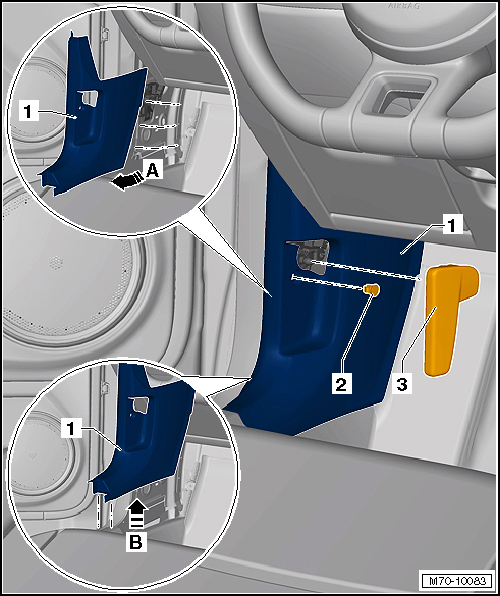
- Remove bonnet operating lever -3- → General body repairs, exterior; Rep. gr.55.
- Remove clip -2-.
- Release lower A-pillar trim -1- in -direction of arrow B- from body. Release lower A-pillar trim from door seal beading while doing so.
- Remove lower A-pillar trim -1- in -direction of arrow A- from mounting.
Removing lower A-pillar trim on driver side, RHD vehicles
- Release sill panel moulding from body in area of overlap to lower trim of A-pillar → Chapter.
- Remove A-pillar gap cover → Chapter.
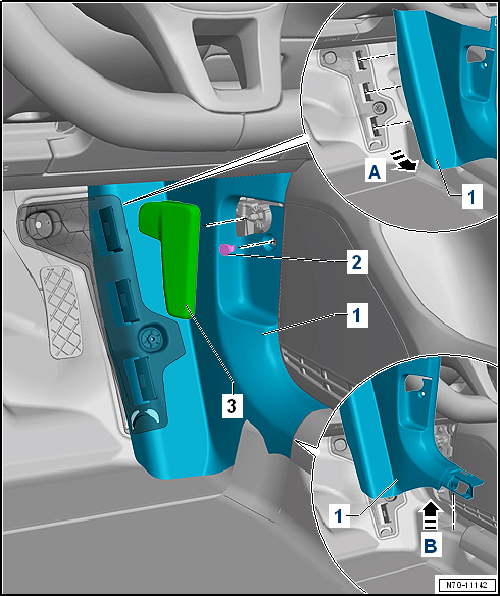
- Remove bonnet operating lever -3- → General body repairs, exterior; Rep. gr.55.
- Remove clip -2-.
- Unclip lower A-pillar trim -1- in -direction of arrow A- from mountings.
- At the same time, release lower A-pillar trim -1- in -direction of arrow B- from body. Release lower A-pillar trim from door seal beading while doing so.
|
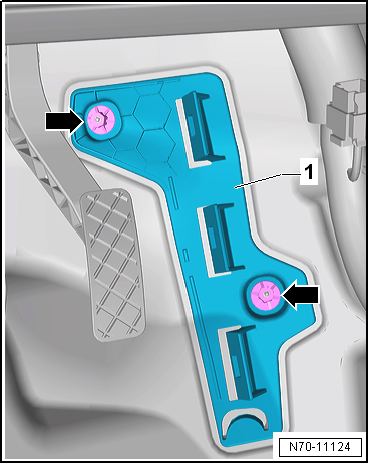 |
Removing lower A-pillar trim on front passenger side
- Release sill panel moulding from body in area of overlap to lower trim of A-pillar → Chapter.
- Remove A-pillar gap cover → Chapter.
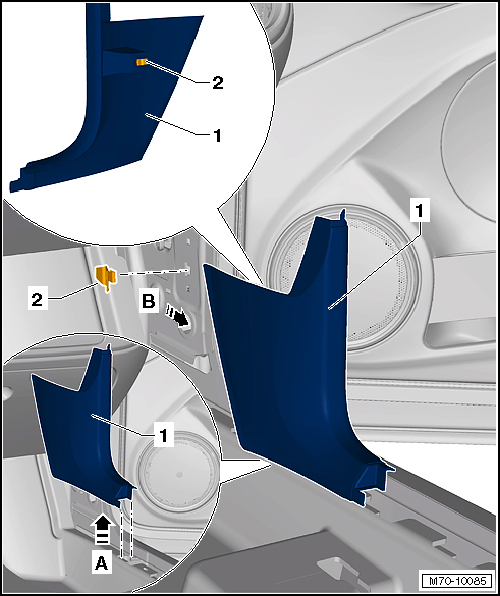
- Release lower A-pillar trim -1- in -direction of arrow A- from body. Release lower A-pillar trim from door seal beading while doing so.
- Remove lower A-pillar trim -1- in -direction of arrow B- from A-pillar.
Installing Note
Installation is carried out in reverse order.Specified torques
|
Test yourself
A quick Volkswagen Golf quiz: every answer comes with an explanation and a link to the manual page.
Was this page helpful?