General body repairs, exterior

Preparing body flange for fitting

~1min read
WARNING

Keep bonding surface free of dirt and grease.

Do not treat bonding surface with activator immediately after cutting back. Do not prime. Do not treat with cleaning solution.
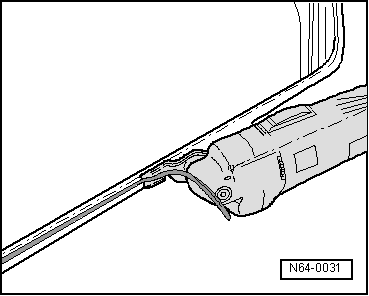
  • Cut back remaining material on body flange with U-shaped blade -V.A.G 1561/3-, but do not remove completely.
Note The remaining material is required as a base for the new adhesive sealing material. Keep dirt and grease off of bonding surfaces.
WARNING Exception: if bonding is performed later than one day after cutting back adhesive bead, the remaining residual material must be activated with activator.

Apply activator evenly in one stroke using applicator.

Activator must not come in contact with paint, or the paintwork will be damaged.

Drying time approx. 10 minutes

If the window flange has been repaired or partially renewed, the area concerned must be cleaned and primed again after painting.
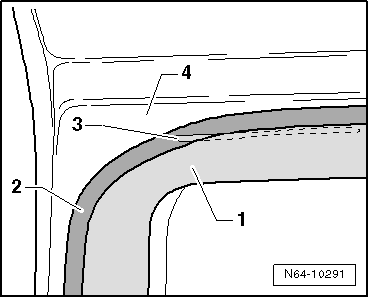
Note It is possible that a laser weld seam lies outside the area of the adhesive bead. In this case, the exposed weld seam must be sealed with glass adhesive before bonding the window.
Preparing body flange for fitting
  • If laser weld seam -3- on metal flange -4- is not covered by existing adhesive bead -1-, coat laser weld seam -3- with glass/paint primer -D 009 200 02--3-. Then fill laser weld seam with glass adhesive -DH 009 100 A2--1-.

Touching up paint damage

Paint structure must be restored after damage to the paintwork according to specifications in the “Paint” workshop manual.
Preparing body flange for fitting

Test yourself

A quick Volkswagen Golf quiz: every answer comes with an explanation and a link to the manual page.