General body repairs, interior
Removing and installing dash panel
In this manual: General body repairs, interior
~2min read
Special tools and workshop equipment required |
Removing
|
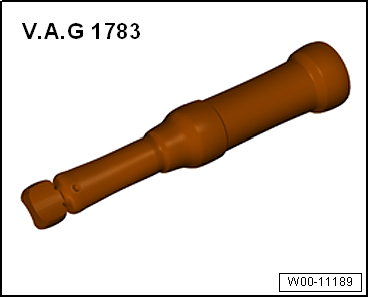 |
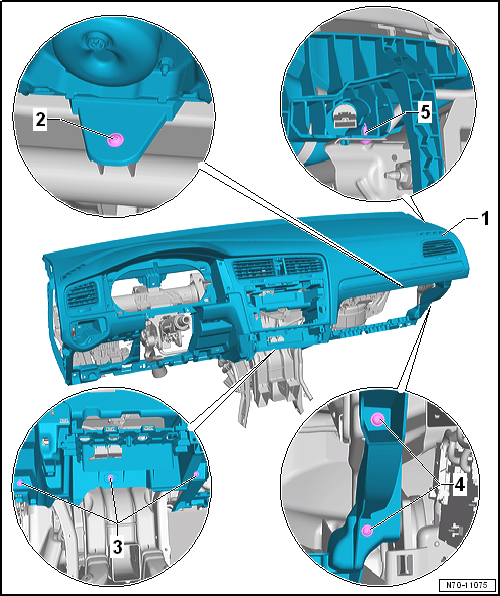
- Unscrew bolt -2- securing dash panel -1- to central tube on front passenger side.
- Unscrew bolts -3- securing dash panel -1- to central tube in middle.
- Unscrew bolts -4- and -5- securing dash panel -1- to central tube on right side.
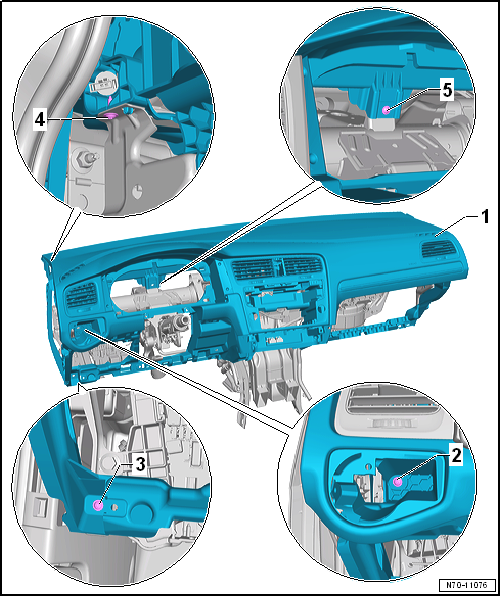
- Unscrew bolts -2-, -3- and -4- securing dash panel -1- to central tube on left side.
- Unscrew bolt -5- securing dash panel -1- to central tube on driver side.
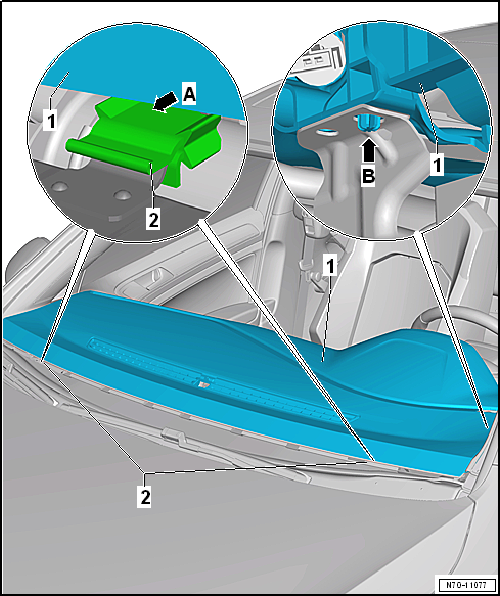
- Lift up dash panel -1- until locating lugs on left and right -arrow B- are released from mountings.
- At the same time, pull dash panel -1- out of mountings -2- in transitional area to windscreen -arrow A-.
 Note
The help of a second mechanic is required to remove the dash panel.
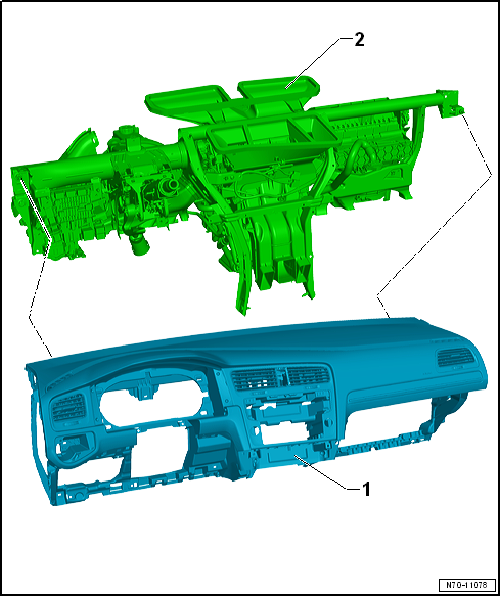
- Remove dash panel -1- from dash panel central tube -2-.
- Disconnect connectors and lay wiring harnesses on dash panel to one side.
- Carefully remove dash panel from vehicle interior and place it on a soft surface.
Installing Note
Install in reverse order, but note the following: |
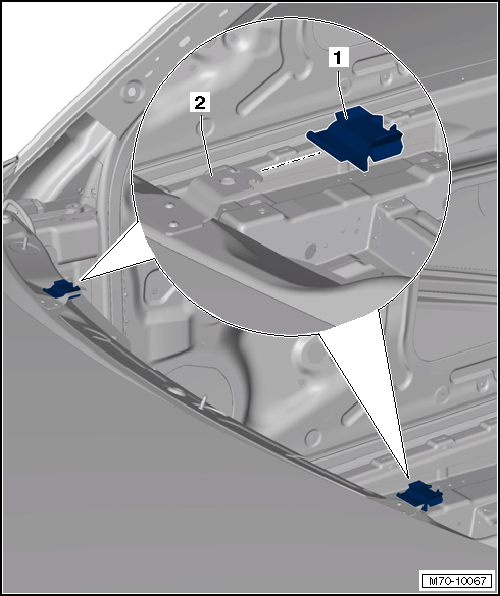
- Before installing dash panel, check whether mountings -1- are firmly attached to body -2-.
- With the aid of a second mechanic position dash panel -1- onto dash panel central tube -2- so that a perfect fit is achieved.
- Insert dash panel -1- into mountings -2- in transitional area to windscreen -arrow A-.
- Insert locating lugs on left and right into mountings -arrow B-.
Specified torques
|
Test yourself
A quick Volkswagen Golf quiz: every answer comes with an explanation and a link to the manual page.
Was this page helpful?