Running gear, axles, steering
Renewing rear bonded rubber bush
In this manual: Running gear, axles, steering
~3min read
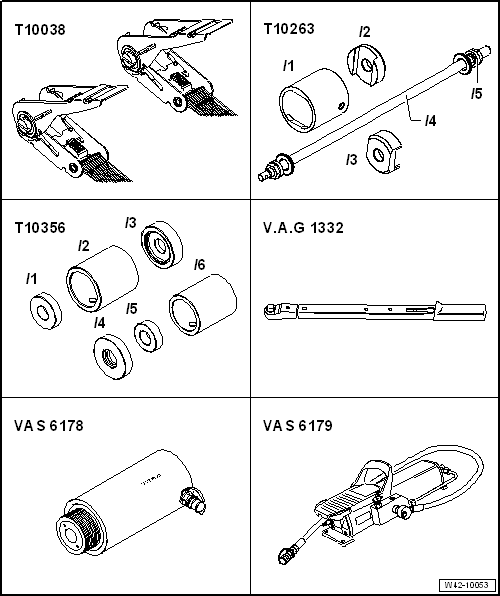
Special tools and workshop equipment required
Tensioning strap -T10038-
Assembly tool -T10263-
Assembly tool -T10356-
Engine and gearbox jack -V.A.G 1383 A-
Hydraulic press -VAS 6178- and thrust piece -T10205/13-
Foot pump -VAS 6179-
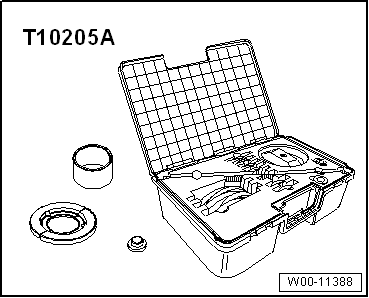
Assembly tool -T10205 A- Note When a bonded rubber bush is defective, the bonded rubber bush on the opposite side must also be renewed; allocation → Electronic Parts Catalogue “ETKA.”. Before replacing a defective bonded rubber bush, check the other bonded rubber bushes. If cracks or other damage is visible, these bonded rubber bushes must be renewed also. To renew bonded rubber bushes, the subframe must be lowered at the front or the rear. The removal of the subframe is not required. Mark position of bonded rubber bushes in relation to subframe before removing.Pressing out rear bonded rubber bush
|
 |
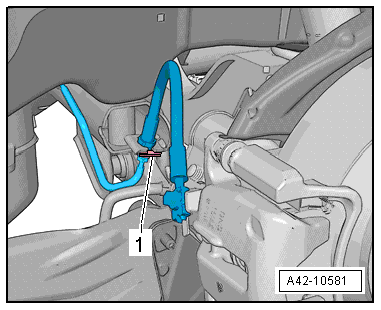
Note
Do not open brake line. |
 |
|
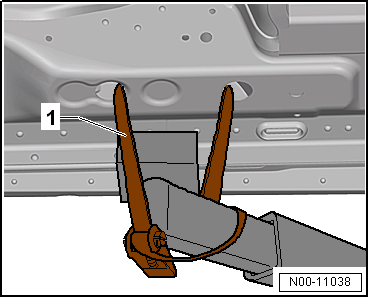 |
 WARNING If the vehicle is not strapped down, there is a great danger that the vehicle will slip off the lifting platform!
Note
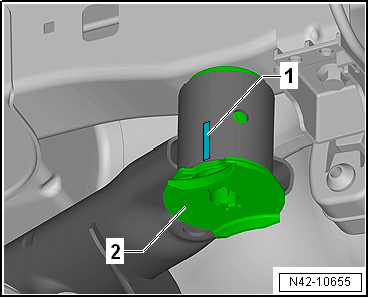
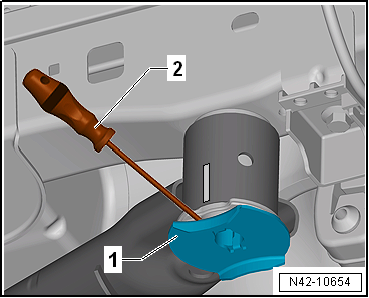
Make a mark -1- on subframe centred on cut-out in bonded rubber bush -2-. |
 |
|
 |
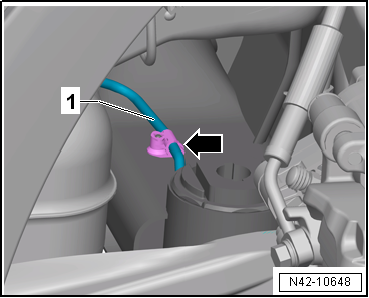
Note
The clip will be destroyed and must be renewed. |
 |
- Fit special tools as shown in illustration.
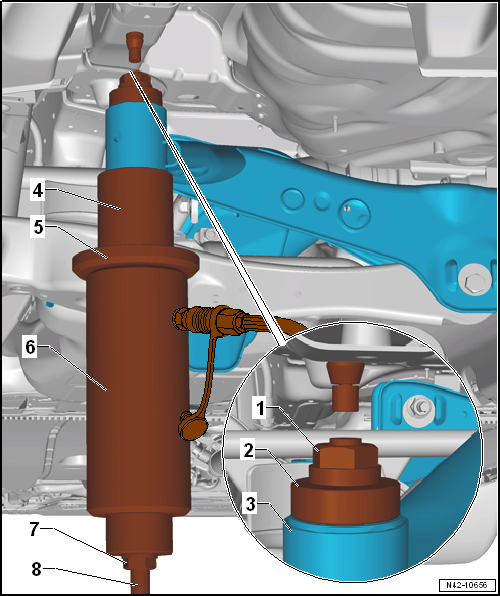
1 - Hexagon nut -T10263/5-
2 - Thrust piece -T10356/5-
3 - Subframe
4 - Tube -T10356/6-, side with recess faces subframe.
5 - Thrust plate -T10205/1-
6 - Hydraulic press -VAS 6178- and thrust piece -T10205/13-
7 - Hexagon nut -T10263/5-
8 - Threaded spindle -T10263/4-
- Take up play in special tools.
- Press out bonded rubber bush.
Note The collar of the outer ring of the bonded rubber bush will be sheared off by the mounting when the bush is pulled out. This occurs with a loud bang. After the bush has been pulled out, the collar must be removed from the tube -T10356/6- with light hammer blows. Pressing in rear bonded rubber bush |
|
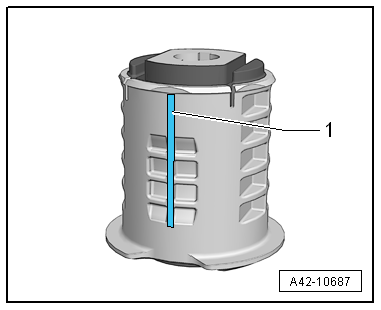 |
- Coat outer edge of bonded rubber bush with assembly paste.
- Set up special tools with bonded rubber bush on subframe as shown.
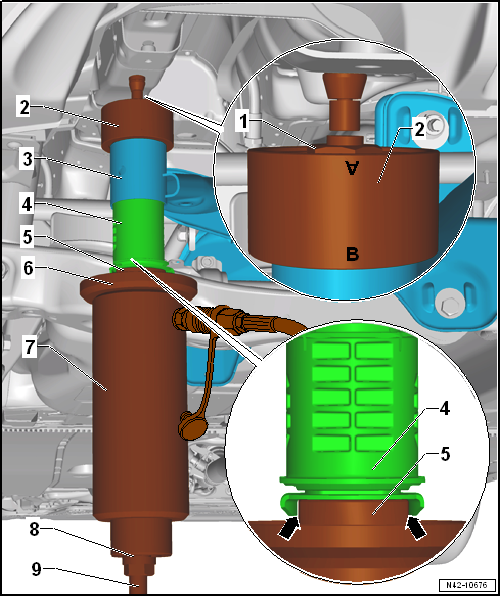
1 - Hexagon nut -T10263/5-
2 - Thrust piece -T10356/7- - the marking -B- faces towards subframe
3 - Subframe
4 - Align bonded rubber bush on mark, made for this purpose (the marks must align with one another) 5 - Thrust piece -T10356/8- - the flattened sides must engage in cover of bonded rubber bush -arrows-.6 - Thrust plate -T10205/1-
7 - Hydraulic press -VAS 6178- and thrust piece -T10205/13-
8 - Hexagon nut -T10263/5-
9 - Threaded spindle -T10263/4-
Note Ensure that the bonded rubber bush does not cant at the start of the pressing action. Otherwise, the outer ring could be damaged.
Install in reverse order of removal, observing the following:Specified torques→ Chapter „Assembly overview - subframe, multi-link suspension, four-wheel drive“→ Chapter „Torque settings for wheel bolts“Exhaust system → Rep. gr.26 |
Test yourself
A quick Volkswagen Golf quiz: every answer comes with an explanation and a link to the manual page.
Was this page helpful?