4- cylinder injection engine(1.4 1 direct inction. turbocharger)

Supporting engine in installation position

~1min read

Special tools and workshop equipment required

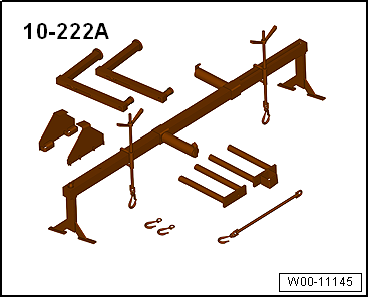
Support bracket -10 - 222 A-

Shackle -10 - 222 A /12-

Adapter -10 - 222 A /18-

Adapter -10 - 222 A /29-

Supporting engine in installation position

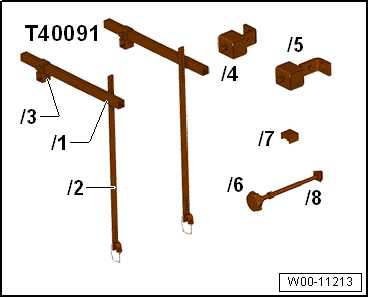
Adapter -T40091/1-

Adapter -T40091/3-

Supporting engine in installation position

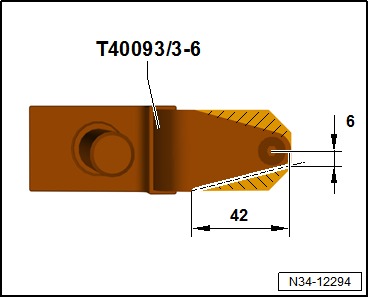
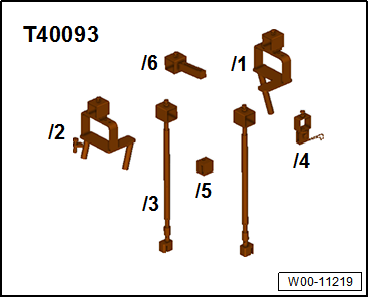
Adapter -T40093/3-

Adapter -T40093/3-6-


Check adapter -T40093/3-6-, and adjust as necessary

  • If necessary, cut off the marked area.
  • Round off the front edges.
  • Protect adapter against corrosion.
  • Then, mark adapter -T40093/3-6- with -T40093/3-6A-.
During subsequent work process, support bracket -10-222 A- is positioned on longitudinal members with adapters -T40093/3-6A-. To prevent damage to longitudinal members, mask off front area of adapters -T40093/3-6A- with textile-reinforced adhesive tape → Electronic Parts Catalogue (ETKA chemical substances) .
Supporting engine in installation position
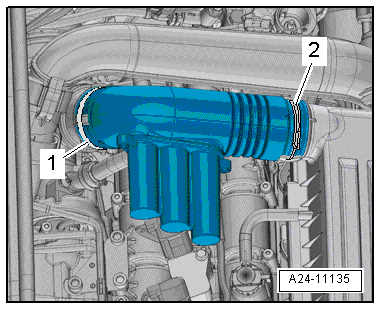
  • Release hose clips -1- and -2-, and remove air pipe.
  • Remove air filter housing → Chapter „Removing and installing air filter housing“.
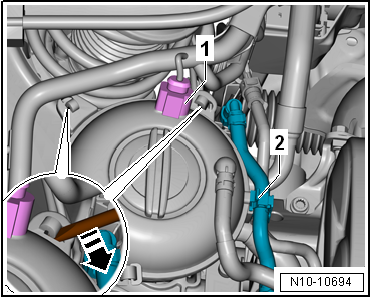
  • Disconnect electrical connector -1-.
Supporting engine in installation position
  • Move clear hose -2- from activated charcoal filter.
  • Using a screwdriver, release fasteners -arrow- and move coolant expansion tank to one side.
Supporting engine in installation position
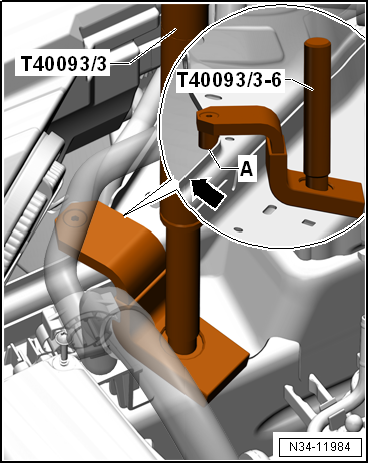
  • Fit adapter -T40093/3-6A- to longitudinal member on both sides.
  • Pins -A- must be seated behind edges -arrow-.
Supporting engine in installation position
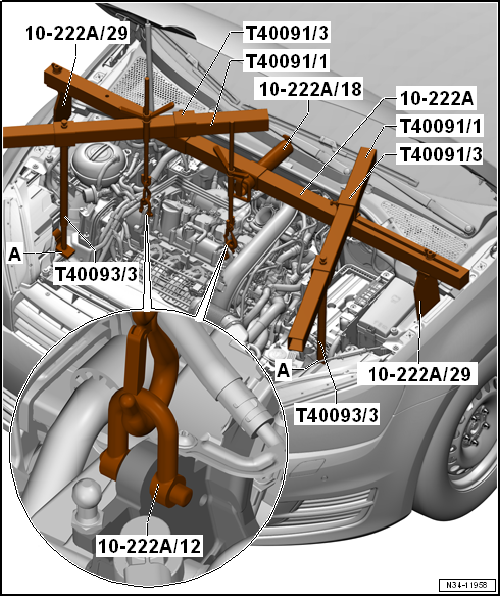
  • Fit engine support bracket -10 - 222 A- as shown in illustration.
  • Tighten spindle slightly to take up weight of engine/gearbox assembly; do not lift.
Supporting engine in installation position

Test yourself

A quick Volkswagen Golf quiz: every answer comes with an explanation and a link to the manual page.