4- cylinder injection engine(1.4 1 direct inction. turbocharger)

Adjusting assembly mountings

~1min read

Procedure

  • Remove battery tray → Electrical system; Rep. gr.27.
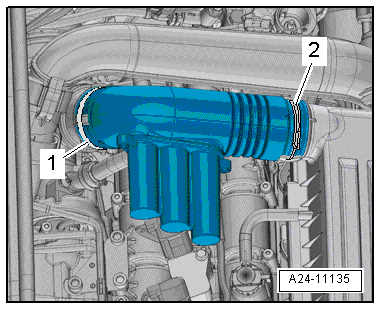
  • Release hose clips -1- and -2-, and remove air pipe.
  • Remove air filter housing → Chapter.
  • Supporting engine in installation position → Chapter „Supporting engine in installation position“
Adjusting assembly mountings
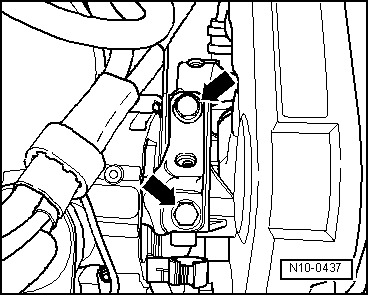
  • Unscrew engine mounting bolts -arrows- one after the other and renew them (if not already renewed when installing engine).
  • First screw bolts in loosely.
Adjusting assembly mountings
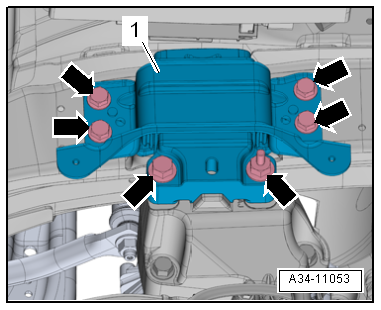
  • Unscrew bolts -arrows- for gearbox mounting -1- one after the other and renew them (if not already renewed when installing engine).
  • First screw bolts in loosely.
Adjusting assembly mountings
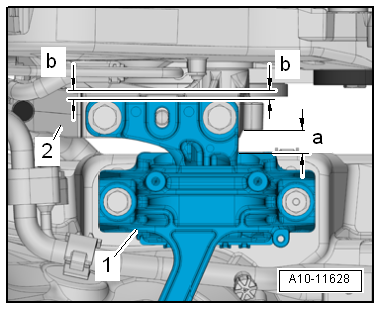
  • Using assembly lever, adjust engine/gearbox assembly so that specifications listed below are attained:
There must be a distance of -a- = 10 mm between engine support -2- and engine mounting -1-. Side surface of engine support casting -2- must be located parallel to support arm of engine mounting -1-.

Distance -b- = distance -b-.

Note Distance -a- = 10 mm can also be checked with a metal rod of suitable size, or similar.
  • Tighten bolts for engine mounting.
Adjusting assembly mountings
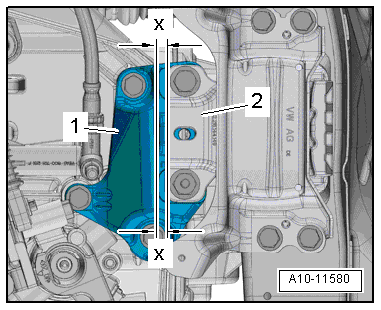
  • On the gearbox side, ensure that the edges of the support arm -2- and gearbox support -1- are parallel.

Distance -x- = distance -x-.

  • Tighten bolts for gearbox mounting.

Install in reverse order.

Specified torques

→ Chapter „Assembly overview - assembly mountings“

→ Chapter „Assembly overview - charge air system“

→ Electrical system; Rep. gr.27

→ Chapter „Assembly overview - air filter housing“

→ Chapter „Assembly overview - assembly mountings“

Adjusting assembly mountings

Test yourself

A quick Volkswagen Golf quiz: every answer comes with an explanation and a link to the manual page.