Covers and Padding Rear Seats
Assembly overview - cover and padding
Assembly overview - cover and padding, seat base
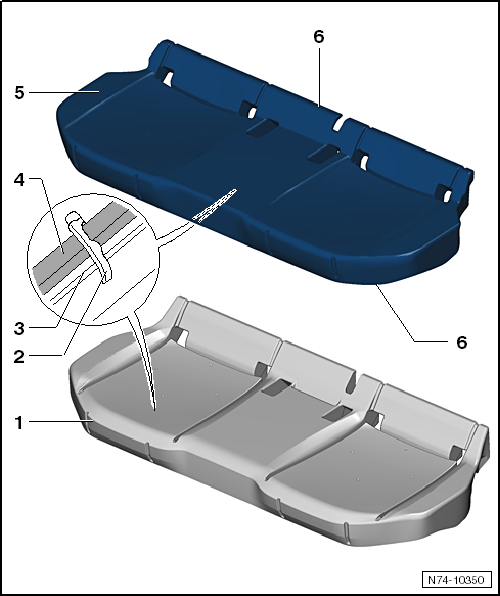
- Pad
- Assignment → Electronic Parts Catalog
- Remove and install
- Padding clip
- for attaching seat base cover to seat base padding
- replace after every removal
- Wire
- for attaching seat base cover to seat base padding
- Contour strip
- sewn to seat base cover
- for attaching seat base cover to seat base padding
- Cover
- Assignment → Electronic Parts Catalog
- after installation, check seat for wrinkle-free fit
- Remove and install
- Contour strip
- sewn to seat base cover
- for attaching seat base cover to seat base padding
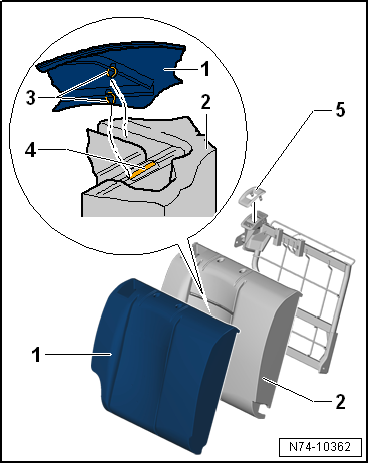
Assembly overview - cover and padding, seat backrest

Note
The assembly overview refers to the right seat backrest 2/3. The left seat backrest 1/3 is similar.

- Cover
- Assignment → Electronic Parts Catalog
- after installation, check seat for wrinkle-free fit
- Remove and install
- Wire
- for attaching seat backrest cover to seat backrest padding
- Contour strip
- sewn to seat backrest cover
- for attaching seat backrest cover to seat backrest padding
- Padding clip
- for attaching seat backrest cover to seat backrest padding
- replace after every removal
- Backrest frame
- Pad
- Assignment → Electronic Parts Catalog
- Remove and install
- Zipper
- sewn to seat backrest cover
- Zipper closer for zipper -1S0.881.451-
Removing and installing cover and padding
Removing and installing seat base cover and padding
Required Special Tools, Test and Measuring Equipment and Auxiliary Items
- Padding clip pliers -V.A.G 1634-

Removing
- Remove rear seat bench / individual seats.
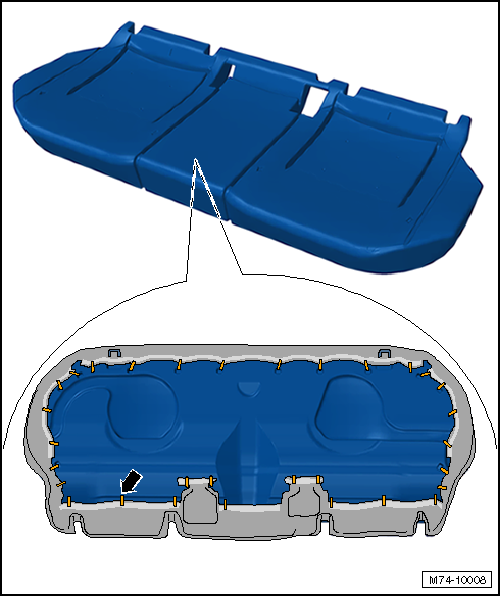
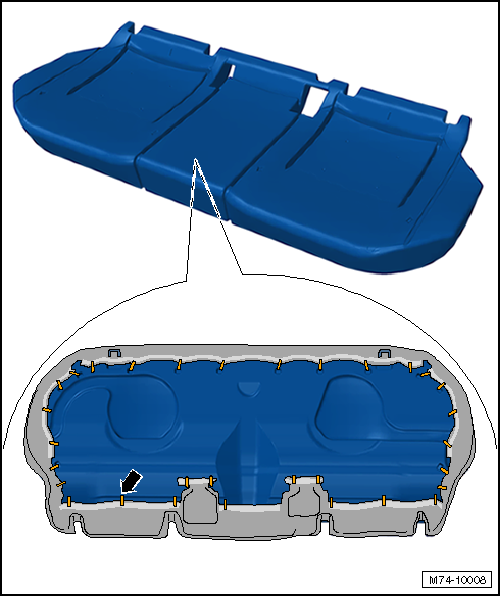
- On the underside, release all padding clips -arrow- around the entire circumference.
- Remove padding clips -arrow- on the underside.
- Fold cover upward.
- Fold cover over at the sides.
- Remove padding clips -5- of cover -1- from padding mounts -4-.
- Remove cover -1- from padding -2- in the -arrow- direction.

Installing

Note
Before installation, check all fasteners for damage and replace them if necessary.
Installation is carried out in the reverse order of removal, observing the following:
- Place cover -1- onto padding -3-.
- Attach cover -1- to padding -3- at the specified points -2- using new padding clips -4- and padding clip pliers -V.A.G 1634-.
- Fold cover -1- over at the sides.

- Attach cover to padding all around at the specified points -arrow- using new padding clips and padding clip pliers -V.A.G 1634-.
Removing and installing backrest cover and padding
Required Special Tools, Test and Measuring Equipment and Auxiliary Items
- Padding clip pliers -V.A.G 1634-

- Release Wedge -3409-
Zipper closer for zipper -1S0.881.451-

Note
The removal and installation is described for the split backrest. Removal and installation on the one-piece backrest is similar.
Removing
- Remove rear seat backrest.
- Remove head restraint.
- Open the zipper all around on the back of the backrest.
- Carefully pry the cover over the lashing eyes using removal wedge -3409-.
- Fold cover over at the sides.
- Remove cover for locking.
- Carefully guide cover and padding over the head restraint guides.
- Remove cover and padding from backrest frame.

- Remove padding clips -arrows- of cover from padding mounts.
- Remove remaining padding clips.
- Remove cover.
Installing

Note
Before installation, check all fasteners for damage and replace them if necessary.
Installation is carried out in the reverse order of removal, observing the following:

Note
- Before installing the trim panels for locks, make sure the cover is resting on the backrest release levers.
- The zipper of the backrest cover must be closed using zipper closer -1S0.881.451-.

- Attach cover -1- to padding -2- all around at the specified points -4- using new padding clips -3- and padding clip pliers -V.A.G 1634-.
- After installing the padding and cover, check and make sure the trim panels for locks on the right and left -5- are engaged with the backrest locks.