Front bumper
Assembly overview - Front bumper
Assembly overview - Bumper

Note
Depending on model variant, minor differences must be taken into account for the front bumper cover.
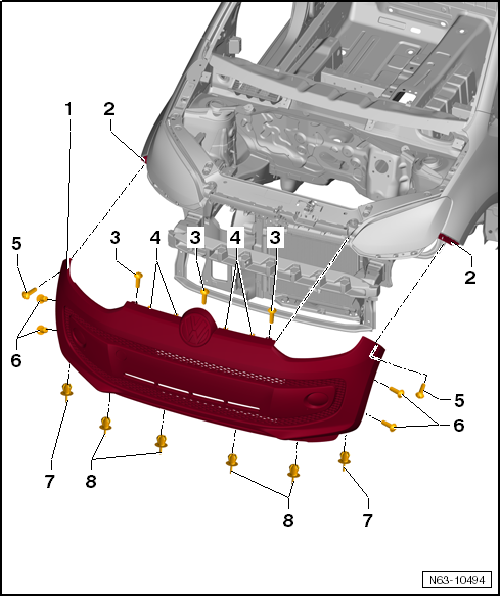
- Front bumper cover
- Material PP/EPDM
- Remove and install
- Side guide
- left and right
- Bolt
- Depending on model, 3 to 5 pieces
- Tightening torque: 2 N·m
- bolted to lock carrier
- Snap hook
- 4 pieces
- snapped onto lock carrier
- Bolt
- left and right
- facing upward
- Tightening torque: 2 N·m
- Bolt
- 2 pieces per side
- Tightening torque: 2 N·m
- bolted to wheel housing shell
- Expanding rivet
- 1 piece per side
- fastened to wheel housing shell
- Expanding rivet
- 4 pieces
- fastened from below to lock carrier
Assembly overview - Attachments

Note
Depending on model variant, minor differences must be taken into account for the attachments.
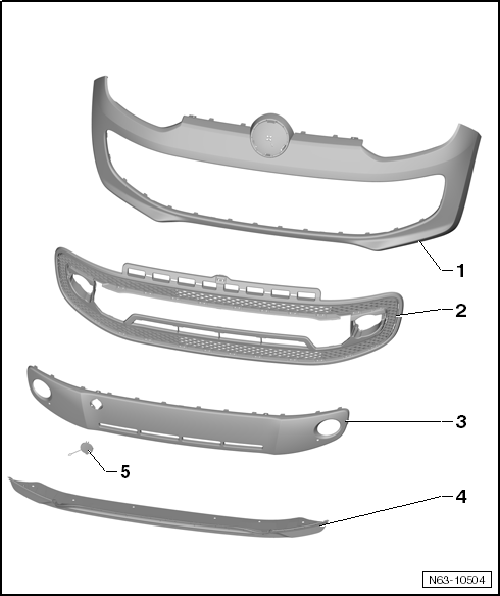
- Front bumper cover
- Material PP/EPDM
- Remove and install
- Ventilation grille
- snapped onto bumper cover
- can only be released from the snap hooks after removing the bumper cover
- various versions, assignment → Electronic Parts Catalog "ETKA"
- Trim panel
- snapped onto ventilation grille
- can only be released from the snap hooks after removing the bumper cover
- various versions, assignment → Electronic Parts Catalog "ETKA"
- Spoiler
- snapped onto bumper cover
- can only be released from the snap hooks after removing the bumper cover
- Cover cap
- for towing eye
Assembly overview - Trim ring
Extra equipment Volkswagen R GmbH
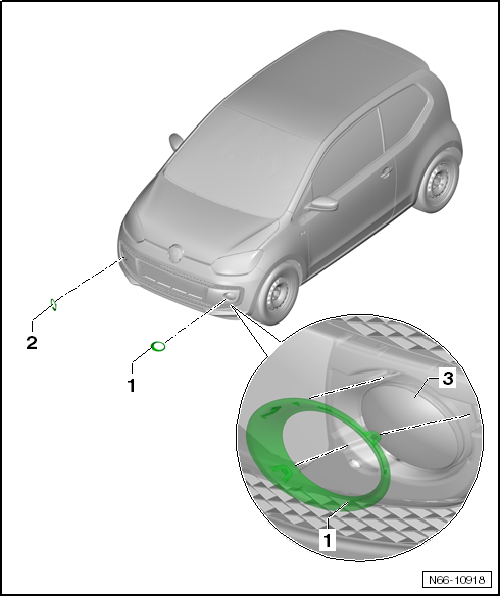
- Trim ring, left
- Chrome finish
- for vehicles with fog lights
- snapped onto ventilation grille -3-
- Trim ring, right
- Chrome finish
- for vehicles with fog lights
- snapped onto ventilation grille -3-
- Ventilation grille
- snapped onto bumper cover
- can only be released from the snap hooks after removing the bumper cover
- various versions, assignment → Electronic Parts Catalog "ETKA"
Assembly overview - front bumper carrier
Required Special Tools, Test and Measuring Equipment and Auxiliary Items
- Torque Wrench -V.A.G 1332-
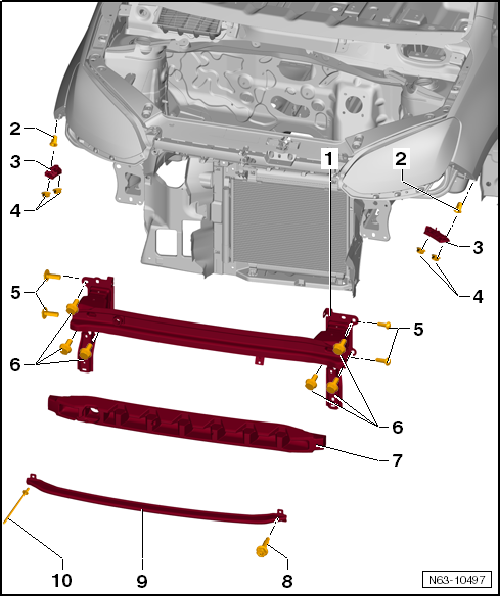
- Front bumper carrier
- Expansion nut
- 1 piece per side
- Side guide
- Hex nut
- 2 pieces per side
- Tightening torque: 3 N·m
- Bolt
- 2 pieces per side
- Tightening torque: 8 N·m
- Bolt
- 3 pieces per side
- Tightening torque: 20 N·m
- Foam part
- Self-adhesive
- not fitted on all model variants
- Bolt
- 1 pc
- Tightening torque: 8 N·m
- Pedestrian protection
- not fitted in all markets
- Expansion rivet
- 1 pc
Removing and installing front bumper
Required Special Tools, Test and Measuring Equipment and Auxiliary Items
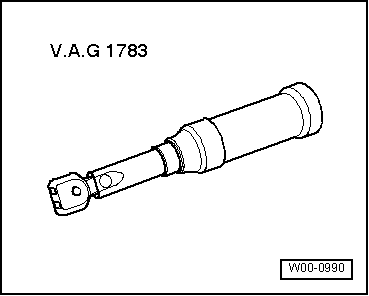
- Torque wrench -V.A.G 1783-

Note
Depending on model variant, minor differences must be taken into account when removing and installing the front bumper cover.
Removing
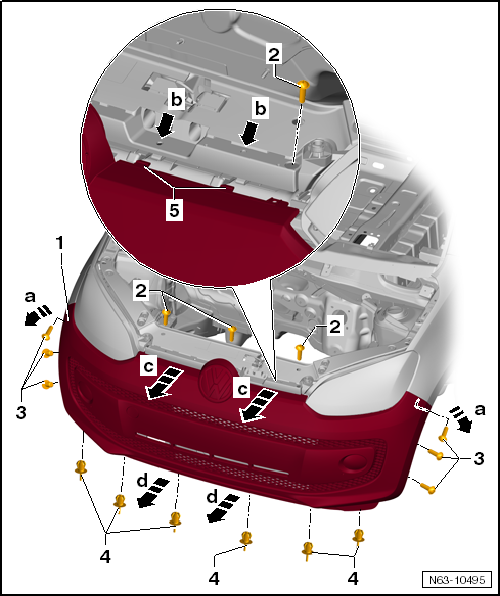
Carry out the following work:
- Unscrew bolts -2-. Depending on model, up to 5 pcs.
- Unscrew bolts -3- securing the wheel housing liner on the left and right.
- Pull out expansion rivets -4- from below.
Further removal is only possible with a second mechanic.
- Pull front bumper cover -1- out of the retainers of the side guide profiles on the left and right at the fender -arrows a-.
- Release latching hooks -arrows b- on the lock carrier.
- With a second mechanic, pull the front bumper cover -1- off the vehicle parallel -arrows c-.
- Disconnect electrical connectors of components (if fitted).
Installing
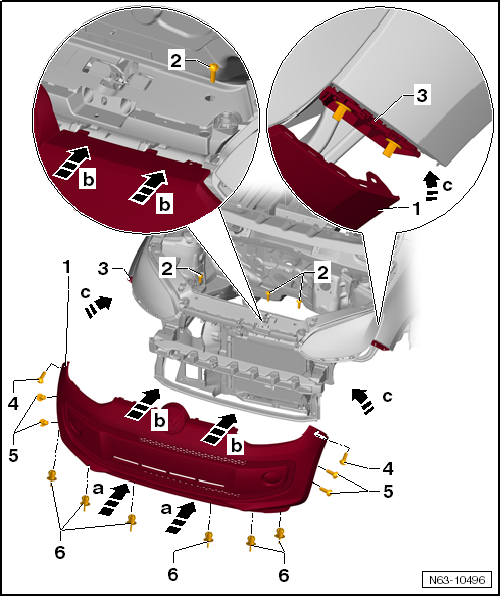
Carry out the following work:
- Connect electrical connectors of the components fitted.
- Guide front bumper cover -1- parallel to the lock carrier -arrows a- until the latching hooks -arrows b- engage.
- Press front bumper cover -1- onto the side guide profiles on the left and right -3- at the fender -arrow c- until they engage with each other.
- Check parallel alignment and gaps.
- Fit bolts -2-, -4- and -5- and tighten them to the specified tightening torques.
- Secure expansion rivets -6-.
Repairing bumper cover

Note
If the front bumper cover is damaged, clarify whether plastic repair is possible before replacing it.
For description see → General Notes; Body Repair, Body Assembly Work.