Детали однократного применения

Напольная консоль

22шагов
~132мин
4/5сложность
010203040509.87Н·мlb·ft
Момент затяжки, найден в тексте страницы
Выполнено 0 из 22

Содержание:

Компоненты и их расположение

Компонент
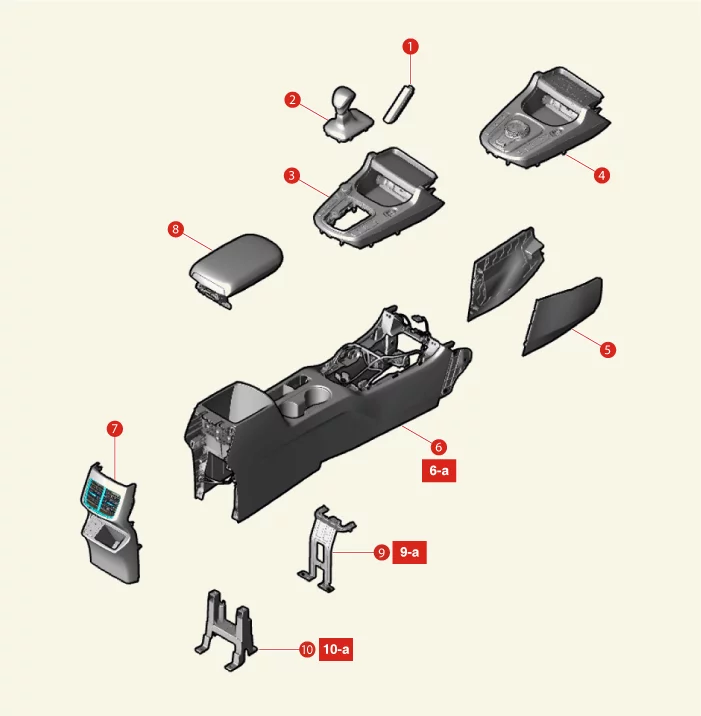
Body (Interior and Exterior) — Floor Console / Components and Components Location / Component illustration
1. Верхняя декоративная накладка консоли
2. Узел ручки селектора [Тип SBC]
3. Верхняя крышка консоли [Тип SBC]
4. Верхняя крышка консоли [Тип SBW]
5. Боковая крышка консоли
6. Узел центральной консоли
6-a. 7.8 - 9,8 Н·м
7. Задняя крышка консоли
8. Подлокотник консоли
9. Центральный монтажный кронштейн консоли [Тип SBW]
9-a. 2.9 - 3,9 Н·м (0.3 - 0.4 кгс·м, 2.2 - 2.9 фунт-фут, 26 - 34.7 фунт-дюйм)
10. Задний монтажный кронштейн консоли
10-a. 2.9 - 3,9 Н·м (0.3 - 0.4 кгс·м, 2.2 - 2.9 фунт-фут, 26 - 34.7 фунт-дюйм)

Снятие и установка верхней крышки консоли

Снятие

[Тип SBC]
  1. Отсоедините отрицательную клемму (-) аккумуляторной батареи.
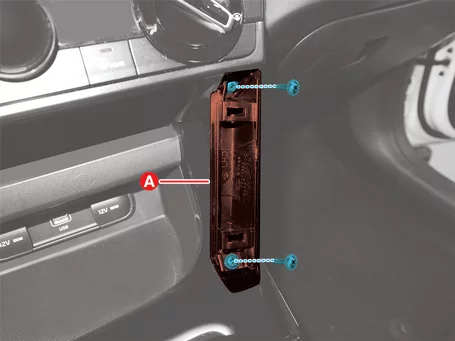
  2. Снимите верхнюю декоративную накладку консоли (A).
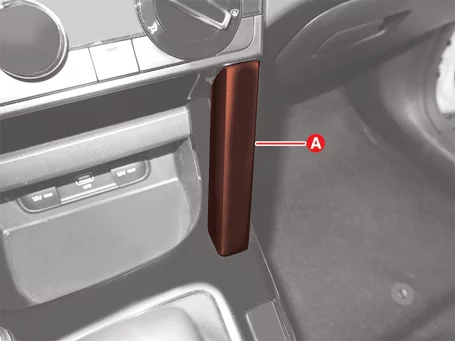
    Body (Interior and Exterior) — Floor Console / Console Upper Cover / Removal and Installation / Removal illustration
    Body (Interior and Exterior) — Floor Console / Console Upper Cover / Removal and Installation / Removal illustration
    Information
    Положение фиксатора :
    Body (Interior and Exterior) — Floor Console / Console Upper Cover / Removal and Installation / Removal illustration
  3. Выкрутите винты и снимите заднюю верхнюю декоративную накладку консоли (A).
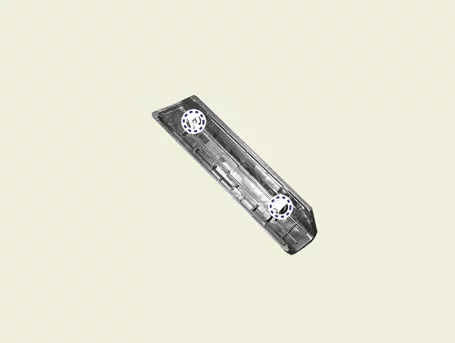
    Body (Interior and Exterior) — Floor Console / Console Upper Cover / Removal and Installation / Removal illustration
  4. Снимите ручку селектора (A) в направлении стрелки.
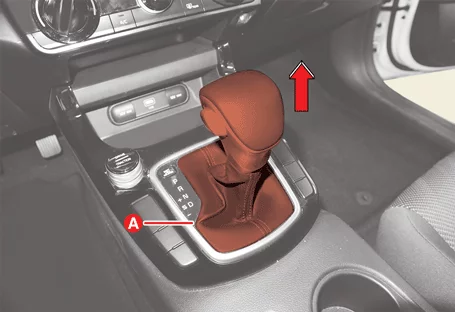
    Body (Interior and Exterior) — Floor Console / Console Upper Cover / Removal and Installation / Removal illustration
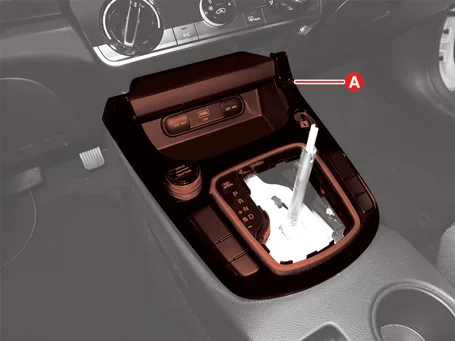
  5. Снимите верхнюю крышку консоли (A).
    Body (Interior and Exterior) — Floor Console / Console Upper Cover / Removal and Installation / Removal illustration
    Body (Interior and Exterior) — Floor Console / Console Upper Cover / Removal and Installation / Removal illustration
    Information
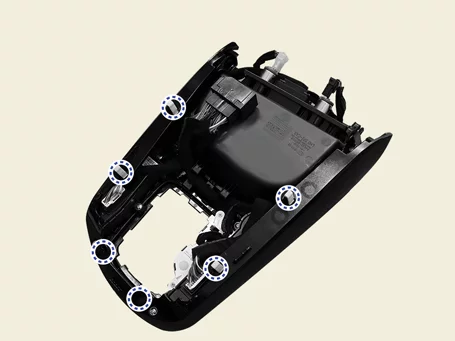
    Положение фиксатора :
    Body (Interior and Exterior) — Floor Console / Console Upper Cover / Removal and Installation / Removal illustration
  6. Отсоедините основной разъём и разъём мультимедийного входа (A).
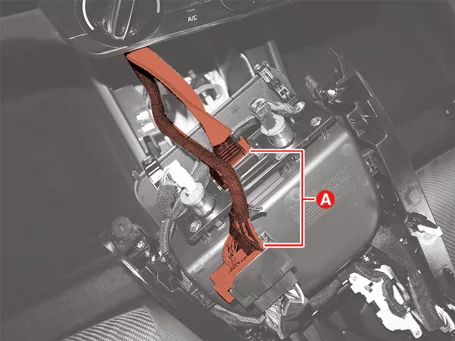
    Body (Interior and Exterior) — Floor Console / Console Upper Cover / Removal and Installation / Removal illustration

Установка

  1. Установка производится в порядке, обратном демонтажу.

Снятие и установка напольной консоли в сборе

Снятие

  1. Снимите верхнюю крышку консоли. (См. Центральная консоль – «Верхняя крышка консоли»)
  2. Отсоедините разъём центральной консоли (A).
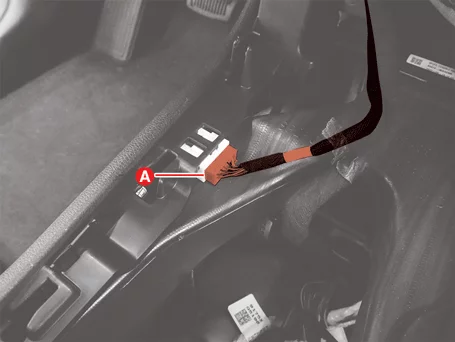
    Body (Interior and Exterior) — Floor Console / Floor Console Assembly / Removal and Installation / Removal illustration
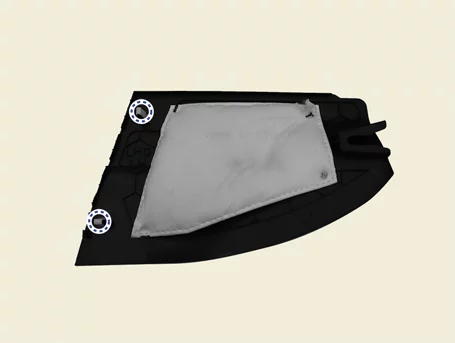
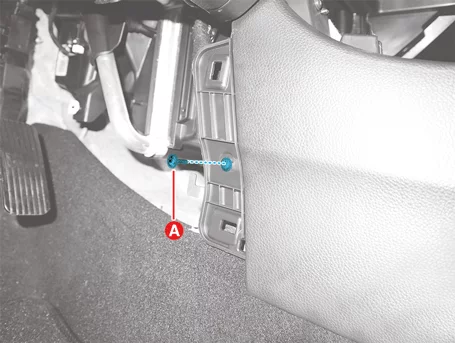
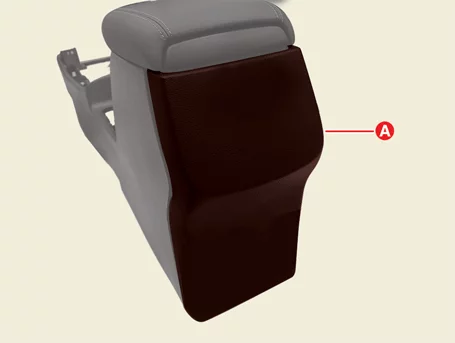
  3. Снимите боковую крышку центральной консоли (A).
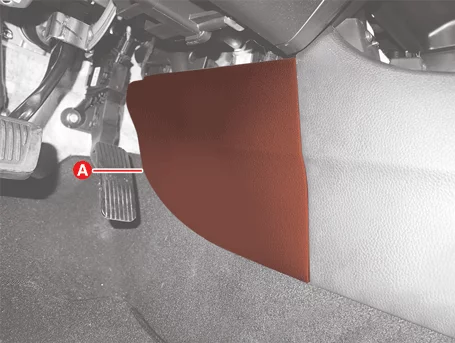
    Body (Interior and Exterior) — Floor Console / Floor Console Assembly / Removal and Installation / Removal illustration
    Body (Interior and Exterior) — Floor Console / Floor Console Assembly / Removal and Installation / Removal illustration
    Information
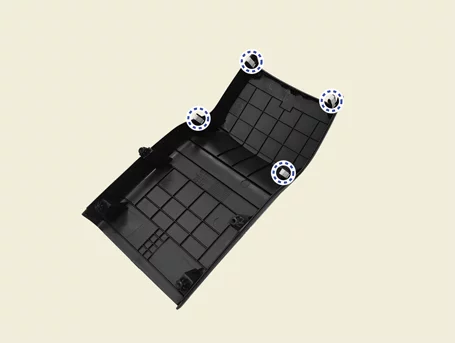
    Положение фиксатора :
    Body (Interior and Exterior) — Floor Console / Floor Console Assembly / Removal and Installation / Removal illustration
  4. Снимите крышку стояночного тормоза (A).
    Body (Interior and Exterior) — Floor Console / Floor Console Assembly / Removal and Installation / Removal illustration
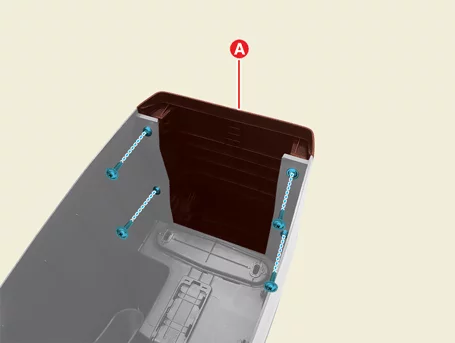
  5. Снимите накладку ящика для хранения (A).
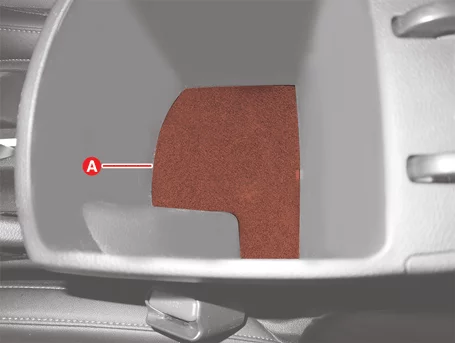
    Body (Interior and Exterior) — Floor Console / Floor Console Assembly / Removal and Installation / Removal illustration
  6. Выкрутите болты узла консоли (A).

    Момент затяжки: 7,8 - 9,8 Н·м
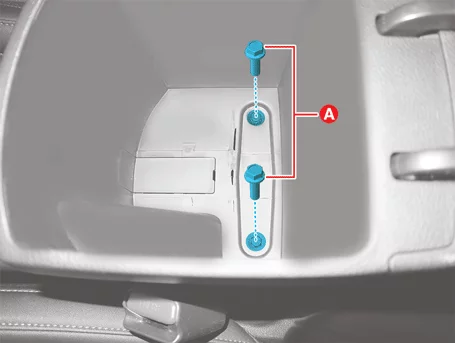
    Body (Interior and Exterior) — Floor Console / Floor Console Assembly / Removal and Installation / Removal illustration
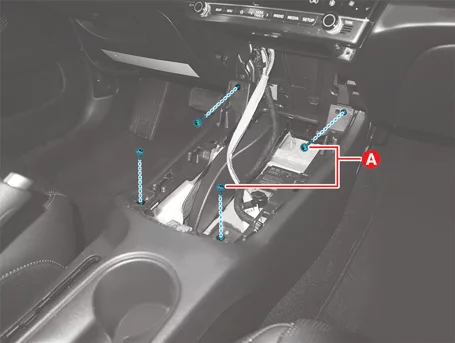
  7. Выкрутите винты узла консоли (A).
    Body (Interior and Exterior) — Floor Console / Floor Console Assembly / Removal and Installation / Removal illustration
    Body (Interior and Exterior) — Floor Console / Floor Console Assembly / Removal and Installation / Removal illustration
  8. Снимите напольную консоль в сборе (A).
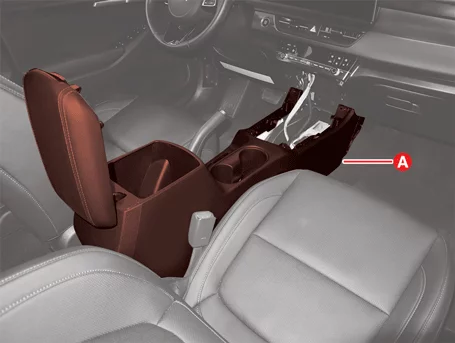
    Body (Interior and Exterior) — Floor Console / Floor Console Assembly / Removal and Installation / Removal illustration
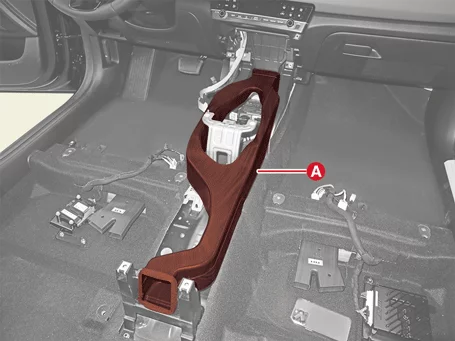
  9. Снимите задний воздуховод (A).
    Body (Interior and Exterior) — Floor Console / Floor Console Assembly / Removal and Installation / Removal illustration
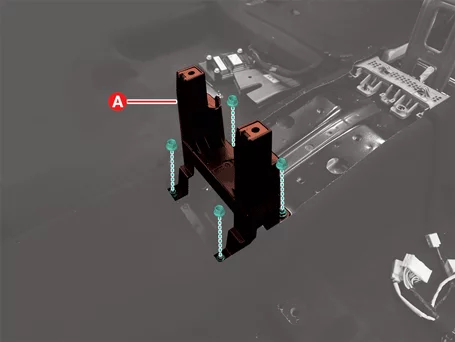
  10. Снимите монтажный кронштейн консоли (A). Момент затяжки: 2.9 - 3,9 Н·м (0.3 - 0.4 кгс·м, 2.2 - 2.9 фунт-фут, 26 - 34.7 фунт-дюйм)
    Body (Interior and Exterior) — Floor Console / Floor Console Assembly / Removal and Installation / Removal illustration
    Body (Interior and Exterior) — Floor Console / Floor Console Assembly / Removal and Installation / Removal illustration

Установка

  1. Установка производится в порядке, обратном демонтажу.

Снятие и установка задней крышки консоли

Снятие

  1. Снимите узел центральной консоли. (См. Центральная консоль – «Узел центральной консоли».)
  2. Отсоедините разъём USB-зарядного устройства (A).
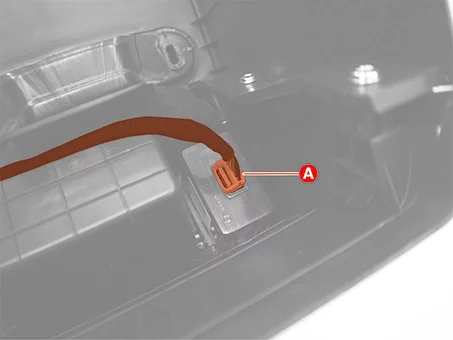
    Body (Interior and Exterior) — Floor Console / Rear Console Cover / Removal and Installation / Removal illustration
  3. Выкрутите крепёжные винты (A).
    Body (Interior and Exterior) — Floor Console / Rear Console Cover / Removal and Installation / Removal illustration
  4. Снимите заднюю крышку консоли (A).
    Body (Interior and Exterior) — Floor Console / Rear Console Cover / Removal and Installation / Removal illustration
    Body (Interior and Exterior) — Floor Console / Rear Console Cover / Removal and Installation / Removal illustration
    Information
    Положение фиксатора :
    Body (Interior and Exterior) — Floor Console / Rear Console Cover / Removal and Installation / Removal illustration

Установка

  1. Установка производится в порядке, обратном демонтажу.

Снятие и установка подлокотника консоли

Снятие

  1. Снимите заднюю крышку консоли. (См. Центральная консоль – «Задняя крышка консоли»)
  2. Снимите подлокотник консоли (A) после отворачивания винтов.
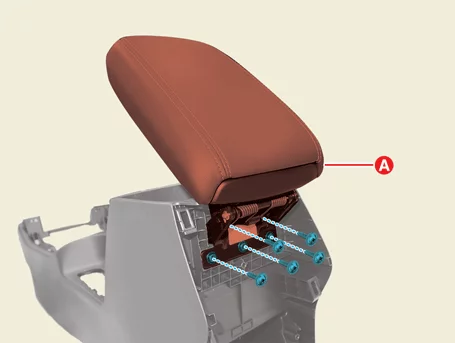
    Body (Interior and Exterior) — Floor Console / Console Armrest / Removal and Installation / Removal illustration

Установка

  1. Установка производится в порядке, обратном демонтажу.