Single-Use Parts

Floor Console

22steps
~132min
4/5difficulty
010203040509.87N·mlb·ft
Tightening torque found on this page
Done 0 of 22

Contents:

Components and Components Location

Component
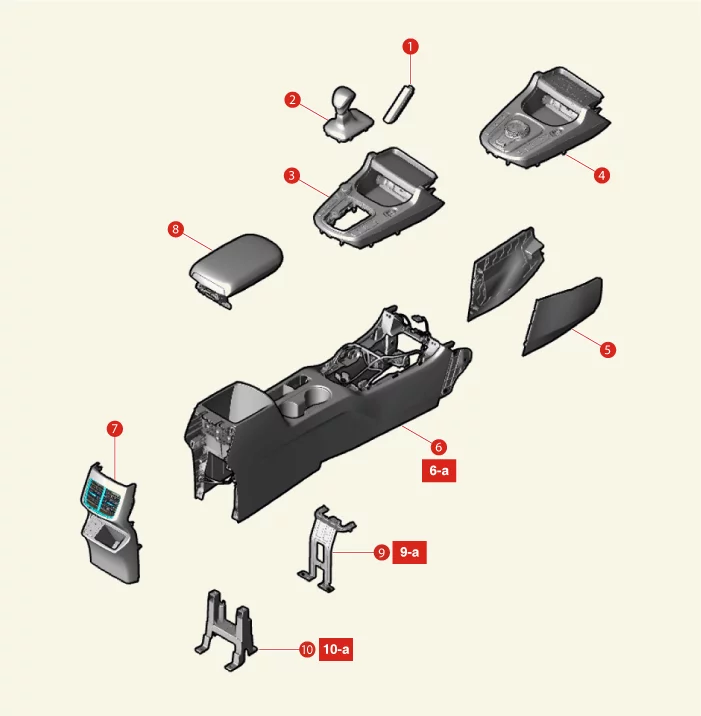
Body (Interior and Exterior) — Floor Console / Components and Components Location / Component illustration
1. Console Upper Garnish
2. Gear Knob Assembly [SBC Type]
3. Console Upper Cover [SBC Type]
4. Console Upper Cover [SBW Type]
5. Console Side Cover
6. Floor Console Assembly
6-a. 7.8 - 9,8 N·m
7. Rear Console Cover
8. Console Armrest
9. Console Center Mounting Bracket [SBW Type]
9-a. 2.9 - 3,9 N·m (0.3 - 0.4 kgf·m, 2.2 - 2.9 lb·ft, 26 - 34.7 lb·in)
10. Console Rear Mounting Bracket
10-a. 2.9 - 3,9 N·m (0.3 - 0.4 kgf·m, 2.2 - 2.9 lb·ft, 26 - 34.7 lb·in)

Console Upper Cover Removal and Installation

Removal

[SBC Type]
  1. Disconnect the battery negative ( - ) terminal.
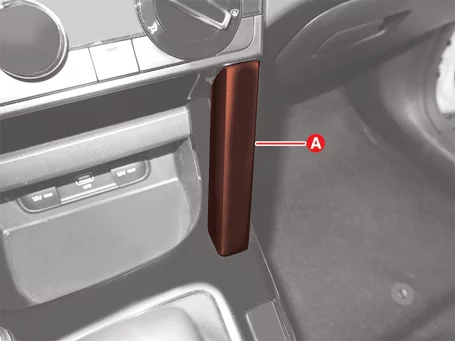
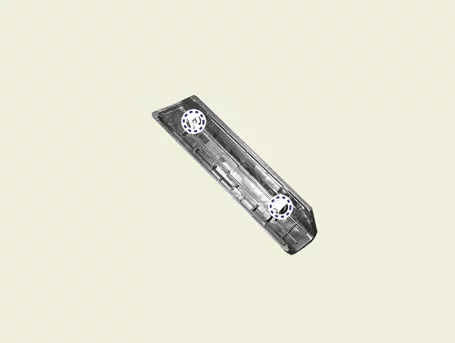
  2. Remove the console upper garnish (A).
    Body (Interior and Exterior) — Floor Console / Console Upper Cover / Removal and Installation / Removal illustration
    Body (Interior and Exterior) — Floor Console / Console Upper Cover / Removal and Installation / Removal illustration
    Information
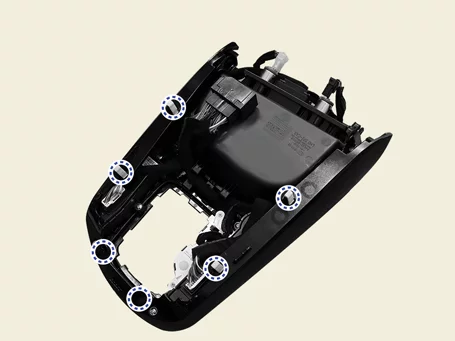
    Clip position :
    Body (Interior and Exterior) — Floor Console / Console Upper Cover / Removal and Installation / Removal illustration
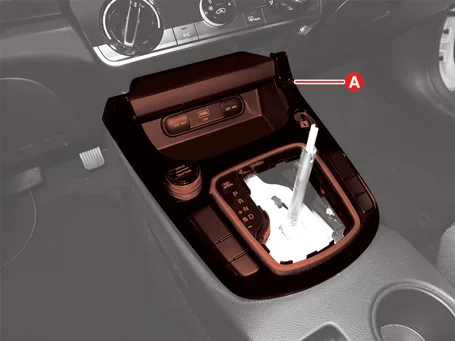
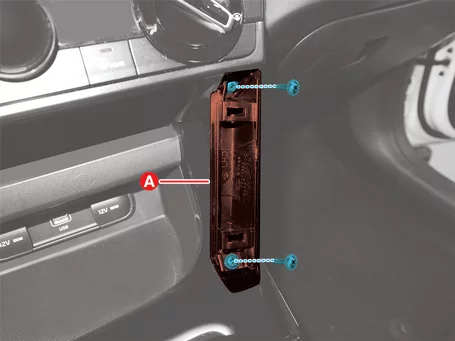
  3. Remove the console upper rear garnish (A) after removing screws.
    Body (Interior and Exterior) — Floor Console / Console Upper Cover / Removal and Installation / Removal illustration
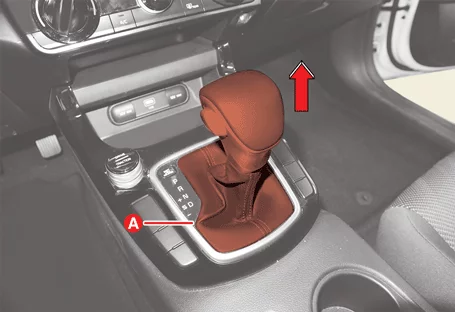
  4. Remove the gear knob (A) in the direction of the arrow.
    Body (Interior and Exterior) — Floor Console / Console Upper Cover / Removal and Installation / Removal illustration
  5. Remove the console upper cover (A).
    Body (Interior and Exterior) — Floor Console / Console Upper Cover / Removal and Installation / Removal illustration
    Body (Interior and Exterior) — Floor Console / Console Upper Cover / Removal and Installation / Removal illustration
    Information
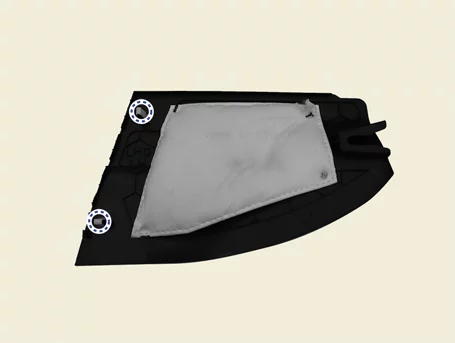
    Clip position :
    Body (Interior and Exterior) — Floor Console / Console Upper Cover / Removal and Installation / Removal illustration
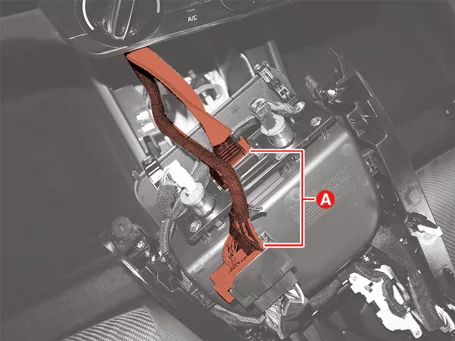
  6. Disconnect the main connector and the multimedia jack (A).
    Body (Interior and Exterior) — Floor Console / Console Upper Cover / Removal and Installation / Removal illustration

Installation

  1. Install in reverse order of removal.

Floor Console Assembly Removal and Installation

Removal

  1. Remove the console upper cover. (Refer to Floor Console - "Console Upper Cover")
  2. Disconnect the floor console connector (A).
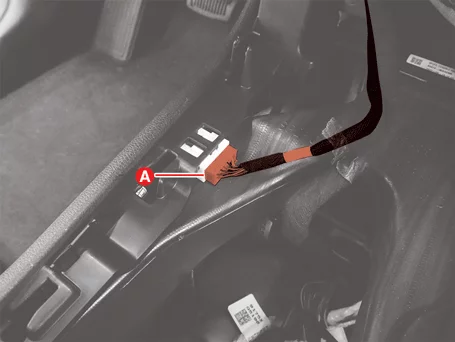
    Body (Interior and Exterior) — Floor Console / Floor Console Assembly / Removal and Installation / Removal illustration
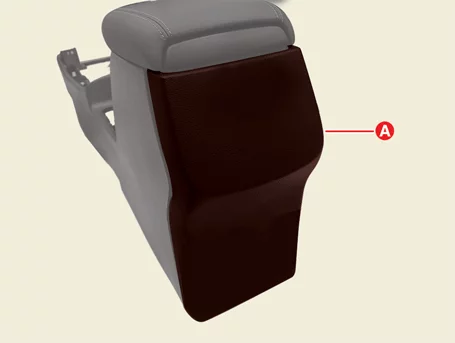
  3. Remove the floor console side cover (A).
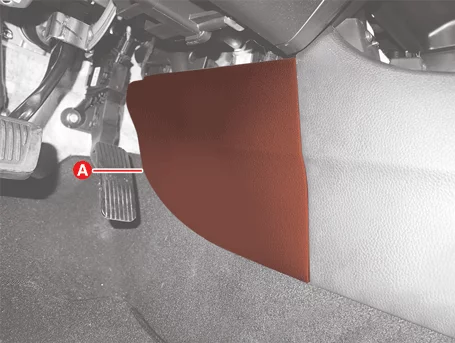
    Body (Interior and Exterior) — Floor Console / Floor Console Assembly / Removal and Installation / Removal illustration
    Body (Interior and Exterior) — Floor Console / Floor Console Assembly / Removal and Installation / Removal illustration
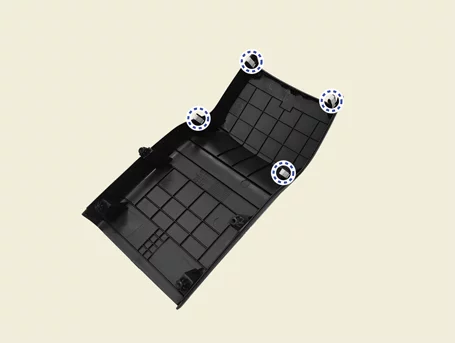
    Information
    Clip position :
    Body (Interior and Exterior) — Floor Console / Floor Console Assembly / Removal and Installation / Removal illustration
  4. Remove the hand brake cover (A).
    Body (Interior and Exterior) — Floor Console / Floor Console Assembly / Removal and Installation / Removal illustration
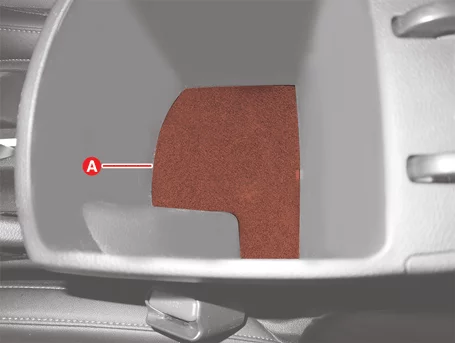
  5. Remove the storage box pad (A).
    Body (Interior and Exterior) — Floor Console / Floor Console Assembly / Removal and Installation / Removal illustration
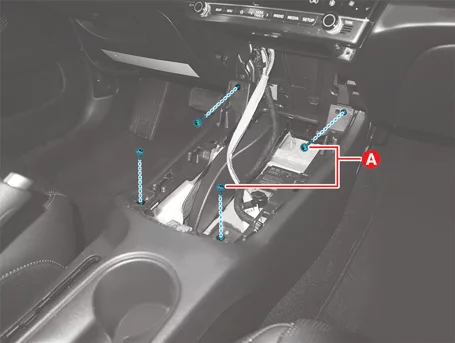
  6. Remove the console assembly bolts (A).

    Tightening torque : 7.8 - 9,8 N·m
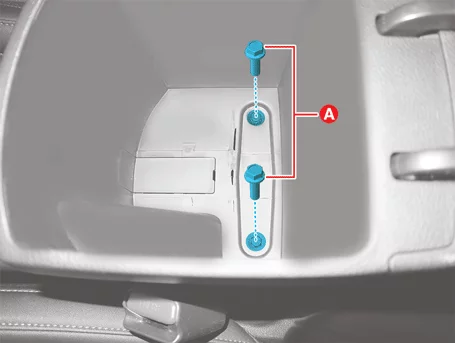
    Body (Interior and Exterior) — Floor Console / Floor Console Assembly / Removal and Installation / Removal illustration
  7. Remove the console assembly screws (A).
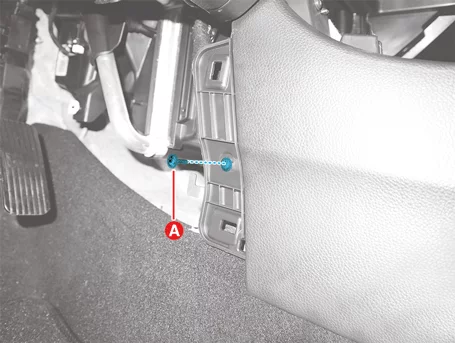
    Body (Interior and Exterior) — Floor Console / Floor Console Assembly / Removal and Installation / Removal illustration
    Body (Interior and Exterior) — Floor Console / Floor Console Assembly / Removal and Installation / Removal illustration
  8. Remove the floor console assembly (A).
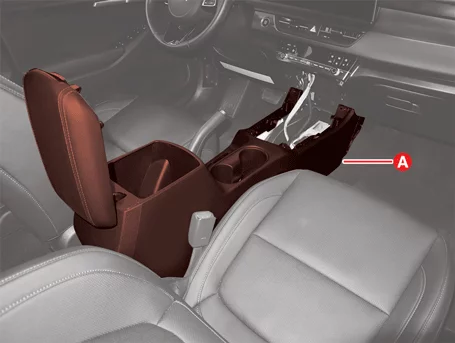
    Body (Interior and Exterior) — Floor Console / Floor Console Assembly / Removal and Installation / Removal illustration
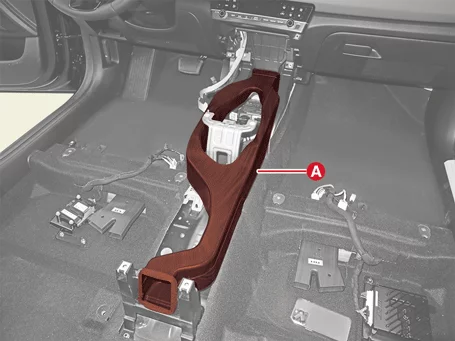
  9. Remove the rear air vent (A).
    Body (Interior and Exterior) — Floor Console / Floor Console Assembly / Removal and Installation / Removal illustration
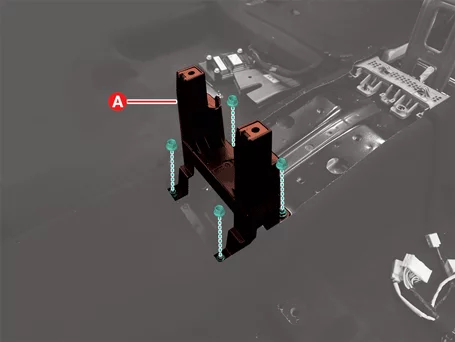
  10. Remove the console mounting bracket (A).
    Tightening torque : 2.9 - 3,9 N·m (0.3 - 0.4 kgf·m, 2.2 - 2.9 lb·ft, 26 - 34.7 lb·in)
    Body (Interior and Exterior) — Floor Console / Floor Console Assembly / Removal and Installation / Removal illustration
    Body (Interior and Exterior) — Floor Console / Floor Console Assembly / Removal and Installation / Removal illustration

Installation

  1. Install in reverse order of removal.

Rear Console Cover Removal and Installation

Removal

  1. Remove the floor console assembly. (Refer to Floor Console - "Floor Console Assembly")
  2. Disconnect the USB charger connector (A).
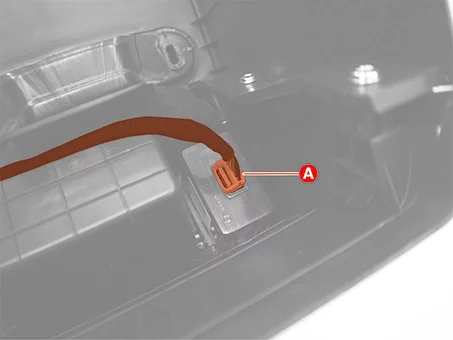
    Body (Interior and Exterior) — Floor Console / Rear Console Cover / Removal and Installation / Removal illustration
  3. Remove the mounting screws (A).
    Body (Interior and Exterior) — Floor Console / Rear Console Cover / Removal and Installation / Removal illustration
  4. Remove the rear console cover (A).
    Body (Interior and Exterior) — Floor Console / Rear Console Cover / Removal and Installation / Removal illustration
    Body (Interior and Exterior) — Floor Console / Rear Console Cover / Removal and Installation / Removal illustration
    Information
    Clip position :
    Body (Interior and Exterior) — Floor Console / Rear Console Cover / Removal and Installation / Removal illustration

Installation

  1. Install in reverse order of removal.

Console Armrest Removal and Installation

Removal

  1. Remove the rear console cover. (Refer to Floor Console - "Rear Console Cover")
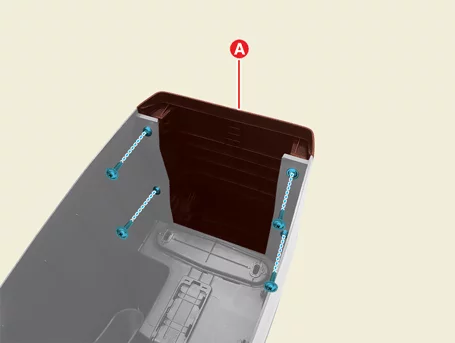
  2. Remove the console armrest (A) after removing the screws.
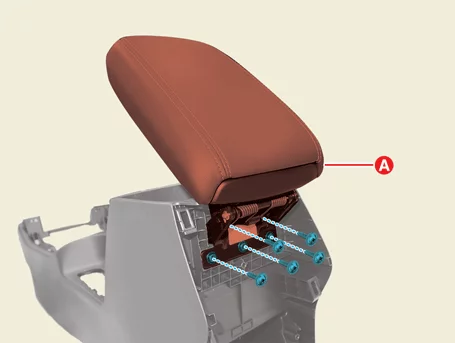
    Body (Interior and Exterior) — Floor Console / Console Armrest / Removal and Installation / Removal illustration

Installation

  1. Install in reverse order of removal.