A-Pillar Trim Panel, Removing and Installing
Special tools and workshop equipment required
- Pry Lever -80-200-
- Trim Removal Wedge -3409-
- Omega Clip Tool -T40280-
Removing
 WARNING
Follow all Safety Precautions when working with pyrotechnic components. Refer to → Chapter "Pyrotechnic Components Safety Precautions".
- Remove the instrument panel side cover. Refer to → Chapter "Instrument Panel Side Cover, Removing and Installing".
- Unclip the gap cover -1- from the lower A-pillar using the Trim Removal Wedge -3409--arrow- and remove it downward from the top of the A-pillar trim panel -2-.

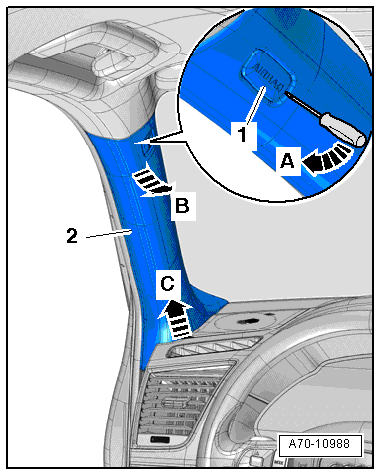
- Pry out the expanding cap -1- with the "airbag" symbol about 5 mm with a screwdriver -arrow A-.
 Note
The clamps with hooks on the trim be detached only up the first catch.
- Carefully loosen the upper A-pillar trim -2- beginning from above with the Pry Lever -80-200- until the catches loosen -arrow B-.
- Pull the trim up -arrow C- to disengage the clamps. The clamps will slide out of the guide on the trim.
- Pull the upper A-pillar trim out of the instrument panel and remove it.
Installing
WARNING
- Follow all Safety Precautions when working with pyrotechnic components. Refer to → Chapter "Pyrotechnic Components Safety Precautions".
- Do not pinch the head curtain airbag when installing the upper A-pillar trim.
Install in reverse order of removal. Note the following:
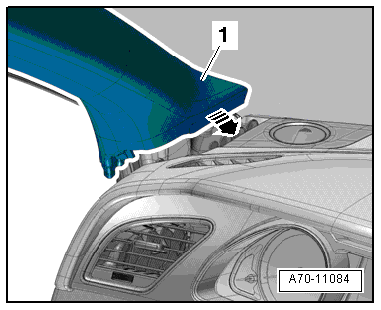
- Insert upper A-pillar trim -1- in the mount on the instrument panel -arrow-.
- Clip the upper A-pillar trim in and stretch the door seal lip over.
Installation notes, for example tightening specifications, replacing components. Refer to → Chapter "Overview - A-Pillar Trim Panel".