Manual Transmission and Automatic Transmission Removal and Installation
This section describes removal of the manual transmission. Refer to the separate instructions for automatic transmission removal.
REMOVAL
1. Disconnect the negative battery cable from the battery. The battery is located in the luggage compartment behind the right side trim panel.
* Disconnecting the battery erases data stored in electronic control module memory, for example engine fault memory. Refer to the Battery Removal and Installation section.
2. Raise and support the vehicle on stands, and remove the exhaust system. Refer to the Exhaust System Removal and Installation section.
3. Disconnect the reverse gear selector cable from the transmission.
4. Remove the mounting bolts and disconnect the driveshaft flange from the transmission. To prevent the flange from deforming, loosen only the nuts and leave the bolts in place.
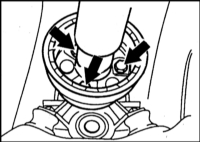
5. Move the driveshaft aside and remove it from the centering pin.
* Secure the driveshaft to the body with wire. Do not allow it to kink at the joint.
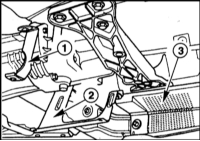
6. Remove the mounting bolts and remove the engine undershield bracket (1) and (2) and the heat shield (3).
7. Remove the clutch slave cylinder.
* Do not disconnect the hydraulic line. Refer to the Clutch Slave Cylinder Removal and Installation section.
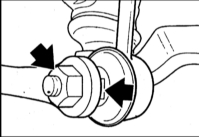
8. Disconnect the push rods from the stabilizer bar on both sides. Hold the ball joint with a wrench on the flats while doing so. Swing the stabilizer bar upward.
9. * Raise the transmission slightly with a floor jack. Then remove the mounting bolts and separate the crossmember from the underbody (arrows in the illustration).
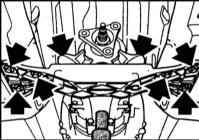
10. Place a wooden block or special tool BMW 11 7 370 between the oil pan and the front suspension crossmember to avoid damaging the oil pan.

11. Lower the transmission with the floor jack.
12. Place a second floor jack under the front of the engine, as the engine may tip forward after the transmission is removed.
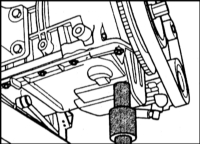
13. Remove the retaining clip (4) from the shift rod. Remove the washers (5) from both sides of the rod, and remove the rod.

14. Pry the shift rod pin upward with a screwdriver. Remove the pin.
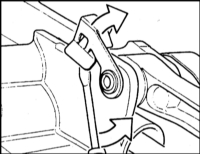
Automatic Transmission
PROCEDURE
1. Disconnect the selector cable from the automatic transmission. Refer to the Shift Linkage Adjustment section.
2. Disconnect the electrical connector from the automatic transmission by opening the lock.
3. Remove the mounting bolts and remove the oil cooler line bracket from the oil pan.
4. Disconnect the oil line bracket (1) from the automatic transmission. Remove the oil lines. Refer to the illustration.
* Place a container to catch escaping oil. Do not allow dirt to enter the oil lines. Cover the openings with polyethylene and secure with rubber rings.
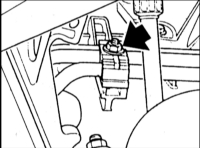
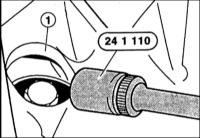
5. Remove the cover on the side of the opening (1) in the lower cylinder block. Using a narrow-head tool, remove the three torque converter mounting bolts in sequence. Make sure the bolts do not fall into the block. To keep the bolts in the slot, rotate the engine by the crankshaft pulley bolt.
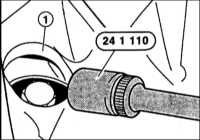
6. Place a floor jack and suitable tool under the automatic transmission. Support the transmission by the transmission case only, not by the oil pan.
7. Remove the bolts securing the automatic transmission to the engine. The bolt locations are the same as for the manual transmission.
8. Make sure the torque converter does not shift. To do this, insert pliers with a flat side against the torque converter at the transmission case and hold it in place. If it is not possible to position the pliers, make sure the torque converter does not slide out of the transmission during removal. Separate the automatic transmission from the engine.
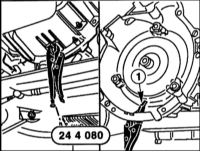
9. Unscrew the mounting bolts using a Torx head.

10. Separate the automatic transmission from the engine and, with an assistant, move it rearward.
INSTALLATION
1. Before installation, inspect the clutch. Refer to the Clutch Removal, Installation and Inspection section.
2. Check that the clutch release bearing moves freely. Lubricate the bearing with Molykote Longtherm 2 grease. Refer to the Clutch Release Mechanism Removal and Installation section.
3. Apply a thin layer of Microlube GL 261 grease to the splines of the manual transmission input shaft. Do not apply too much grease. Excess grease may get onto the clutch friction surfaces and impair clutch operation. The amount of grease should be about the size of a corn kernel.
4. Engage any gear.
* Check that the alignment sleeves (1) and (2) are in place between the engine and the manual transmission.
5. Lift the transmission and guide it horizontally into the clutch. If the input shaft does not engage the clutch disc, turn it by hand at the rear flange of the driveshaft.
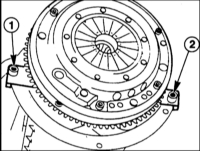
6. Install the Torx mounting bolts for the manual transmission to the engine. Do not forget the washers. Refer to the Specifications for the tightening torques of the Torx bolts and hex-head bolts.
7. Raise the manual transmission and tighten the crossmember to the torque given in the Specifications.
8. Install the clutch slave cylinder. Refer to the Clutch Slave Cylinder Removal and Installation section.
9. Lubricate the shift rod pins with Kluber Polylub GLY 801 grease and insert them. Pull the retainer back.
10. Insert the rod. Install the washers on the pin and secure with the retaining washer. For the manual transmission, continue with the steps starting at step 9 of the automatic transmission procedure below.
Automatic Transmission
PROCEDURE
1. Rotate the torque converter so that the holes in the drive plates align with the center holes of the flywheel. Insert the special tool (alignment pin) into the plate.
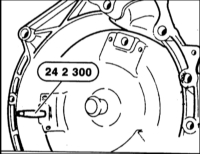
2. When mating the engine with the automatic transmission, the three mounting tabs on the torque converter must align with the three lugs on the engine flywheel plate. They cannot be aligned later. Failure to align them may cause damage.
3. Install the automatic transmission and carefully insert the alignment pin into the hole in the drive plate. Remove the pin after the transmission is secured.
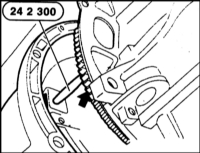
4. Remove the clamps from the transmission case and install the three torque converter bolts into the transmission holes. Tighten the bolts to 45 N·m. When replacing bolts, use only genuine parts.
5. Remove the plugs from the fluid lines and connect the fluid lines to the transmission using new seals. Secure the fluid line brackets.
6. Secure the fluid line brackets to the engine oil pan.
7. Connect the plug connector to the transmission. Lock it in place.
8. Install the transmission selector cable and adjust it. Refer to Section Adjusting the Gear Shift Drive.
9. Fill the transmission with fluid. Refer to Section Checking the Fluid Level and Replacing the Automatic Transmission Fluid.
10. Install the driveshaft. Refer to Section Removal and Installation of the Driveshaft.
11. Secure the transmission crossmember to the underbody and transmission to 20 N·m. Remove the floor jack.
12. Secure the heat shield.
13. Install the exhaust system. Refer to Section Removal and Installation of the Exhaust System.
14. Secure the stabilizer bar to the push rods using new self-locking nuts to 60 N·m.
15. Secure the engine compartment lower cover.
16. Connect the negative battery cable. Set the clock. Reprogram the radio stations.
Test yourself
A quick BMW 1 quiz: every answer comes with an explanation and a link to the manual page.