Chevrolet Cruze Repair Manual
Removal Procedure
In this manual: Chevrolet Cruze Repair Manual
21steps
~126min
4/5difficulty
Done 0 of 21
- Turn the front wheels to the straight forward position and secure the steering wheel from moving.
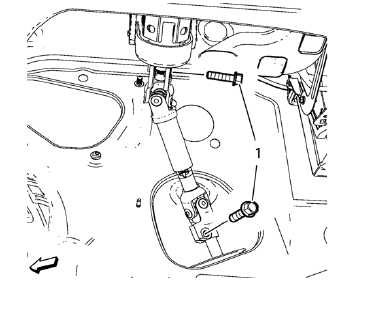
- Remove the 2 lower steering intermediate shaft bolts (1).
- Remove the steering intermediate shaft from the steering gear.
- Raise and support the vehicle. Refer to Lifting and Jacking the Vehicle
- Remove the tire and wheel assemblies. Refer to Tire and Wheel Removal and Installation
- Remove the front compartment insulator, if equipped.
- Remove the engine shield, if equipped
- Remove the exhaust flexible pipe. Refer to Exhaust Flexible Pipe Replacement.
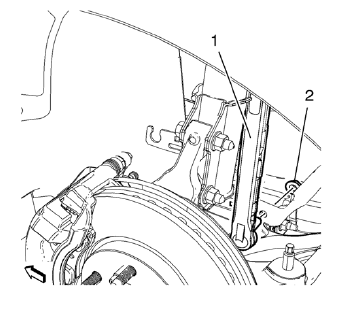
- Remove lower stabilizer link shaft nut (2) on both sides.
- Remove stabilizer link shaft (1) from stabilizer shaft.
- Remove stabilizer link shaft (1) from stabilizer.
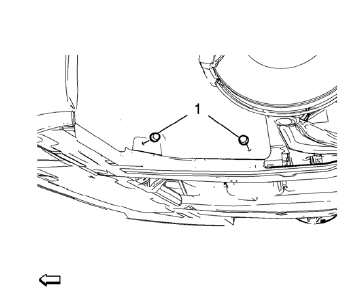
- Remove 4 fasteners (1) for the engine side cover on both sides.
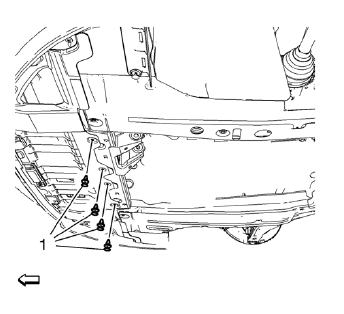
- Remove 4 fasteners (1) for the front engine compartment cover.
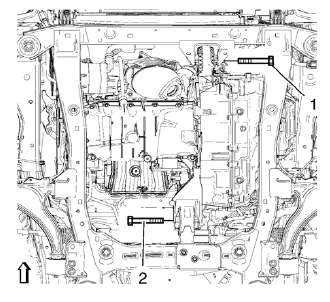
- Remove the front and rear transmission mount bracket bolts (1, 2).
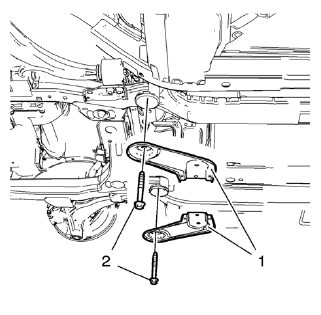
- Remove and DISCARD 2 rear suspension frame bolts (2).
Remove rear frame reinforcements (1).
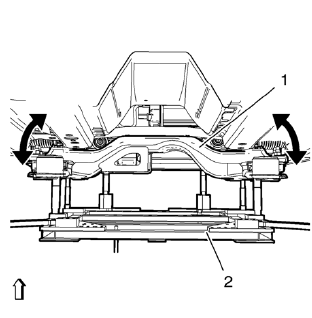
- Position and set hydraulic lifter in connection with CH 904 frame and CH 49289-50 adapter (2) onto suspension frame (1). Bent from cover beside.
- Lower suspension frame max. 55 mm.
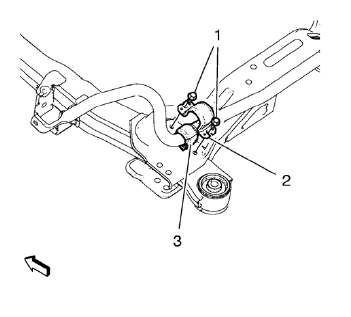
Note: In order to assure a correct installation of the insulators ONLY remove and install the insulators side by side! Dismantled MUST BE discarded.
- Remove and discard the two front stabilizer shaft insulator clamp bolts (1).
- Remove the shaft insulator clamp (2).
Bend up clamp (2) slightly.
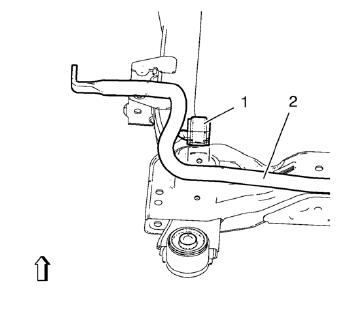
- Mark the location of the insulator (1) to the stabilizer shaft (2).
- Remove insulator (1) from stabilizer shaft (2).
Test yourself
A quick Chevrolet Cruze quiz: every answer comes with an explanation and a link to the manual page.
Was this page helpful?