Body and Paint
General Procedures - Heated Rear Window Wiring Repair
In this manual: Body and Paint
14steps
~84min
3/5difficulty
Done 0 of 14
Materials
| Name | Specification |
|---|---|
| Motorcraft® Ultra Clean Glass Cleaner Spray ZC-23 |
ESR-M14P5-A |
| Motorcraft® Rear Window Defroster Repair PM-11 |
ESR-M4J58-B |
| Motorcraft® Lacquer Touch-Up Paint PMPC-19500-XXXXA, PMPM-19500-XXXXG, PMPP-19500-XXXXA |
ESR-M2P100-C |
Inspection
- Using a bright light inside the vehicle, inspect the grid wire from the outside. A broken grid wire appears as a brown spot.
- Start the engine and let it idle. Activate the rear window defrost switch. The indicator should illuminate.
- With a voltmeter connected inside the vehicle, touch the wide red-brown stripes of the rear window (positive lead to the B+ side and negative lead to the ground side). The meter should read 10-13 volts. A lower voltage reading indicates a weak ground.
- Connect to a good ground point with the negative meter lead. The voltage readings should not change.
- With the multimeter negative lead grounded, touch each heated rear window grid line at its midpoint with the positive lead. A reading of about 6 volts indicates the line is good. A reading of 0 volts indicates a break in the line between the midpoint and the B+ side of the grid line. A reading of 12 volts indicates the circuit is open between the midpoint of the grid line and ground.
- To precisely locate the break, move the positive voltmeter lead to the B+ side of the grid line and touch the grid line until the voltmeter reads 12 volts (if the voltmeter reads 0 volts when the grid line midpoint is touched with the positive lead). If the voltmeter reads 12 volts when the midpoint of the grid line is touched with the positive voltmeter lead, simply move the positive voltmeter lead to the ground side of the grid line and touch the grid line until the voltmeter reads 0 volts.
Repair
- Bring the vehicle to room temperature of at least 16 °C or higher.
NOTICE: Do not use scrapers, sharp tools, or abrasive glass cleaners on the inside surface of the rear window glass, as this may damage the antenna and heated window grid lines.
Clean the entire antenna and heated window grid line repair area with a glass cleaner and 0000 steel wool to remove all dirt, wax, grease, oil, or other foreign materials.
Material: Motorcraft® Ultra-Clear Glass Cleaner Spray / ZS-23 (ESR-M14P5-A)- Mark the location of the antenna or heated window grid break on the outside of the rear window glass.
- Using thin polypropylene film tape, mask the area directly above and below the antenna or heated window grid break. Extend the tape 26 mm (1.0236 in) beyond the area of concern in both directions. The break area must be centered in the mask. Fine Line Tape polypropylene film (commercially available).
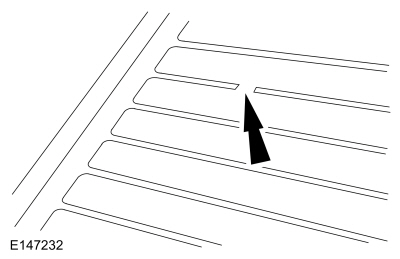
- Apply the repair coating to the antenna or heated window grid line break area with several smooth, continuous strokes. Extend the silver repair coating at least 6.35 mm (0.25 in) on both sides of the break area. Apply at least 6 coats of the grid repair compound. Fine Line Tape polypropylene film (commercially available)
Material: Motorcraft® Rear Window Heater Repair / PM-11 (WSB-M4J58-B)
Material: Motorcraft® Lacquer Touch-Up Paint / PMPC-19500-XXXXA, PMPM-19500-XXXXG, PMPP-19500-XXXXA (ESR-M2P100-C)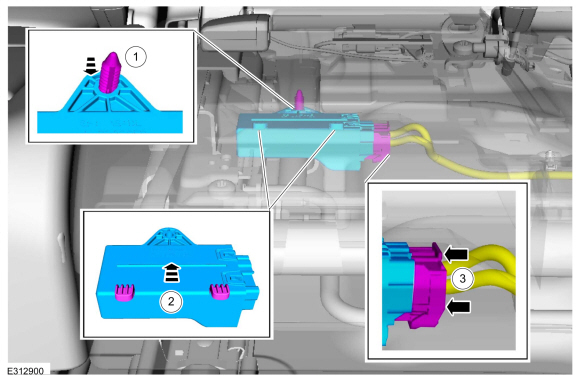
- Allow the repair area to dry completely, then remove the masking.
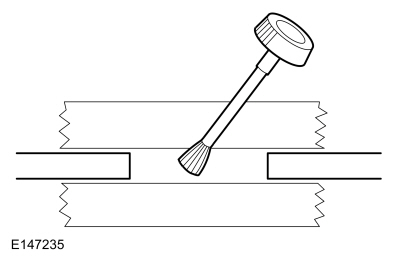
NOTICE: Be careful not to damage the antenna or heated window grid line with the razor blade. Additional repair may be necessary if this occurs.
Remove excess repair compound above or below the antenna or heated window grid line using a razor blade.- Check the system for normal operation.
Test yourself
A quick Ford Escape quiz: every answer comes with an explanation and a link to the manual page.
Was this page helpful?