Powertrain
Removal and Installation - Catalytic Converter
In this manual: Powertrain
42steps
~252min
4/5difficulty
Done 0 of 42
Special Service Tools / General Equipment
Wood block
Removal
- Position the vehicle in NEUTRAL on the lift.
Refer to: Jacking and Lifting - Overview (100-02 Jacking and Lifting, Description and Operation). - Remove the HO2S.
Refer to: Heated Oxygen Sensor (HO2S) (303-14C Electronic Engine Controls, Removal and Installation). - Remove the catalyst monitor sensor.
Refer to: Catalyst Monitor Sensor (303-14C Electronic Engine Controls, Removal and Installation). - Remove the EGR cooler inlet pipe.
Refer to: Exhaust Gas Recirculation (EGR) Cooler Inlet Pipe (303-08C Engine Emission Control, Removal and Installation). - Remove the bolts and heat shield.
Torque: 97 lb-in (11 N·m)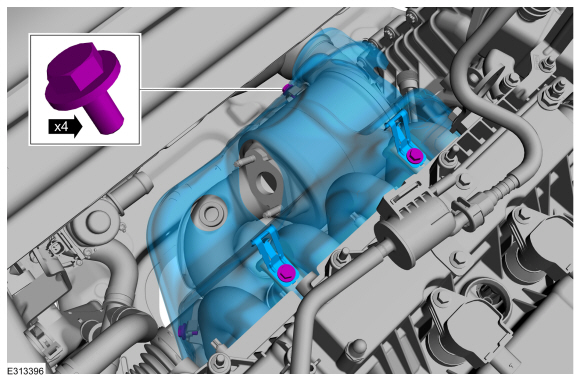
- Remove and discard the exhaust manifold nuts.
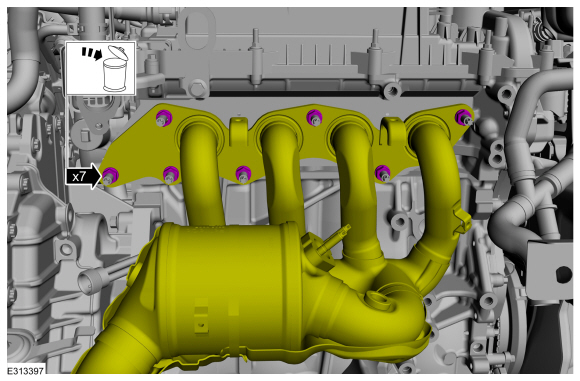
- Remove the muffler and exhaust pipe.
Refer to: Muffler and Exhaust Pipe - Plug-In Hybrid Electric Vehicle (PHEV) (309-00C Exhaust System, Removal and Installation).
Refer to: Muffler and Exhaust Pipe - Full Hybrid Electric Vehicle (FHEV) (309-00C Exhaust System, Removal and Installation). - Remove the front lower engine shield.
Refer to: Front Lower Engine Shield (501-02 Front End Body Panels, Removal and Installation). - Remove the catalytic converter support bracket bolts.
Torque: 18 lb-ft (25 N·m)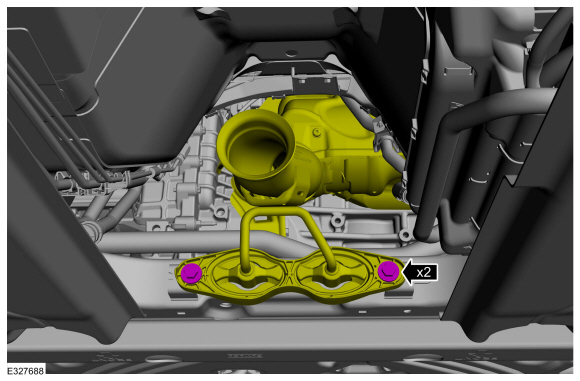
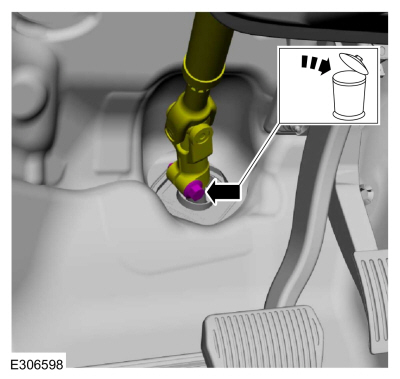
- Using a holding device, hold the steering wheel in the straight-ahead position.
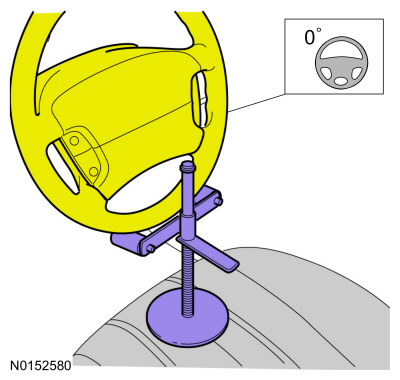
- Remove the bolt and discard it.
- Move the steering column shaft aside.
Torque: 46 lb-ft (63 N·m)
- If equipped.
Remove the bolts and shield.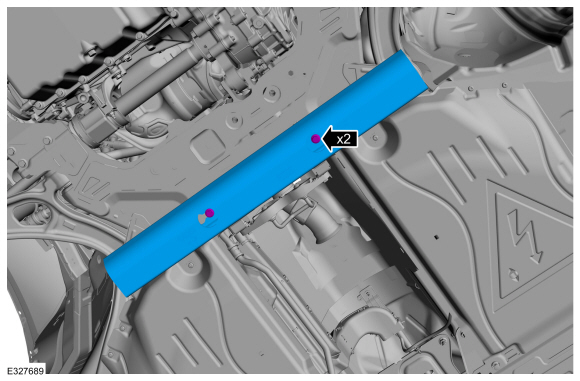
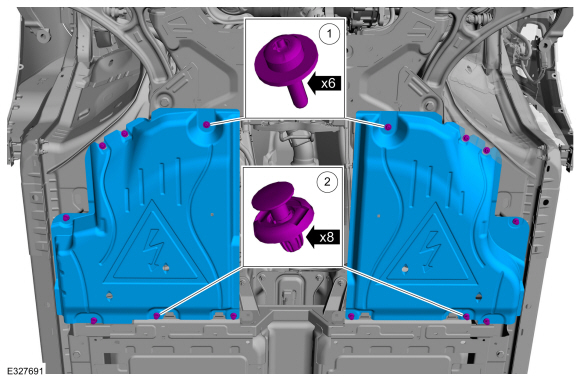
- Remove the screws.
- Remove the push pins and underbody deflector shield.
- Remove the front bumper cover.
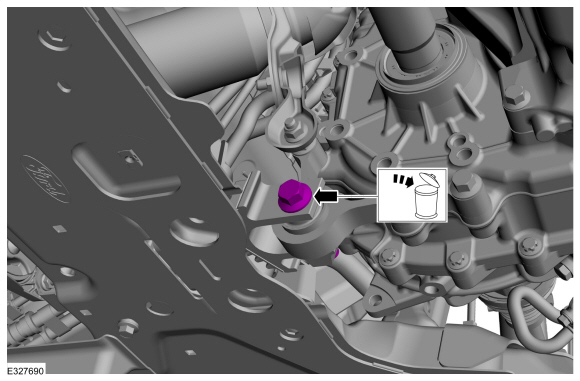
Refer to: Front Bumper Cover (501-19 Bumpers, Removal and Installation). - Remove and discard the roll restrictor bracket bolt.
- Remove the subframe support bracket bolts.
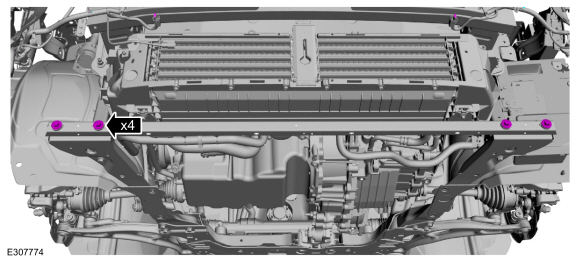
- Remove and discard the rear subframe bolts.
- Remove the subframe bolts and brackets.
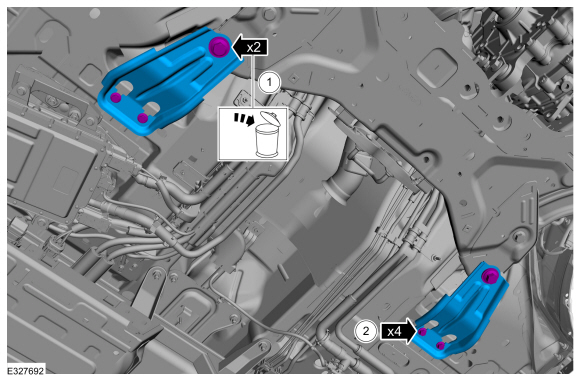
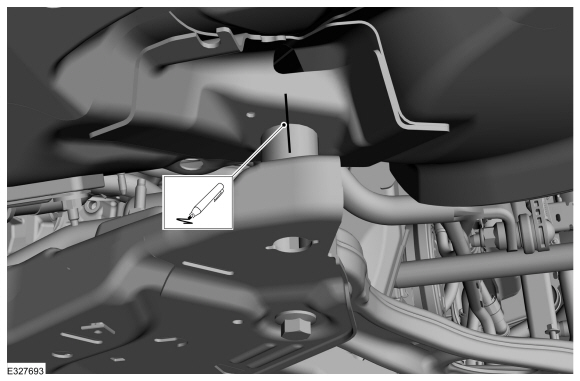
- Mark the subframe position relative to the body on both sides.
- Remove the front subframe bolts on both sides.
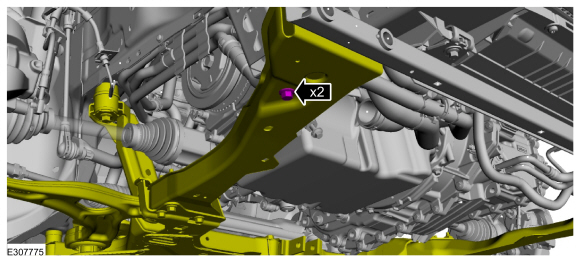
- Support the subframe with a floor jack.
Use the general equipment: Wood block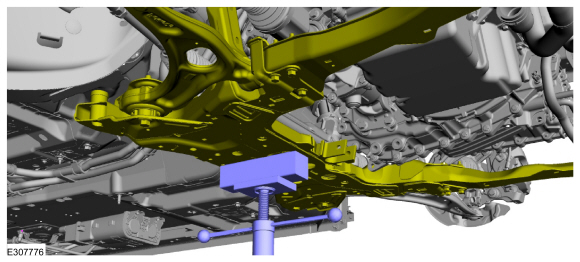
- Loosen the subframe mounting bolts on both sides.
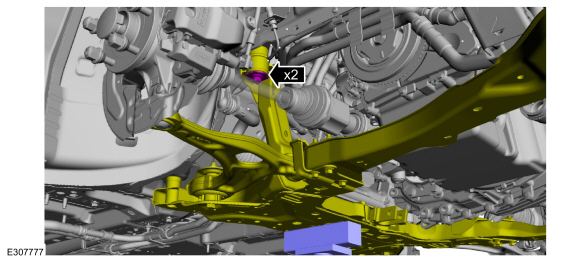
NOTICE: Use care when lowering the front subframe to make sure the front subframe mounting structure is not damaged.
Using a screw jack, lower the subframe.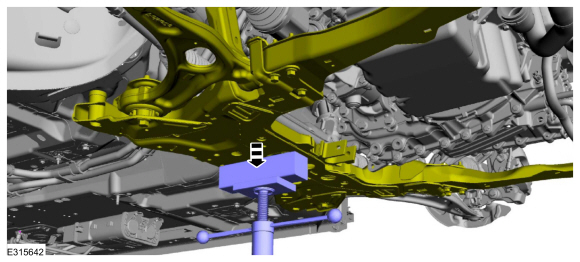
- Remove the lower bracket nut and the catalytic converter.
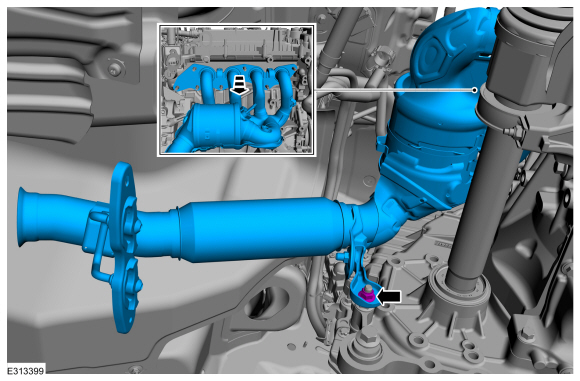
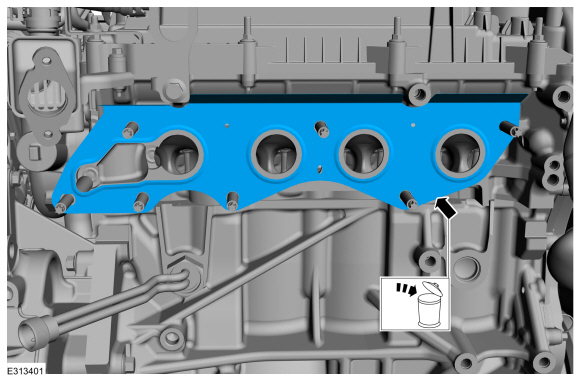
- Remove and discard the gasket.
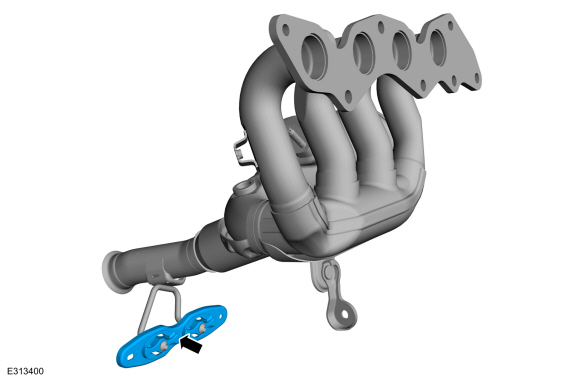
- Remove the insulator bracket assembly.
Installation
- Clean all exhaust outlet pipes before reassembly.
- Install the insulator bracket assembly.
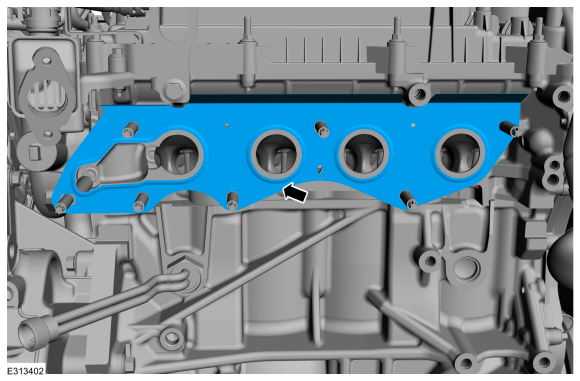
- Install a new gasket.
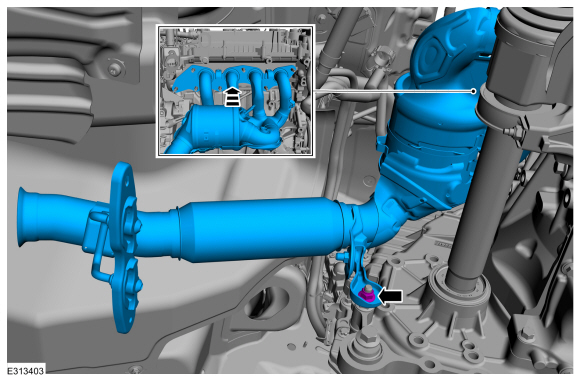
- Position the catalytic converter in the vehicle and install the lower bracket nut.
- Raise the front subframe.
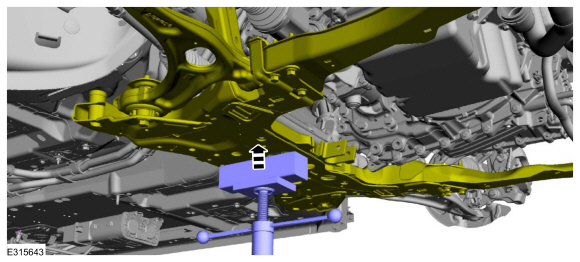
- Hand-tighten the front subframe bolts on both sides.
- Install the brackets and the new rear subframe bolts, hand-tightening them.
- Hand-tighten the subframe bracket bolts.
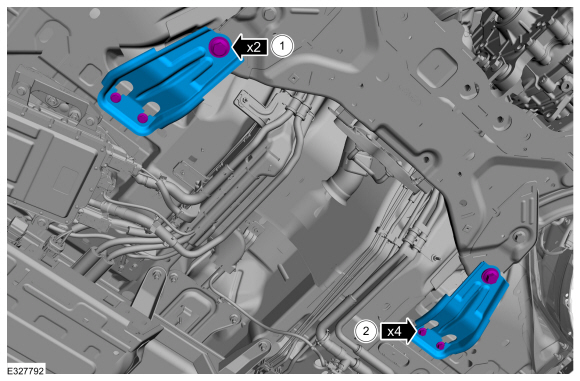
- Align the marks made during removal on both sides.
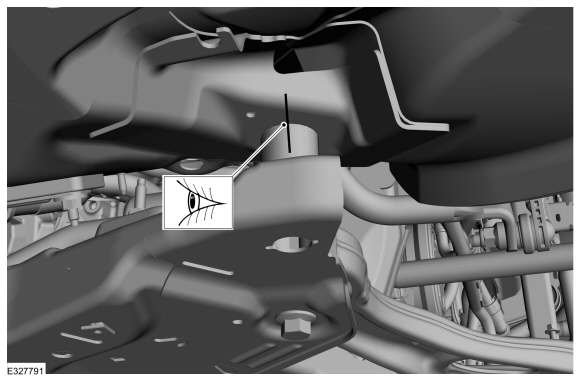
- Tighten the subframe bolts on both sides.
Torque: 85 lb-ft (115 N·m) - Tighten the front subframe bolts on both sides.
Torque: 22 lb-ft (30 N·m) - Tighten the bolts.
Torque:
Stage 1: 159 lb-ft (215 N·m)
Stage 2: 60 degrees
- Tighten the bolts.
Torque: 46 lb-ft (63 N·m)
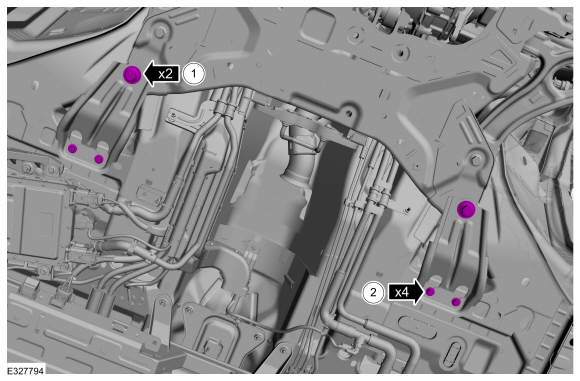
- Tighten the bolts.
- Install the subframe support bracket bolts.
Torque: 22 lb-ft (30 N·m) - Install a new roll restrictor bolt.
Torque: 129 lb-ft (175 N·m)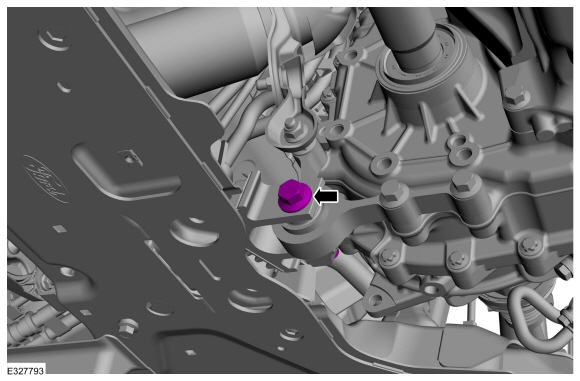
- Install the exhaust manifold nuts.
Torque: 41 lb-ft (55 N·m)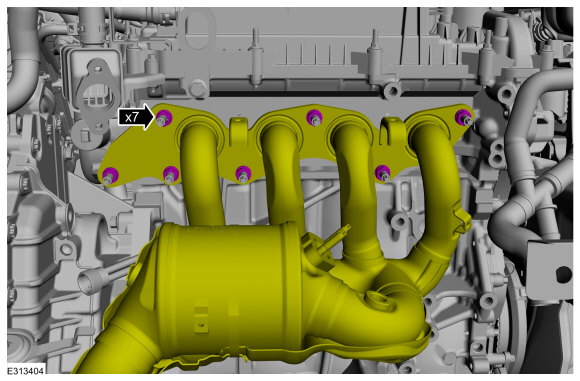
- Tighten the lower bracket nut.
Torque: 35 lb-ft (48 N·m)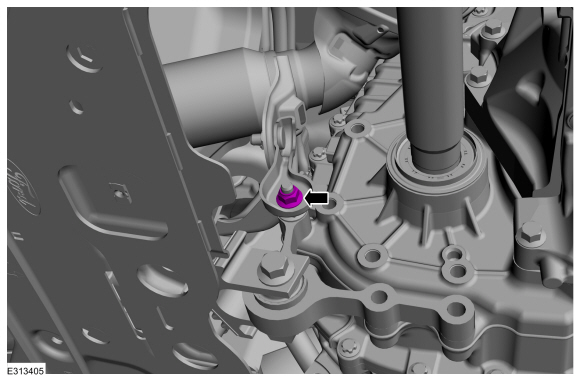
- To install, reverse the removal procedure.
- Check the exhaust system for leaks.
Test yourself
A quick Ford Escape quiz: every answer comes with an explanation and a link to the manual page.
Was this page helpful?