Powertrain
Removal and Installation - Cooling Module
In this manual: Powertrain
35steps
~210min
4/5difficulty
Done 0 of 35
Special Service Tools / General Equipment
| Hose Clamp Removal/Installation Tool | |
| Interior trim removal tool |
Removal
NOTICE: When removing any turbocharger air intake system components, be sure to cover all open ports to prevent debris from entering the system. Turbocharger compressor blades can be damaged by even the smallest particles. All components must be inspected and cleaned before installation or reassembly.
- Remove the air cleaner assembly.
Refer to: Air Cleaner (303-12C Air Distribution and Filtering, Removal and Installation). - Drain the cooling system.
Refer to: Engine Cooling System Draining, Vacuum Filling and Bleeding (303-03C Engine Cooling – General Procedures). - Drain the electric drive cooling system.
Refer to: Cooling System Filling and Air Bleeding (303-03D Electric Transaxle Cooling - Hybrid Electric Vehicle (HEV), General Procedures). - Recover the air conditioning system.
Refer to: Air Conditioning (A/C) System Recovery, Evacuation and Charging — 2.5 L Duratec — Hybrid (121 kW/164 L hp) (BG) (412-00 Climate Control System - General Information, General Procedures).
Refer to: Air Conditioning (A/C) System Recovery, Evacuation and Charging — Hybrid Electric Vehicle (HEV), vehicles with: R134a Refrigerant (412-00 Climate Control System - General Information — 2.5 L Duratec — Hybrid (121 kW/164 L hp) (BG)). - Remove the front bumper cover.
Refer to: Front Bumper Cover (501-19 Bumpers, Removal and Installation). - Remove the headlamp assembly.
Refer to: Headlamp Assembly (417-01 Exterior Lighting, Removal and Installation).
- Remove the push pins.
- Release the retainers, tabs and remove the radiator air deflectors.
Use common service equipment: interior trim removal tool.
- If equipped.
Remove the CMM.
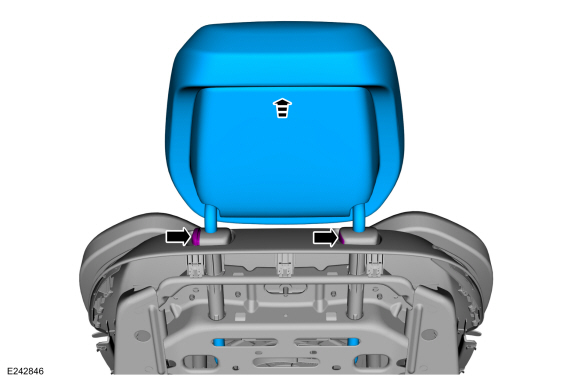
- Remove the air cleaner inlet pipe.
Refer to: Air Cleaner Inlet Pipe (303-12C Air Distribution and Filtering, Removal and Installation).
- Disconnect the electrical connector.
- Disconnect the latch cable clips.
- Remove the bolts and move the latch assembly aside.
Torque: 93 lb-in (10.5 N·m)
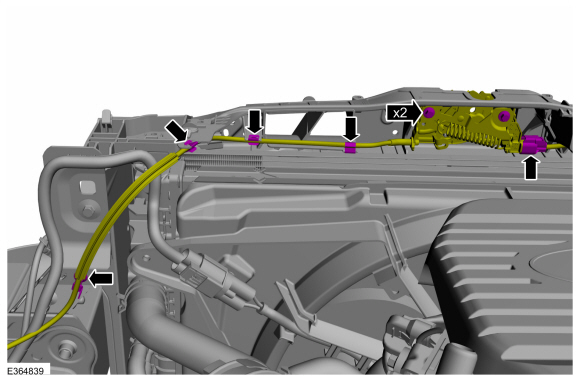
- Remove the hood prop rod.
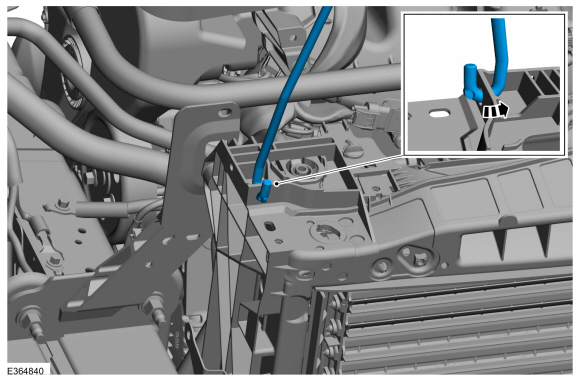
- Disconnect the cooling fan and shroud electrical connector and disconnect the wiring harness clips.

- Disconnect the transmission fluid cooler hose clip.
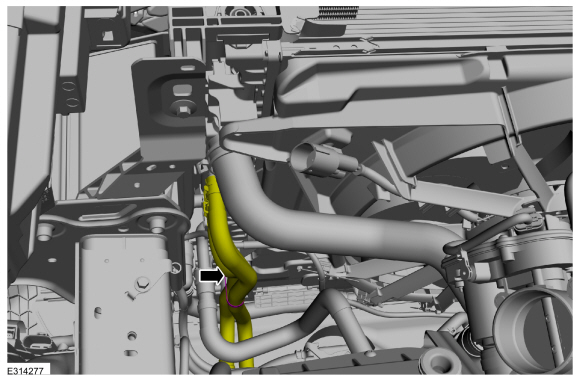
- If equipped.
Disconnect the wiring harness clips.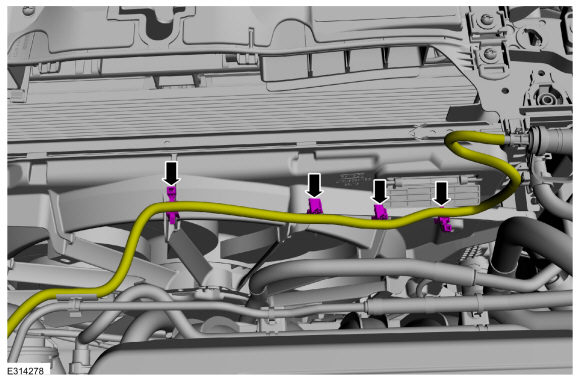
- Disconnect the wiring harness clips.
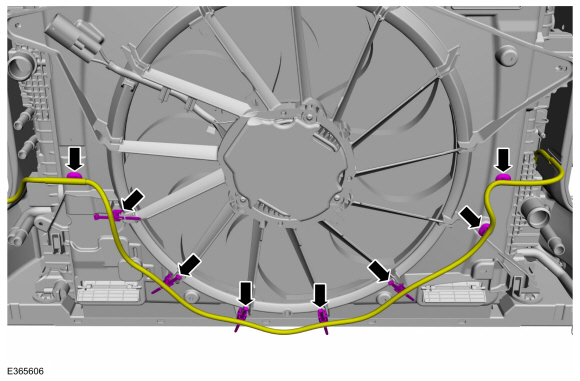
- Remove the bolts and disconnect the radiator auxiliary coolant hose.
Torque: 36 lb-in (4.1 N·m)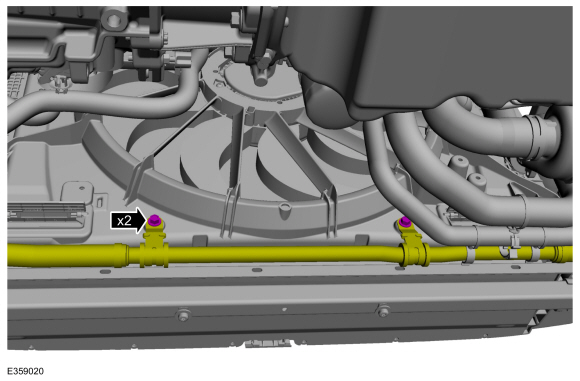
- Loosen the clamp and disconnect the upper radiator hose.
Use common service equipment: hose clamp removal/installation tool.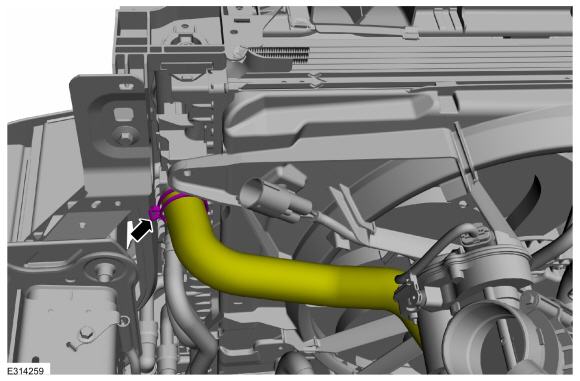
- Loosen the clamps and disconnect the transmission fluid cooler hoses.
Use common service equipment: hose clamp removal/installation tool.
- Loosen the clamp and disconnect the radiator vent hose.
Use common service equipment: hose clamp removal/installation tool.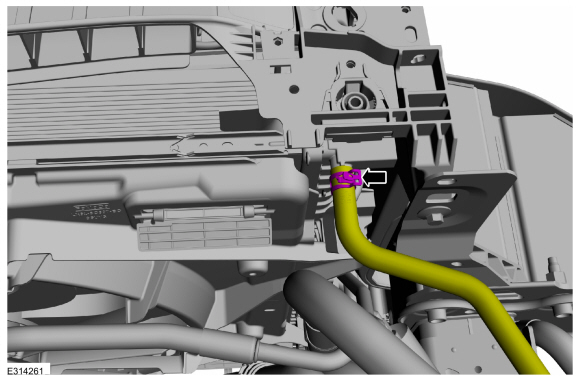
NOTICE: Make sure all openings are covered.
- Remove the nut and disconnect the condenser inlet fitting.
Torque: 159 lb-in (18 N·m)
- Remove the nut and disconnect the condenser outlet fitting.
Torque: 80 lb-in (9 N·m)
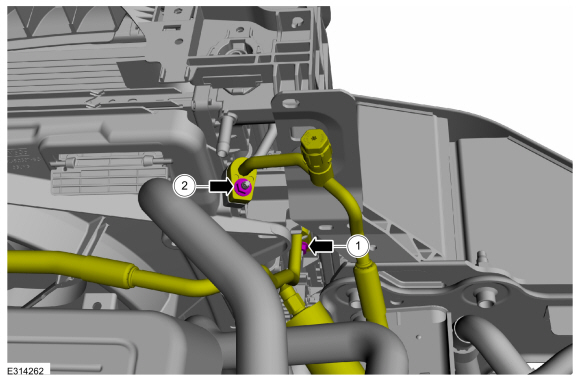
- Remove the nut and disconnect the condenser inlet fitting.
- Disconnect the quick-connect hose couplings.
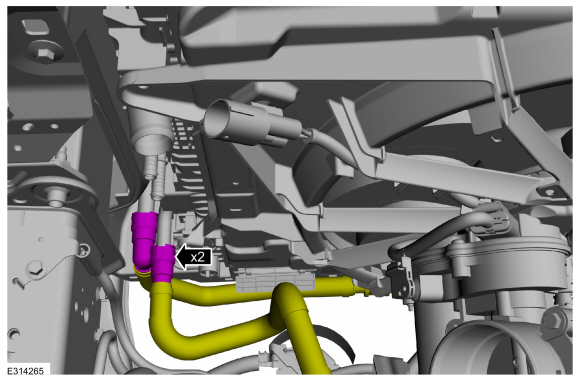
- Loosen the clamp and disconnect the coolant hose.
Use common service equipment: hose clamp removal/installation tool.
- Disconnect the quick-connect hose coupling.
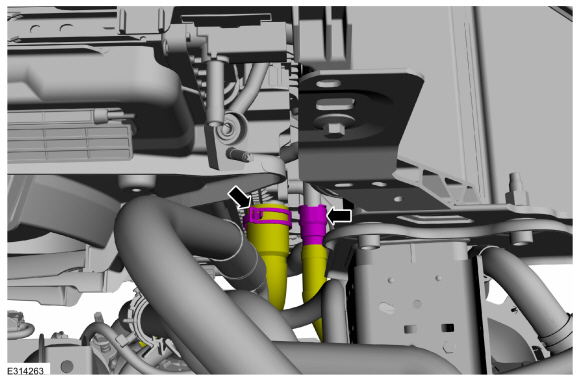
- Loosen the clamp and disconnect the coolant hose.
- Disconnect the quick-connect hose coupling.
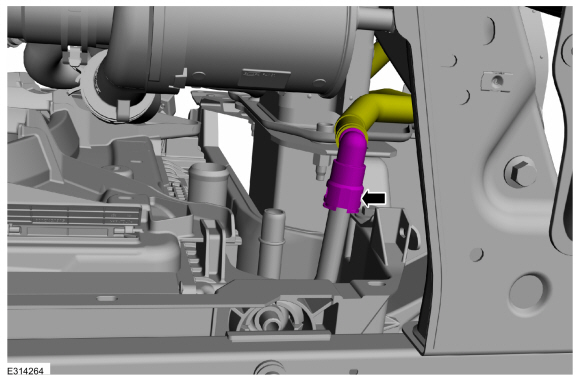
- Disconnect the electrical connector.
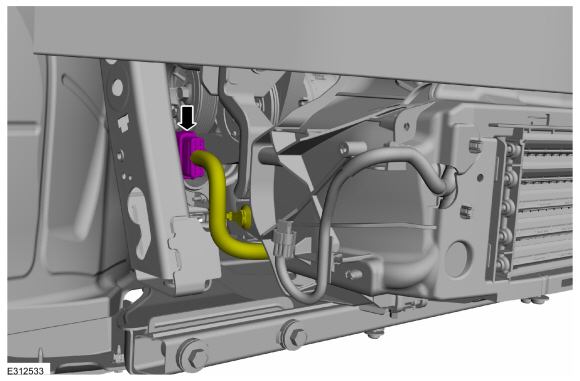
- Disconnect the A/C pressure switch wiring harness clip.
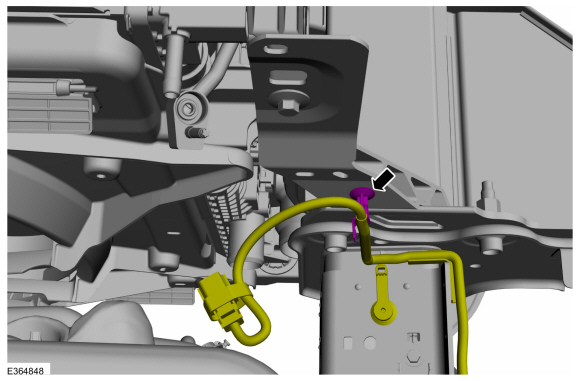
- Disconnect the horn electrical connector and remove the wiring harness clip.
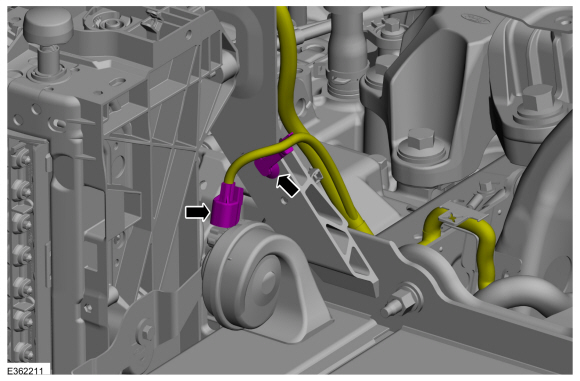
- Remove the cooling module lower support beam bolts.
Torque: 22 lb-ft (30 N·m)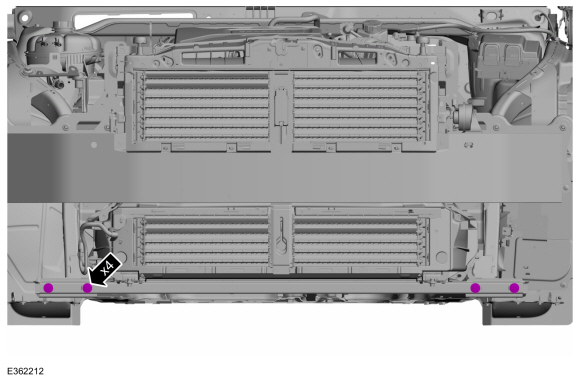
- Both sides.
Remove the bolt.
Torque: 46 lb-ft (63 N·m)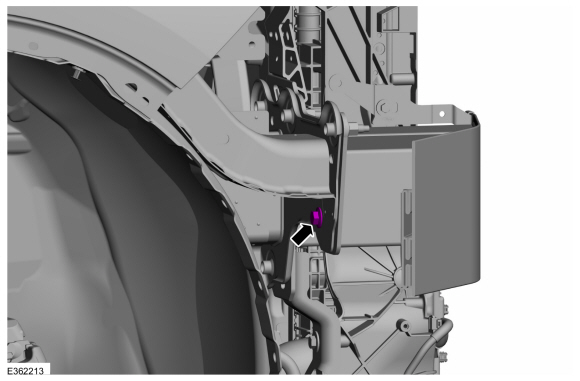
- Remove the nuts and the cooling module assembly.
Torque: 46 lb-ft (63 N·m)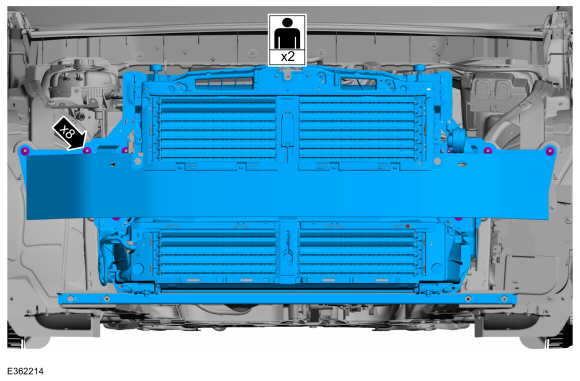
- Remove the cooling module mounting bolts and the bumper reinforcement.
Torque: 93 lb-in (10.5 N·m)
Installation
- To install, reverse the removal procedure.
- Install and lubricate the O-rings on the new condenser fitting.
Refer to: Specifications (412-00 Climate Control System - General Information, Specifications). - Evacuate, leak test and charge the air conditioning system.
Refer to: Air Conditioning (A/C) System Recovery, Evacuation and Charging — 2.5 L Duratec — Hybrid (121 kW/164 L hp) (BG) (412-00 Climate Control System - General Information, General Procedures).
Refer to: Air Conditioning (A/C) System Recovery, Evacuation and Charging — Hybrid Electric Vehicle (HEV), vehicles with: R134a Refrigerant (412-00 Climate Control System - General Information — 2.5 L Duratec — Hybrid (121 kW/164 L hp) (BG)). - Fill and bleed the cooling system.
Refer to: Engine Cooling System Draining, Vacuum Filling and Air Bleeding (303-03C Engine Cooling - General Procedures). - Fill and bleed the electric drive cooling system.
Refer to: Cooling System Filling and Air Bleeding (303-03D Electric Transmission Cooling - Hybrid Electric Vehicle (HEV), General Procedures). - Check and, if necessary, add transmission fluid.
Refer to: Transmission Fluid Level Check (307-01B Automatic Transmission - Automatic Transmission - HF45, General Procedures).
Test yourself
A quick Ford Escape quiz: every answer comes with an explanation and a link to the manual page.
Was this page helpful?