Child Safety
Using Lap and Shoulder Belts
In this manual: Child Safety
10steps
~60min
3/5difficulty
Done 0 of 10
When installing a child restraint with a combination lap and shoulder belt:
- Use the seat belt buckle that corresponds to the seating position.
- Insert the belt tongue into the correct buckle until you hear a click and feel the latch engage. Make sure the tongue is securely latched in the buckle.
- Keep the buckle release button facing up and away from the child restraint, with the tongue between the child restraint and the release button, to prevent accidental unlatching.
- Return the vehicle seat to the upright position before installing the child restraint.
- For second row seats, slightly adjust the seat to improve the fit of the child restraint. Remove the head restraints if necessary.
- For third row seats, remove the head restraints to improve the fit of the child restraint. Refer to Head Restraints.
- Set the seat belt to automatic locking mode. Refer to Step 5 in the procedure that follows. This vehicle does not require the use of a locking clip.
- Perform the following steps when installing a child restraint with a combination lap and shoulder belt:
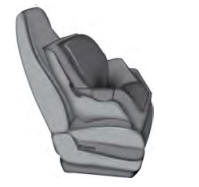
- Install the child restraint on the seat with a combination lap and shoulder belt.
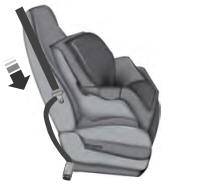
- After positioning the child restraint correctly, pull down on the shoulder belt, then grasp the shoulder and lap belts together at the tongue.
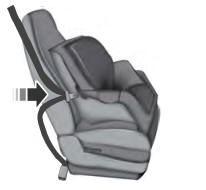
- Holding the shoulder and lap belts together, pass the tongue through the child restraint according to the child restraint manufacturer's instructions. Make sure the belt is not twisted.
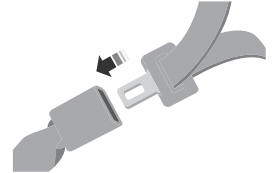
- Insert the belt tongue into the correct buckle (closest to the direction the tongue comes from) for this seating position until you hear a click and feel the latch engage. Make sure the tongue is securely latched by pulling on it.
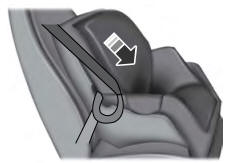
- To set the retractor to automatic locking mode, grasp the shoulder portion of the belt and pull down until the entire belt is extended.
- Allow the belt to retract to remove slack. The belt clicks as it retracts to indicate that it is in automatic locking mode.
- Try to pull the belt out of the retractor to make sure the retractor is in automatic locking mode. You should not be able to pull out any more belt. If the retractor did not lock, unbuckle the belt and repeat Steps 5 and 6.
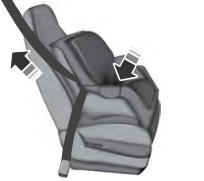
- Remove any remaining slack in the belt. Push down on the child restraint with additional weight, for example by pressing or kneeling on the child restraint, while pulling the shoulder belt to remove slack. This is necessary to remove the remaining slack that remains after you add extra weight to the child restraint. It also helps achieve a proper fit of the child restraint in your vehicle. Sometimes leaning slightly toward the buckle provides additional help in removing the remaining belt slack.
- If the child restraint has a tether strap, attach it now.
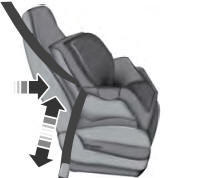
- Before installing the child restraint, firmly push the seat forward and backward to make sure the seat is securely locked in place. To check this, grasp the seat at the belt path and try to move it side to side and forward and backward. For a proper installation, there should be no movement of more than 1 in (2.5 cm).
We recommend contacting a NHTSA-certified child passenger safety technician to make sure you have installed the child restraint correctly. In Canada, contact your provincial transport authority for a child car seat clinic referral.
Test yourself
A quick Ford Explorer quiz: every answer comes with an explanation and a link to the manual page.
Was this page helpful?