Chassis
Brake Master Cylinder - Removal and Installation
In this manual: Chassis
6steps
~36min
2/5difficulty
Done 0 of 6
Removal
All vehicles
NOTICE: Before removing the brake master cylinder, release the vacuum in the brake booster, otherwise the brake master cylinder sealing ring may be drawn into the brake booster, causing brake booster failure and increased brake pedal effort.
Fully depress and release the brake pedal 5 times.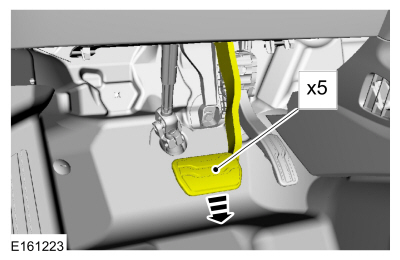
- Disconnect the battery.
Refer to: Battery Disconnect and Connect (414-01 Battery, Mounting and Cables, General Procedures).
1.5 L EcoBoost (118 kW/160 L hp)/2.5 L Duratec (125 kW/170 L hp)
- Disconnect the brake fluid level sensor electrical connector and release the brake tube clip.
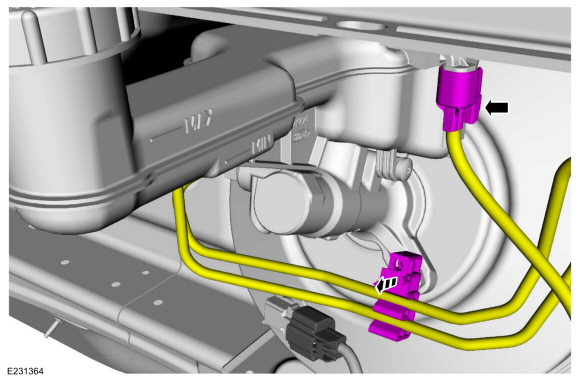 |
2 L EcoBoost (184 kW/250 L hp) - MI4/2.7 L EcoBoost (238 kW/324 L hp)
- Disconnect the brake fluid level sensor electrical connector and remove the wiring clips.
Torque: 18 lb-ft (25 N·m)
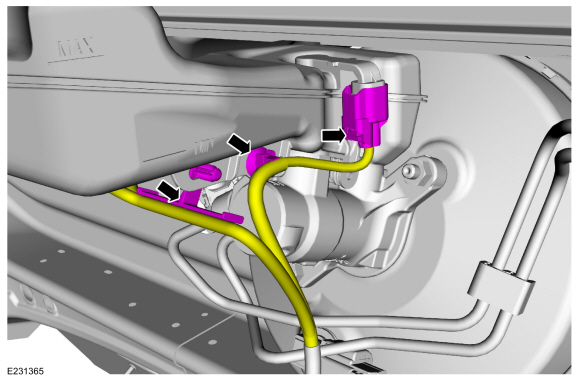 |
All vehicles
NOTICE: If brake fluid contacts painted surfaces, rinse the affected area immediately with cold water.
NOTICE: Make sure all openings are covered.
Disconnect the brake tube fittings.
Torque: 18 lb-ft (25 N·m)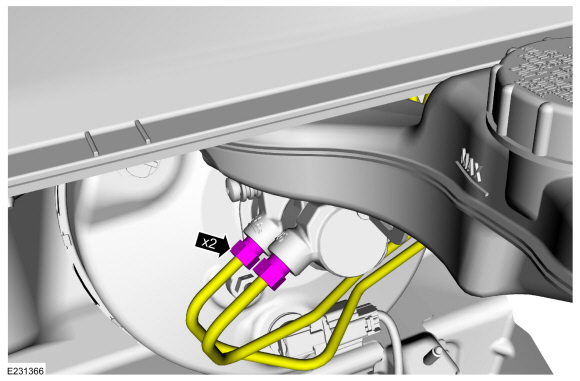
- Remove the nuts and the brake master cylinder. Discard the nuts.
Torque: 18 lb-ft (25 N·m)
Installation
- To install, reverse the removal procedure.
- If a new brake master cylinder was installed, bleed the master cylinder.
Refer to: Component Bleeding (206-00 Brake System - General Information, General Procedures).
- If the brake master cylinder was removed to access other components, bleed the brake system.
Refer to: Depressurizing the Brake System (206-00 Brake System - General Information, General Procedures).
- If a new brake master cylinder was installed, bleed the master cylinder.
Test yourself
A quick Ford Fusion quiz: every answer comes with an explanation and a link to the manual page.
Was this page helpful?