Powertrain
Transmission Fluid Warmer - Removal and Installation
In this manual: Powertrain
18steps
~108min
4/5difficulty
Done 0 of 18
Special Service Tools / General Equipment
Clamps)
Materials
| Name | Specification |
|---|---|
| Motorcraft® MERCON® LV Automatic Transmission Fluid XT-10-QLVC |
WSS-M2C938-A MERCON® LV, |
Removal
- Remove the battery tray.
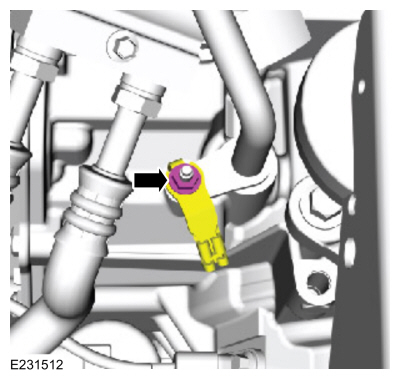
Refer to: Battery Compartment (414-01 Battery, Mounting and Cables, Removal and Installation). - Remove the nut and disconnect the ground cable terminal from the transmission fluid warmer tube stud.
- Remove the bolt, stud and the transmission fluid warmer tube.
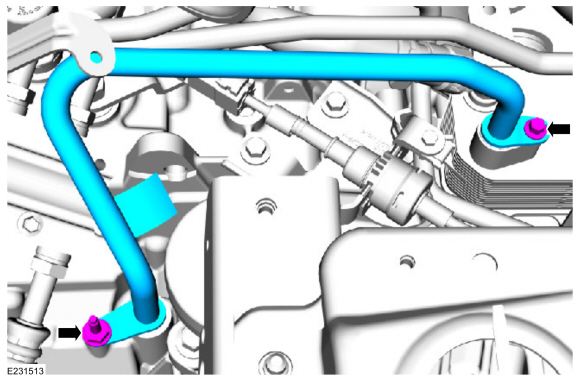
- Inspect the transmission to make sure the fluid tube seal and the backup ring were removed with the fluid tube and are not stuck in the transmission. If the fluid tube seal or the backup ring is stuck in the transmission, remove the seal and the backup ring.

- Fully loosen the fitting, remove the bolt and remove the bypass valve tube from the warmer to the transmission fluid cooler.
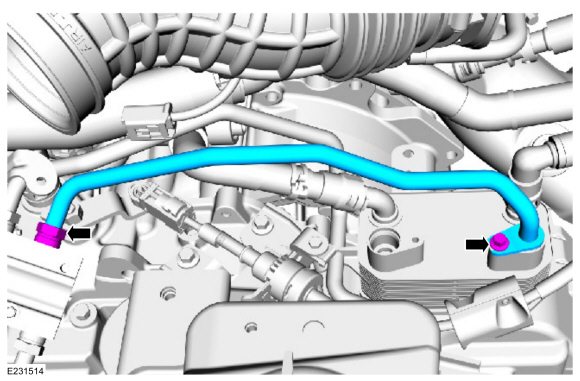
- Inspect the transmission fluid warmer to make sure the transmission fluid tube seals and the backup rings were removed with the transmission fluid tubes and are not stuck in the transmission fluid warmer. If the transmission fluid tube seals or the backup rings are stuck in the transmission fluid warmer, remove the seals and the backup rings.

- Pinch off the coolant hoses and disconnect the quick-connect coolant hose couplings from the transmission fluid warmer.
Use the general equipment: Hose clamp(s)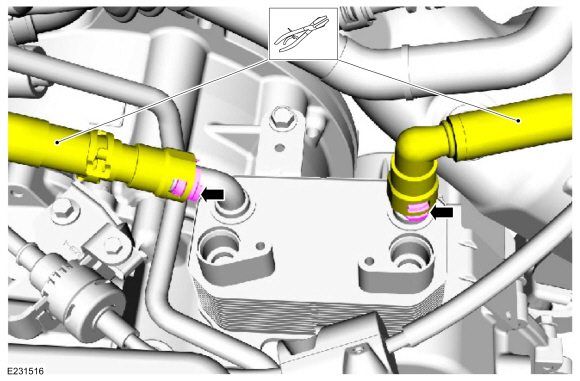
- Remove the bolts, nut and the transmission fluid warmer.
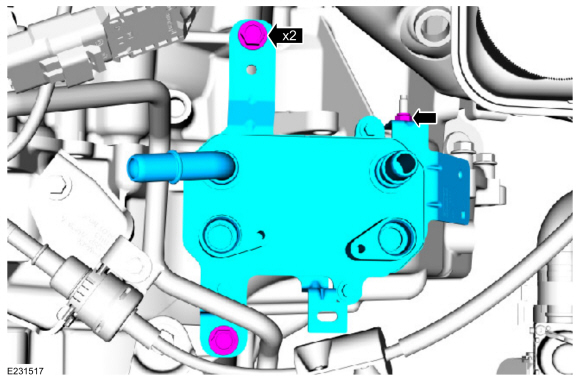
Installation
- Install the transmission fluid warmer, nut and bolts.
Torque: 18 lb-ft (25 N·m)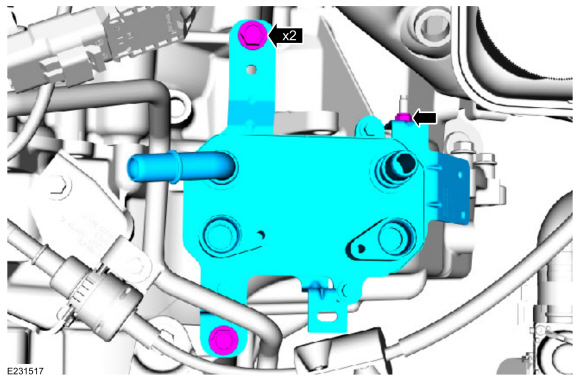
- Connect the quick-connect coolant hose couplings to the transmission fluid warmer and remove the clamps.
Use the general equipment: Hose clamp(s)
Inspect the bypass valve from the warmer to the transmission fluid cooler. Inspect the backup ring and the valve tube seal for damage and install new rings or seals if necessary.- Support Ring (7J324)
- Seal (7D285)
Material: Motorcraft® MERCON® LV Automatic Transmission Fluid / XT-10-QLVC (WSS-M2C938-A) (MERCON® LV)
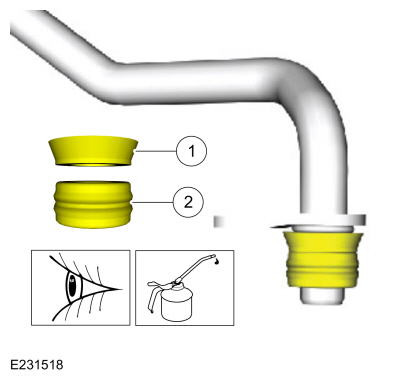
Install the bypass valve tube from the warmer to the transmission fluid cooler, tighten the fitting and install the bolt.- Torque: 16 lb-ft (22 N·m)
- Torque: 80 lb-in (9 N·m)

Inspect the fluid warmer tubes from the transmission to the transmission. Inspect the backup rings and tube seals for damage and install new backup rings or seals if necessary.- Support Ring (7J324)
- Seal (7D285)
Material: Motorcraft® MERCON® LV Automatic Transmission Fluid / XT-10-QLVC (WSS-M2C938-A) (MERCON® LV)
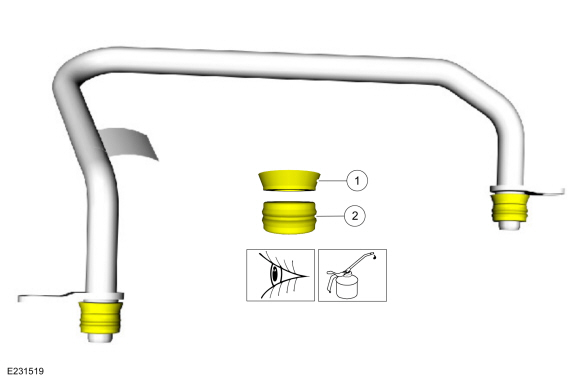
- Install the transmission fluid warmer tube, stud and bolt.
Torque: 80 lb-in (9 N·m)
- Connect the ground cable terminal to the transmission fluid warmer tube stud and install the nut.
Torque: 80 lb-in (9 N·m)
- Install the battery tray.
Refer to: Battery Compartment (414-01 Battery, Mounting and Cables, Removal and Installation). - Check the transmission fluid level and adjust as necessary.
Refer to: Transmission Fluid Level Check (307-01A Automatic Transmission - 6-Speed Automatic Transmission - 6F35, General Procedures). - Check the engine coolant level and adjust as necessary.
Refer to: Engine Cooling System Draining, Vacuum Filling and Air Bleeding (303-03A Engine Cooling - 1.5 L EcoBoost (118kW/160 L PS) - I4, General Procedures).
Refer to: Engine Cooling System Draining, Vacuum Filling and Air Bleeding (303-03B Engine Cooling - 2 L EcoBoost (184kW/250 L PS) - MI4, General Procedures).
Refer to: Engine Cooling System Draining, Vacuum Filling and Air Bleeding (303-03C Engine Cooling - 2.5 L Duratec (125kW/170 L PS), General Procedures).
Test yourself
A quick Ford Fusion quiz: every answer comes with an explanation and a link to the manual page.
Was this page helpful?