Accessories
Rear Speaker Removal, Installation, and Test (2-door)
013100 LEFT REAR
0131A8 RIGHT REAR

Removal
NOTE: SRS components are located in this area. Review the SRS component locations and the precautions and procedures before doing repairs or service.
- Both Quarter Pillar Trims
 |
|
1. |
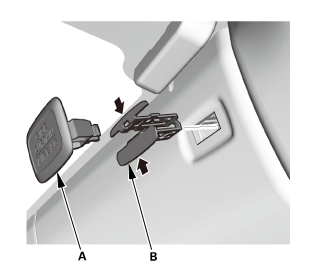
Remove the cap (A) and the clip (B). |
|
2. |
The left side is shown; repeat on the right side. |
|
 |
|
3. |
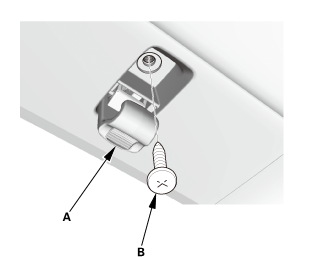
Lower the coat hanger hook (A), then remove the screw (B). |
|
4. |
The left side is shown; repeat on the right side. |
|
 |
|
5. |
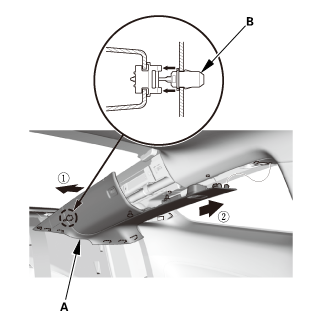
Pull out the quarter pillar trim (A) to release the clips. |
|
6. |
Remove the quarter pillar trim. |
|
NOTE: The rear clip (B) will stay in the body. |
|
7. |
The left side is shown; repeat on the right side. |
|
 |
|
8. |
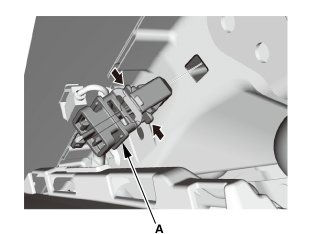
Remove the rear clip (A). |
|
9. |
The left side is shown; repeat on the right side. |
|
- Rear Shelf Trim
 |
|
1. |
Fold down the seat-back(s). |
|
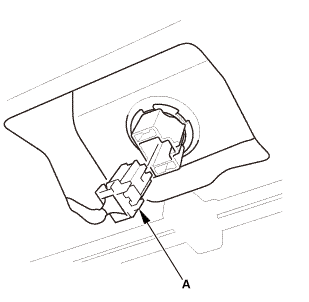
2. |
From the trunk compartment, disconnect the connector (A). |
|
 |
|
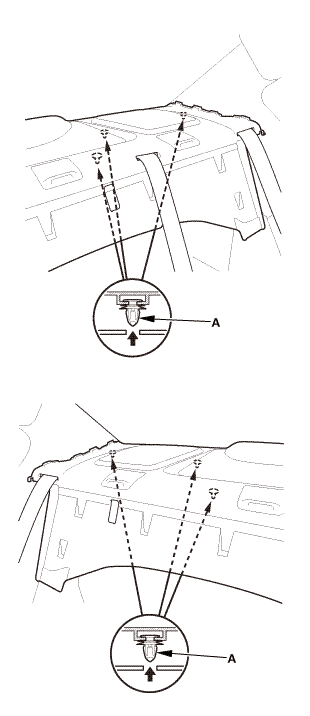
3. |
From the trunk compartment, detach the clips (A). |
|
 |
|
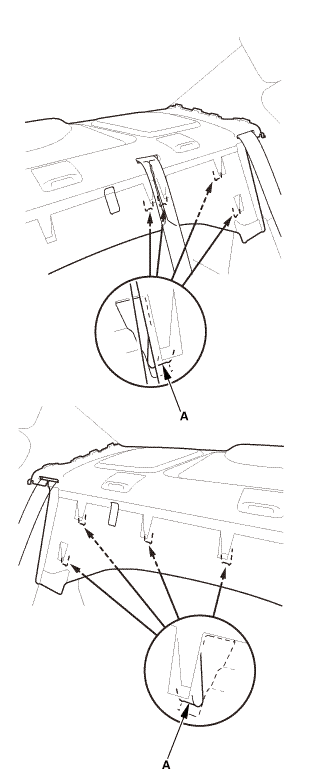
4. |
Release the hooks (A). |
|
 |
|
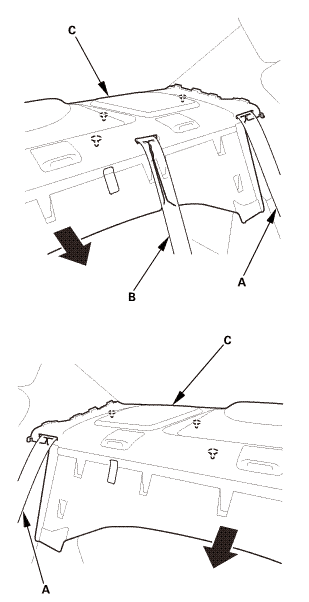
5. |
Pull out both rear seat belts (A) and the rear center seat belt (B) through the slits in the rear shelf trim (C), then remove the rear shelf trim. |
|
- Rear Speaker
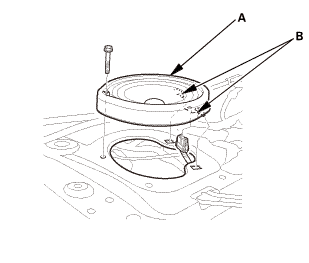 |
|
1. |
Remove the screw. Remove the rear speaker (A) by tilting it forward to release the clips (B). |
|
2. |
Disconnect the connector. |
|
 Test
- Rear Speaker - Test
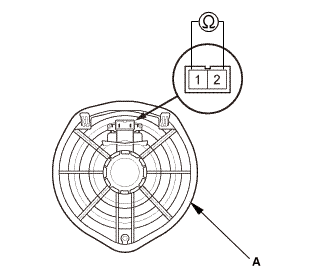 |
|
1. |
Measure the resistance between terminals No. 1 and No. 2. There should be about 4 ?. |
|
2. |
If the resistance is not as specified, replace the rear speaker (A). |
|

Installation
NOTE: SRS components are located in this area. Review the SRS component locations and the precautions and procedures before doing repairs or service.
- Rear Speaker
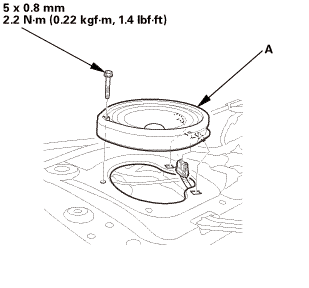 mmmmwzzm.mwn
|
|
1. |
Connect the connector. |
|
2. |
Install the rear speaker (A). |
|
- Rear Shelf Trim
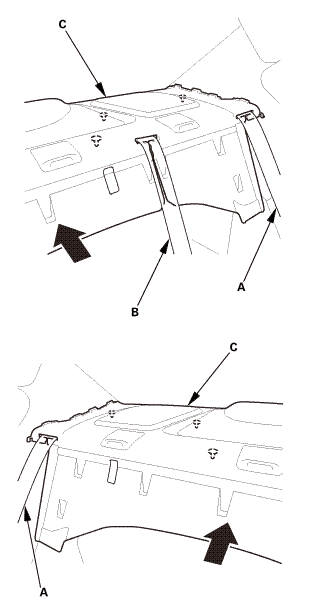 |
|
1. |
Slip the rear seat belts (A) and the rear center seat belt (B) through the slits in the rear shelf trim (C). |
|
|
|
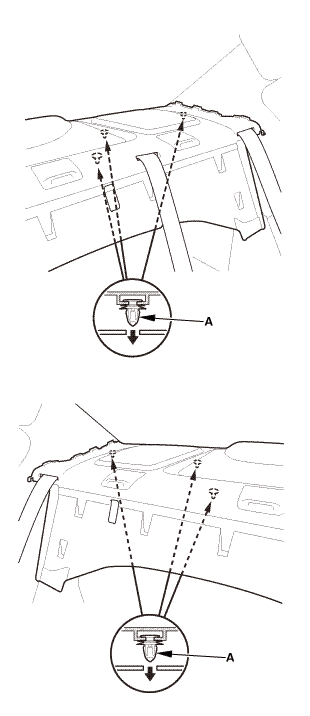
2. |
Install the hooks (A). |
|
 |
|
3. |
Install the clips (A). |
|
|
|
4. |
From the trunk compartment, connect the connector (A). |
|
5. |
Raise the seat-back(s). |
|
- Both Quarter Pillar Trims
 |
|
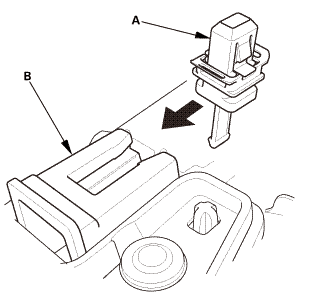
1. |
Install the new rear clip (A) to the quarter pillar trim (B). |
|
 |
|
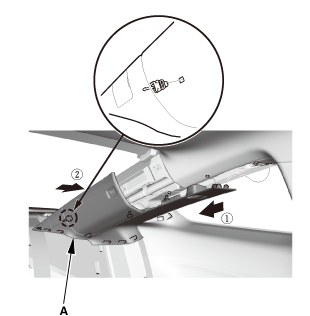
2. |
Fit the clips into the holes in the quarter pillar. |
|
3. |
Lightly push the quarter pillar trim (A) into place, then install the trim. |
|
NOTE: |
|
 |
Make sure the side curtain airbag is not tucked under the clips or the ribs. |
|
|
|
Do not push too hard on the quarter pillar trim. If you push too hard, the clip will be damaged, and it will not hold the trim properly. |
|
|
|
Gently tug on the quarter pillar trim to verify that all clips are securely fastened. |
|
|
|
 |
|
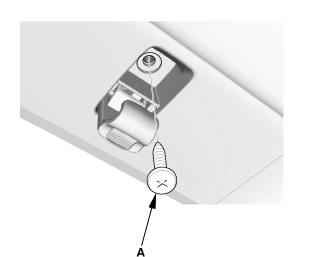
4. |
Install the screw (A). |
|
 |
|
5. |
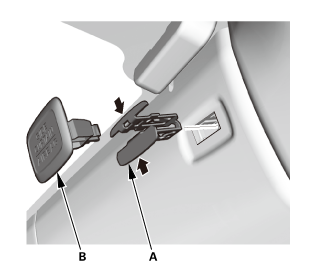
Install the clip (A) and the cap (B). |
|
?
Test yourself
A quick Honda Civic quiz: every answer comes with an explanation and a link to the manual page.
Was this page helpful?