In this manual: Heating, Ventilation, and Air Conditioning
32steps
~192min
4/5difficulty
Tightening torque found on this page
Done 0 of 32
Replacement
When prying with a flat-tip screwdriver or a trim tool, wrap the tool with protective tape and apply protective tape to the surrounding parts to prevent damage.
Disconnect the negative (-) battery terminal.
Recover the refrigerant using a refrigerant recovery/recycling/recharging station.
When the engine has cooled, drain the engine coolant from the radiator. (Refer to Engine Mechanical System - "Coolant")
Remove the upper hood cover. (Refer to Body - "Upper Cover Panel")
Remove the bolts and the expansion valve (A) from the evaporator core.
Tightening torque: 8.8 ~ 13.7 N·m
Disconnect the heater hoses (A) from the heater unit.
Engine coolant will drain when the hoses are disconnected. Drain it into a clean pan. Be careful not to spill coolant on electrical parts or painted surfaces. If coolant is spilled, wash it off immediately.
Loosen the hood cross member bolts.
Remove the floor console assembly. (Refer to Body – Floor Console Assembly)
Remove the emergency pad lower panel. (Refer to Body - "Emergency Pad Lower Panel")
Remove both sides of the front pillar garnish. (Refer to Body - "Front Pillar Garnish")
Remove the hood side trim. (Refer to Body - "Hood Side Trim")
Remove the lower steering column cover panel. (Refer to Body - "Steering Column Cover Panel")
Remove the steering wheel. (Refer to Steering System - "Steering Wheel")
Remove the combination switch. (Refer to Body Electrical System - "Combination Switch")
Lower the steering column after loosening the mounting bolts. (Refer to Steering System - "Steering Column and Shaft")
Remove the shift lever assembly. (Refer to Automatic Transmission System - "Shift Lever")
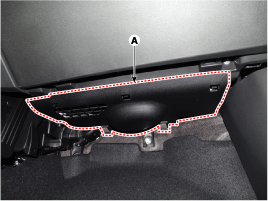
Remove the protector under the cover [RH] (A).
Remove the rear duct (A).
Separate the floor carpet (A) to make room for removing the rear heating duct.
Loosen the mounting nut and remove the front duct (A).
Disconnect the connector (A) of the SRS control module (SRSCM).
Disconnect the connectors of the junction box (A).
Disconnect the connectors of the multi-box (A). [LHD][RHD]
Disconnect the connectors (A) and the wire clips on the front pillar. [LHD][RHD]
Remove the drain hose (A).
Loosen the blower unit mounting bolts of the hood.
Tightening torque: 3.9 ~ 5.9 N·m
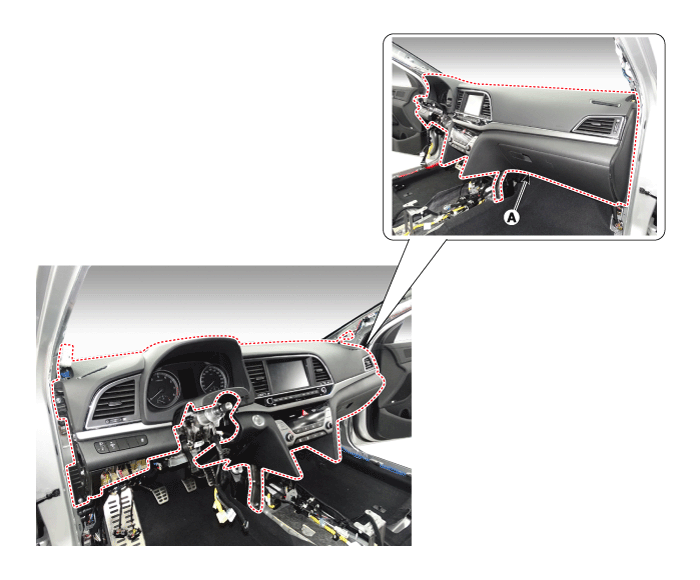
After loosening the bolts and nuts, remove the main cowl panel and hood cross member assembly (A) together.
Disconnect the connectors of the heater and blower unit.
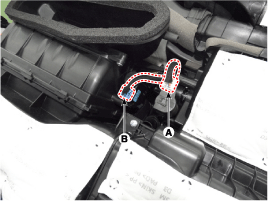
Disconnect the connector (A) of the automatic defogging system actuator, the connector (B) of the intake system actuator, and remove the wiring clips.
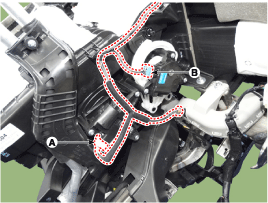
Disconnect the driver side temperature control actuator (A) and the mode control actuator (B), and remove the wiring clips.
Disconnect the blower motor connector (A) and remove the wiring clips.
Disconnect the passenger side temperature control actuator (A), the evaporator temperature sensor connector (B), the power FET connector (C), and remove the wiring clips.
Loosen the heater and blower unit mounting bolt (A).
Remove the heater and blower unit (A) from the cowl panel after loosening the mounting nuts.
Tightening torque: 3.9 ~ 5.9 N·m
Separate the blower unit (A) from the heater unit (B) after loosening the screws.
To install, reverse the removal procedure.
?
Test yourself
A quick Hyundai Elantra AD quiz: every answer comes with an explanation and a link to the manual page.