Body (Interior and Exterior)
Center Pillar Trim Repair Procedures
In this manual: Body (Interior and Exterior)
10steps
~60min
3/5difficulty
Done 0 of 10
Replacement
[Center Pillar Lower Trim]
|
|
- Remove the front door sill trim. (Refer to Interior Trim - "Door Scuff Trim")
- Remove the rear door sill trim. (Refer to Interior Trim - "Door Scuff Trim")
- Carefully remove the front door side weatherstrip.
- Carefully remove the rear door body side weatherstrip.
- Using a screwdriver or removal tool, remove the center pillar lower trim (A).

- Install in the reverse order of removal.

- Make sure the connector is properly connected.
- Replace any damaged clips.
|
|
- Remove the lower center pillar trim. (Refer to Interior Trim - "Center Pillar Trim")
- Remove the front seat belt anchor (A).
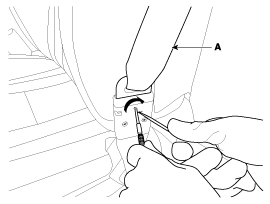
How to Disconnect the Seat Belt Anchor: 1) Expose the red indicator pin (A) by pressing the slot with a pointed tool (1.5 mm), as shown in the figure below.
2) Insert a (-) screwdriver (4 mm) into the latch hole (
Be careful not to scratch the anchor cover with a pointed object when pressing the slot.
 ) and turn it clockwise. 3) Remove the connector by pulling the seat belt (
 ).
When connecting the anchor connector, secure it firmly until you hear a click.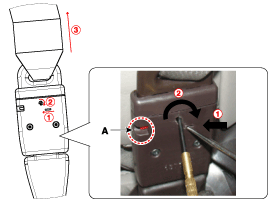
- Using a screwdriver or removal tool, remove the center pillar lower trim (A).
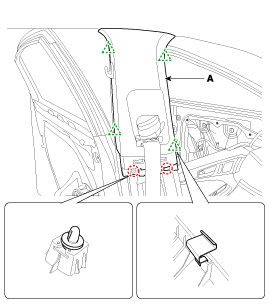
- Install in the reverse order of removal.
- Replace all damaged clips.
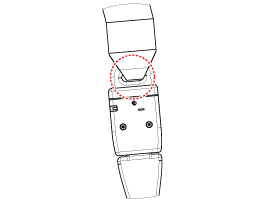
- When attaching the tongue to the buckle, be careful not to twist the belt.
Test yourself
A quick Hyundai Genesis DH quiz: every answer comes with an explanation and a link to the manual page.
Was this page helpful?