All-Wheel Drive (AWD) System
Oil Hydraulic Motor (Actuator)
In this manual: All-Wheel Drive (AWD) System
8steps
~48min
2/5difficulty
Done 0 of 8
Description and Operation
Description
The AWD ECM controls the pump motor (actuator) to generate oil pressure. The pressure engages the multi-plate clutch to transmit torque to the rear wheels. The torque delivered to the rear wheels depends on the clutch pressure.
Circuit Diagrams
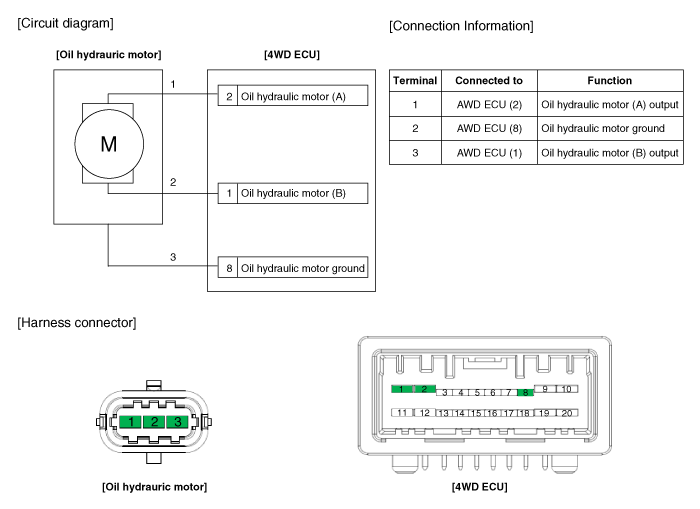
Wiring Diagram
Repair Procedures
Inspection
|

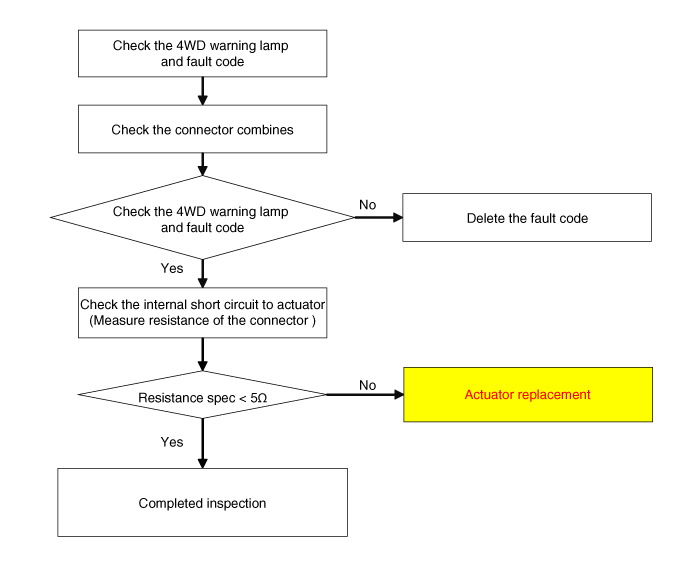
Oil Hydraulic Motor (Actuator) Inspection Procedure
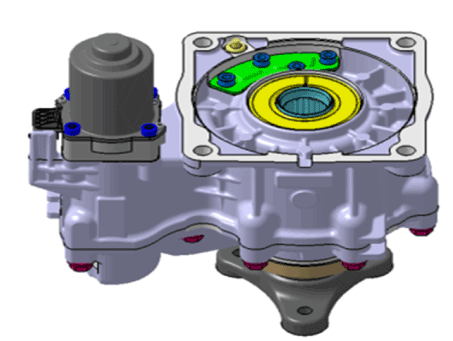
Removal
- Remove the coupling assembly. (Refer to All-Wheel Drive (AWD) System - Coupling Assembly)
- Keep the coupling perpendicular after removing the coupling assembly.

- Keep the hydraulic motor (actuator) perpendicular during removal (installation).
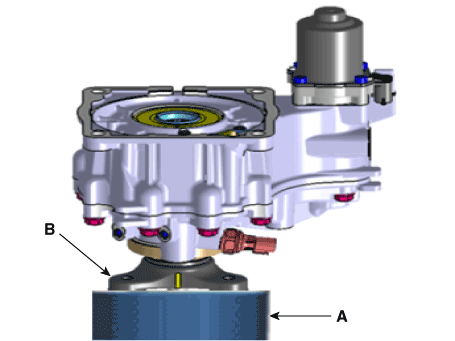
- Use the tool (A) that allows an assistant to hold or set the coupling in a vertical position.
- To prevent damage to the input shaft side (B).
- Keep the hydraulic motor (actuator) perpendicular during removal (installation).
- Remove the hydraulic motor (A) after first loosening the bolts with a hex key.
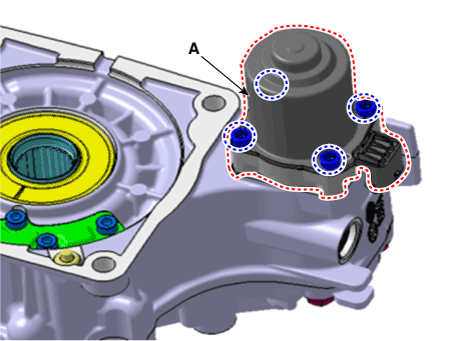

- Remove the hydraulic motor (actuator) after draining as much residual oil as possible from inside the coupling (A). (Approximately 5-10 seconds)
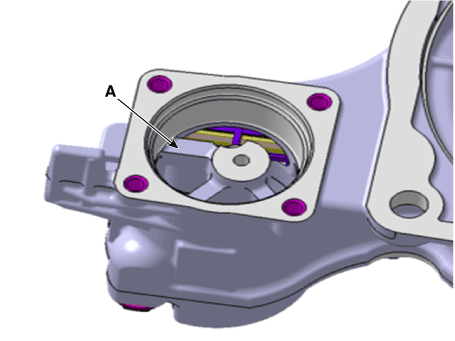
- Remove the hydraulic motor (actuator) after draining as much residual oil as possible from inside the coupling (A). (Approximately 5-10 seconds)
Installation
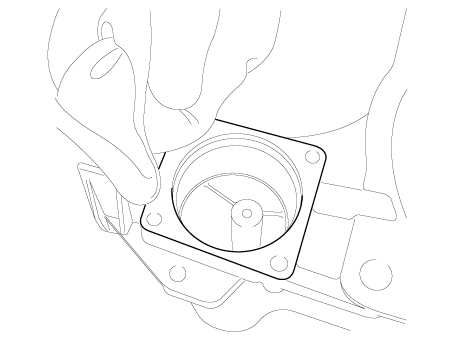
- Before installation, wipe the surface clean with a clean cloth.
- Inspect the O-rings (A) of the new hydraulic motor (actuator).
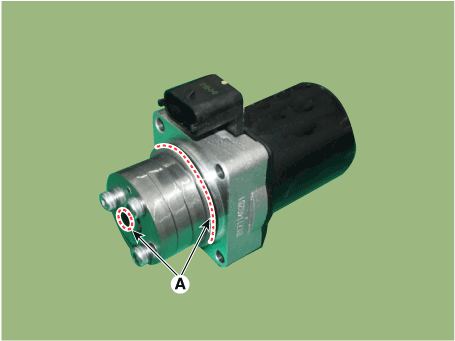

- Prevent dust from entering the hydraulic motor (actuator) and the housing.
- Tighten the bolts after installing the hydraulic motor.

- When installing, the motor connector (A) must face outward from the coupling.
Tightening torque: 8.8 - 10.8 N·m
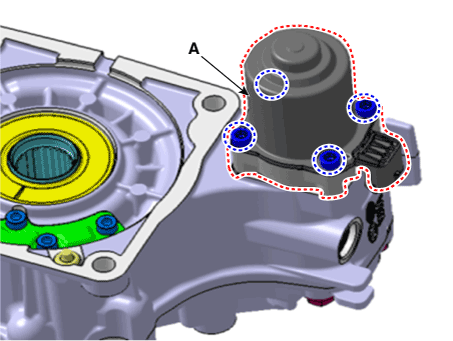

- During installation, oil may flow back under pressure through the breather hole (A).
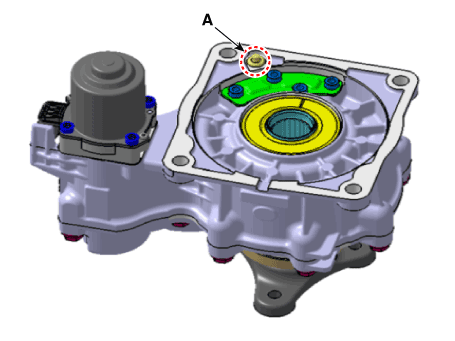
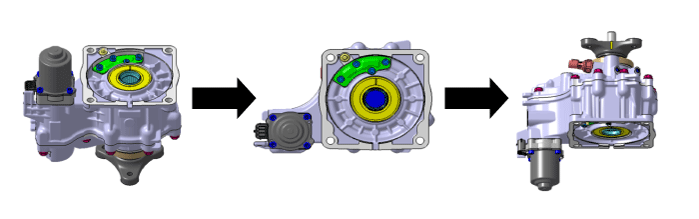
- Change direction in the direction of the arrow and lay on the floor as shown in the illustration. ※ Oil flowing back will drain to the bottom.
- Prevent additional backflow by ordering as shown in the illustration.
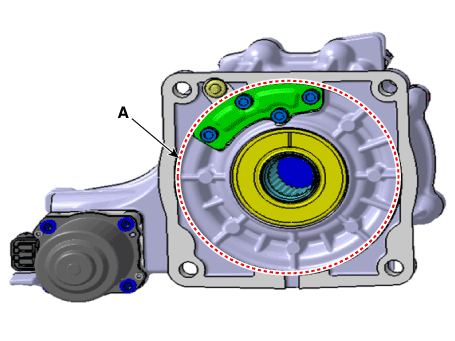
- Wipe off leaked oil from the surface (A) with a clean cloth.
- Install the coupling assembly. (Refer to All-Wheel Drive (AWD) System - Coupling Assembly)
Test yourself
A quick Hyundai Palisade quiz: every answer comes with an explanation and a link to the manual page.
Was this page helpful?