Body Electrical System
Seat Heater
In this manual: Body Electrical System
24steps
~144min
4/5difficulty
Done 0 of 24
Components and Component Location
COMPONENT LOCATION
Front Seat Heater
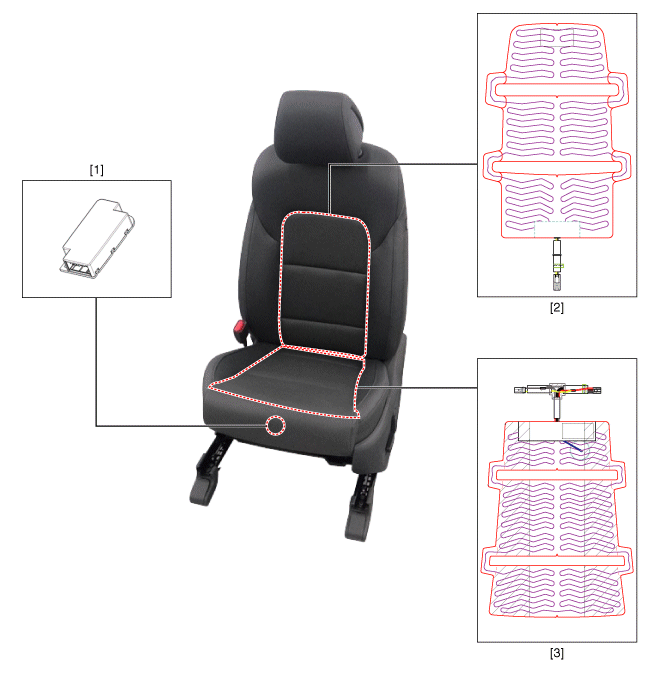
| 1. Seat Heater Unit (passenger seat only) 2. Front Seatback Heater |
3. Front Seat Cushion Heater |
Front Seat Heater (Ventilation)
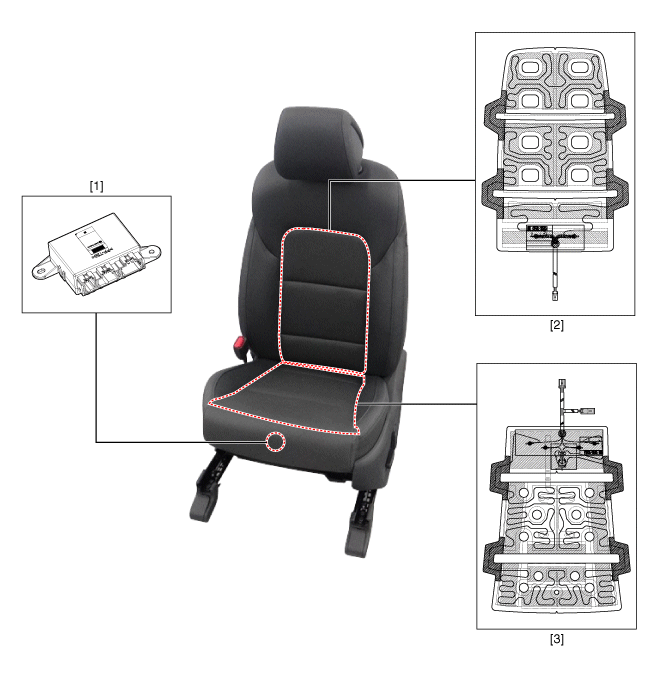
| 1. Seat Ventilation Air (passenger seat only) 2. Front Seatback Heater |
3. Front Seat Cushion Heater |
Rear Seat Heater
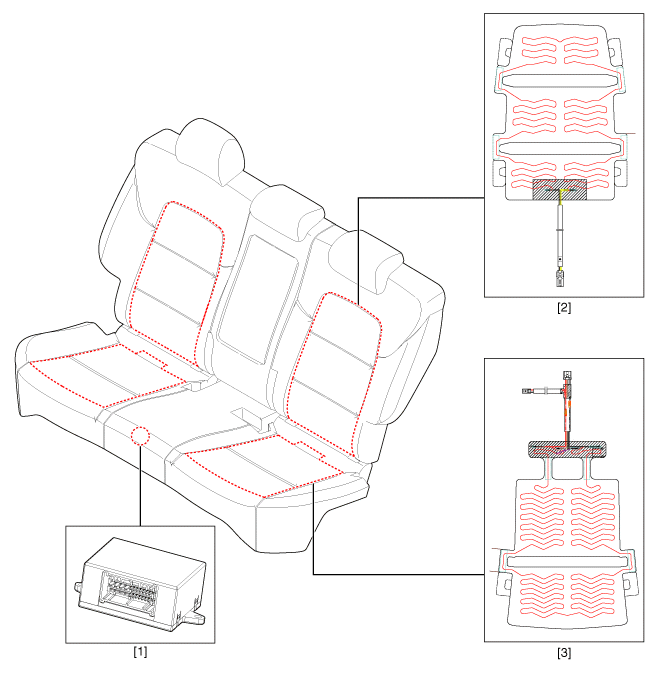
| 1. Rear Seat Heater Unit 2. Front Seatback Heater |
3. Front Seat Cushion Heater |
Circuit Diagrams
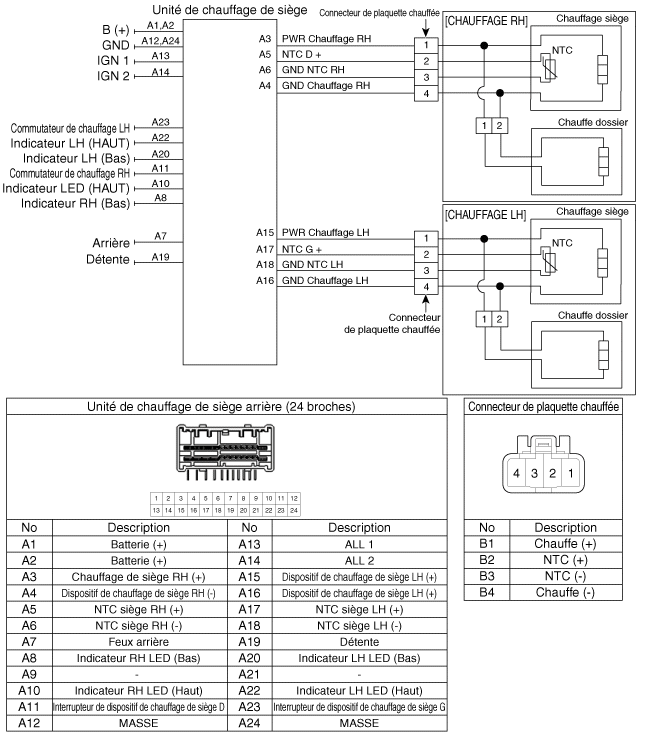
Circuit diagram
Front Seat Heater
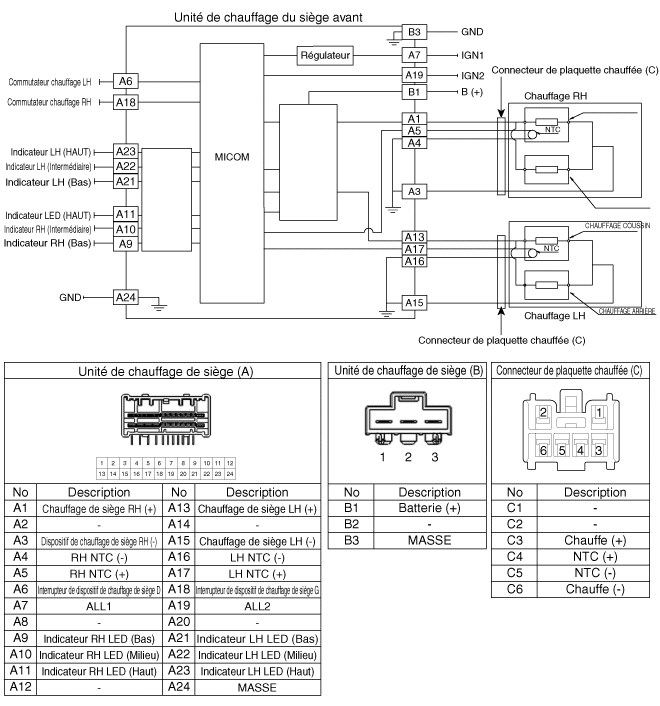
Rear Seat Heater
Repair Procedures
DEPOSIT
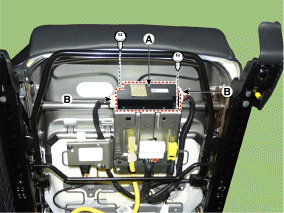
Front Seat Heater Unit- Disconnect the negative (-) battery terminal.
- Remove the front passenger seat. (Refer to Body - "Front Seat")
- Remove the front seat heater unit (A) after loosening the mounting screws and disconnecting the connectors from the unit (B).
- Disconnect the negative (-) battery terminal.
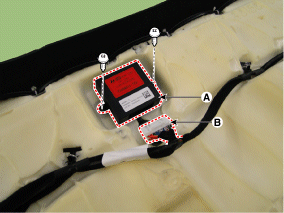
- Remove the rear seat cushion assembly. (Refer to Body Group - Rear Seat)
- Remove the rear seat heater unit (A) after loosening the mounting screws and disconnecting the connector from the unit (B).
REMEDY
Front Seat Heater Unit- Install the front seat heater unit.
- Install the front passenger seat.
- Connect the negative (-) battery terminal.
- Install the front seat heater unit.
- Install the rear seat cushion.
- Connect the negative (-) battery terminal.
Inspection
Front Seat Warmer- Check the circuit continuity and measure the resistance between terminals No. 3 and No. 6.
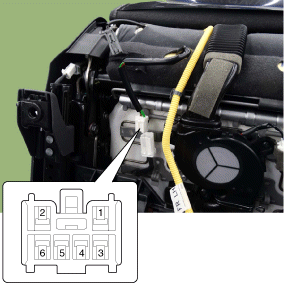
Standard value Driver/Passenger (cushion + seatback): 1.65 Ω ±10% / 23 °C
- Turn on the seat warmer after connecting the connector, then check the thermostat by measuring the surface temperature of the seat. Standard value: 1st: cushion: 36 ±2 °C, back: 40 ±2 °C; 2nd: cushion: 39 ±2 °C, back: 45 ±2 °C; 3rd: cushion: 42 ±2 °C, back: 50 ±2 °C
- Check the circuit continuity and measure the resistance between terminals No. 1 and No. 4.
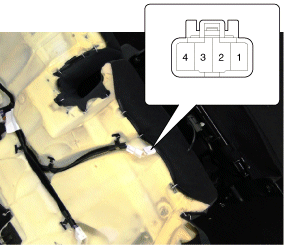
Standard value Rear Seat: 1.67 Ω ±10% / 20 °C
- Turn on the seat heater after connecting the connector, then check the thermostat by measuring the surface temperature from the HI position. Standard value Upper (cushion): 38 ±2 °C, seatback: 45 ±2 °C; Lower (cushion): 42 ±2 °C, seatback: 50 ±2 °C
- You can enter diagnostic mode by pressing the seat heater button.
- You can enter diagnostic mode by referring to the following description.
- Press ALL ON while holding the heater button from ALL OFF.
- Continue pressing IGN ON for more than three seconds. Before pressing again, wait 2 seconds for more than three seconds.
- All LED indicators blink once on the driver and passenger seat buttons.
- After entering diagnostic mode, the malfunction can be checked by the blinking LED.

Malfunction Indicator Lamp Components to Inspect Detailed Checks Low: ON
Medium: BLINK
High: BLINKLow voltage detection
Overvoltage detection1) Check the power supply line ALL 1 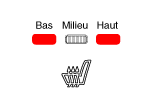
Low: BLINK
Medium: OFF
High: ONSeat heater cable power cut off (disconnection) 1) Seat heater B(+) line connector disconnected or missing 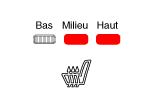
Low: OFF
Medium: BLINK
High: ONSeat heater cable power cut off (disconnection) 1) Seat heater ALL2 line connector disconnected or missing Low: OFF
Medium: ON
High: BLINKNTC (open) /
Heater (open)1) NTC (open)
2) NTC connector open or missing
3) Seat heater power line connector disconnected or missing
Low: BLINK
Medium: ON
High: OFFNTC (short circuit) /
Heater (short circuit)1) NTC cable short circuit (short to ground)
2) Seat heater wire short circuit (short to ground)Low: BLINK
Medium: ON
High: BLINKLoss of Temperature Feedback 1) Check the NTC terminal. - The malfunction can be checked by the blinking LED.
- The seat heater unit records the malfunction that has occurred.
- If the seat heater button is pressed for more than five seconds, the LED blinks four times, indicating a memory malfunction, and the stored memory will be deleted.
- Pressing the ALL OFF button ends diagnostic mode for the ventilated seat.
- You can check whether the seat heater system operates properly after pressing ALL ON. If you want to check a fault code, refer to Procedure 2 above.
Test yourself
A quick Hyundai Tucson quiz: every answer comes with an explanation and a link to the manual page.
Was this page helpful?