Suspension System
FRONT STRUT ASSEMBLY
In this manual: Suspension System
19steps
~124min
5/5difficulty
2special tools
Done 0 of 19
Components and Component Location
COMPONENTS

| 1. Strut Assembly 2. Insulator 3. Bearing 4. Upper Spring Seat |
5. Spring 6. Dust Cover 7. Lower Spring Seat |
Repair Procedures
DEPOSIT
- Remove the front wheel and tire assembly (A) from the hub.
Tightening torque: 88.2 - 108 N·m

- Remove the brake hose and wheel speed sensor from the front strut assembly by loosening the mounting bolts (B).
Tightening torque: 6.9 ~ 10.8 N·m
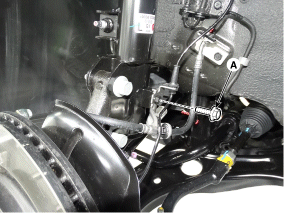
- Remove the stabilizer bar link (B) from the crossmember assembly by loosening the nut (A).
Tightening torque: 98.1 ~ 118 N·m
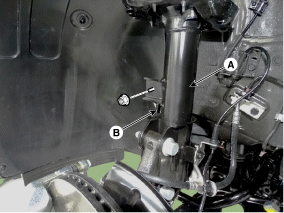
- After loosening the strut mounting bolts, remove the strut assembly (A).
Tightening torque: 156.9 ~ 176 N·m (16.0 ~ 18.0 kgf·m, 115.7 ~ 130.2 ft-lbf)

- Remove the upper hood cover. (Refer to Body group - "Upper Cowl Cover")
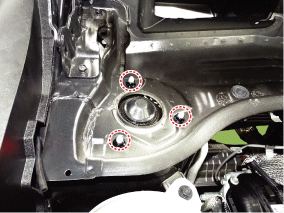
- Remove the front strut by loosening the strut mounting nuts.
Tightening torque: 53.9 ~ 74 N·m
- To install, perform the removal procedure in reverse order.
DISASSEMBLY
- Remove the dust cover (A).

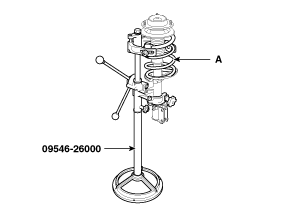
- Compress the coil spring (A) using the special service tool (09546-26000). Do not compress the spring more than necessary.
- Using SST (09546-3X100), loosen the lock nut.
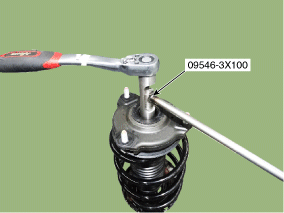
- Remove the insulator, disc spring, coil spring, and strut dust cover.
Inspection
- Check that the strut insulator is not damaged or worn.
- Make sure that the rubber parts are not cracked or damaged.
- Compress and extend the piston rod (A) and make sure there is no abnormal resistance or abnormal noise during operation.
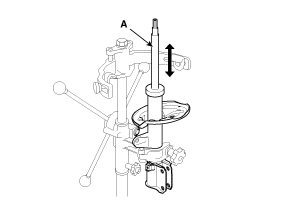
- Fully extend the piston rod.
- Drill a hole in section "A" to release the gas from the cylinder.

Installation
- Install the insulator, disc spring, coil spring and strut dust cover.
- Compress the coil spring (A) using the special service tool (09546-26000). Do not compress the spring more than necessary.
- Using the SST (09546-3X100), install the lock nut.
Test yourself
A quick Hyundai Tucson quiz: every answer comes with an explanation and a link to the manual page.
Was this page helpful?